Joseph
-
Posts
1,921 -
Joined
-
Last visited
Content Type
Profiles
Forums
Events
Everything posted by Joseph
-
Can't be hard to add a tab for that purpose
-
Yep, i did SRAD 600 and slabside rims on mine. For some reason i don't see fit to use USD on non faired bikes
-
Technically not too hard of a job, although the biggest bit to overcome is the offset of the discs in relation to the calipers (easier done on non radial braked forks) One thing that could look a bit weird is the width of the wheel in relation to the spacing of the forks. Might look a bit skinny However, depending on how you handle the wheel spindle accommodation (diameters to be sorted out), you might be able to retain a cable drive if the hub width of the 19 inch rim is narrow enough
-

WN swing arm swap
Joseph replied to cookie656's topic in Water Cooled, V-Twins, Singles and 2-strokes
Any non standard swingarm (apart from the very sought after and expensive 750W braced arm) will need : wheel spacers and swingarm top hats machined, compatible bearings for the wheel and swingarm. if the disc you've got (220 or 240 on any GSXR) isn't the same diameter as the one you need to use for the caliper hanger, you'll need the other disc or hanger, etc etc You will also need custom dogbones, a different knuckle if you go K or SRAD It adds up fast and tall -
WN swing arm swap
Joseph replied to cookie656's topic in Water Cooled, V-Twins, Singles and 2-strokes
Can't be hard to find a replacement banana swingarm Anything else will need work 1100 arms should fit but are longer, so you'll need to change the chain as well -
Yep, will be available soon
-
Just put the W leg on the oilcooled fixing plate, it's a doddle to do
-
WC side stands are slightly longer. I always use them in my Oilcooled
-
RS36 and RS38 are the same size as your BST36 so will fit the BST36 rubbers indeed. But like you said, on crusty old rubbers, it will be a very demanding job to push any carbs on. I gave up on a tank fitted tap, just used an alloy plate and brass spigot, maybe due to the clearance issues the dot head seems to have created that could be a solution for your situation ?
-
Since it's M8 and that needs a big hole drilled, it can just be drilled to 5, tapped to M6 and the rotor held in with a bit of 8 OD 6 ID tube to cover the diameter difference
-
Thats something you see on modern bikes. I don't think oilcooled or W bikes ever came with noise levels included on the frame plate.
-
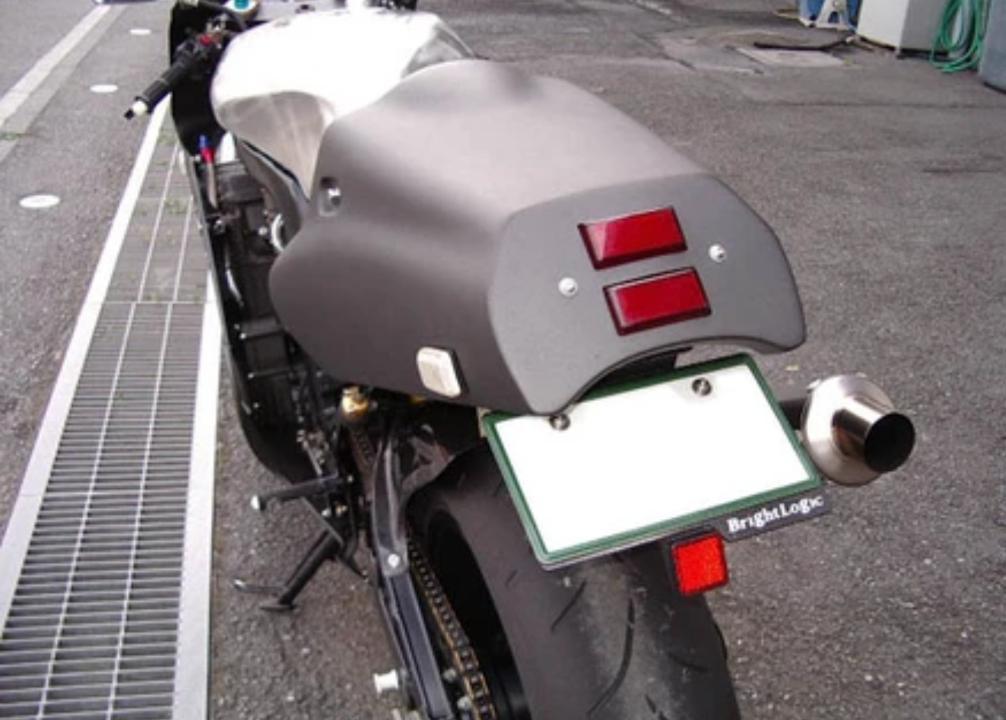
This is one of the BrightLogic bikes i was mentioning. It has Yosh F1 fairing and CWR seat unit :

-
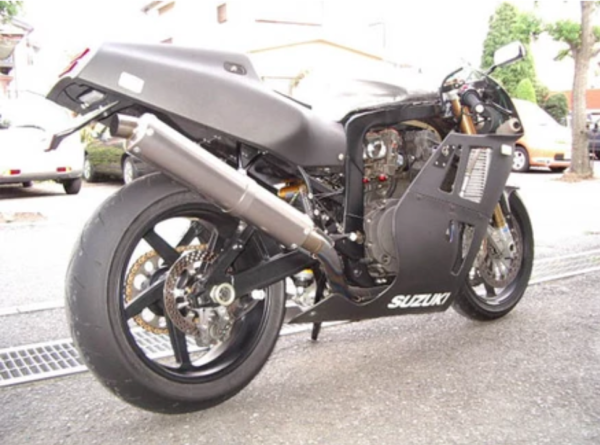
Yep thats what is often seen used on japanese builds (bright logic has several with that seat) Do you have any info about that second one you posted ? Its been posted around a lot but never linked to any info
-
I have a 92 frame and title in my name, i'm not with it at the moment but i think the sound level will be indicated on it if that could be of any help ?
-
I think they were coded GR7BA GR7BB GR7BC GR7BD, but i have no idea why the letter changes. My 93 was GR7BD, but clearly was the same as yours i guess
-
That we can all agree on
-
Surely if they were sold new back in the day in your country, Suzuki Denmark can get you that ? (Obviously not for free) Since they're specific to each vehicle the police might find it weird if in the process they actually check the conformity of the certificate in regards to the bike they're checking, and it turns out to be a different bike and a certificate not from denmark ?
-
The one on the bike @clivegtoshowed looks like a modified watercooled Clever Wolf Racing unit, being a japanese bike could point to that http://www.cwr.co.jp/cathand/detail-495098.html
-
New loom - buy, make or repair? - gsxr 750 wp
Joseph replied to Digs's topic in Water Cooled, V-Twins, Singles and 2-strokes
I use these : https://a.aliexpress.com/_v3gqwB it's all made in China anyway -
New loom - buy, make or repair? - gsxr 750 wp
Joseph replied to Digs's topic in Water Cooled, V-Twins, Singles and 2-strokes
AliExpress can supply all OEM connectors in good quality -
Exhaust connected to tank for 10 minutes trick is how they did it on the old school Paris Dakar for years apparenlty
-
New loom - buy, make or repair? - gsxr 750 wp
Joseph replied to Digs's topic in Water Cooled, V-Twins, Singles and 2-strokes
I'll get the link for you -
New loom - buy, make or repair? - gsxr 750 wp
Joseph replied to Digs's topic in Water Cooled, V-Twins, Singles and 2-strokes
I am in France, just checked on my usual classifieds website and one of the good bike breaker professionals i use has a complete loom for 50€ If you can't find a matching one your side that could probably be the easiest way to fix your bike situation
-
New loom - buy, make or repair? - gsxr 750 wp
Joseph replied to Digs's topic in Water Cooled, V-Twins, Singles and 2-strokes
Yep, thats the best plan. Unwrap it to locate iffy soldered add ons and other butchered wires. Buy a bandit loom, and unwrap that. It will provide you with all the correct colour-coded wire to take from it and replace whats messed up on yours. Ideal move is to replace the whole section of a wire thats messed, rather than cut and crimp or solder a section in Replace the spades on the new wires you fit on and you should be good to go. I'm guessing it's the lights/ingnition switch areas that have been messed around the most ? The rest of it shouldn't be too molested ? -
Could spring up different part numbers solely based on the paint used to paint them, despite being the same physical shapes