.gif.e933260ae92122aa3d358d32e9e8f6a6.gif)
Jaydee
-
Posts
1,177 -
Joined
-
Last visited
Content Type
Profiles
Forums
Events
Everything posted by Jaydee
-
.thumb.gif.c71fd8dcce0a6f066ab2ce62a706b62a.gif)
Brembo calipers on Hayabusa ID
Jaydee replied to Jonny's topic in Water Cooled, V-Twins, Singles and 2-strokes
Yeah I was thinking the same. It reminds me of that strange rebranding practice I've seen offered where you can have your slingshot forks gold nitrated and anodised to give the impression they're Ohlins. -
Brembo calipers on Hayabusa ID
Jaydee replied to Jonny's topic in Water Cooled, V-Twins, Singles and 2-strokes
Thought all the yam models with 4 pots were 100mm spacing? -
-
Nope, no such part in a bandit clutch. Nearest thing it looks like is the washer that the needle roller type washer sits on but it's only 0.5mm thick. Fatblokeonbandit has already given you your answer. Probably lost down the cam chain tunnel removing or refitting head after a head gasket change.
-
What the application, drag or road? I used normal oem valve springs with my Yoshi stage 1's as I wanted durability as it's a road bike. Most aftermarket hi lift vavle springs have less coils on their springs to prevent valves binding and need a lot more pressure to compress. That's perfect for short bursts on drag strip but after any real milage you could be looking at broken springs or if they hold out, really worn cam profiles and/or cam followers.
-
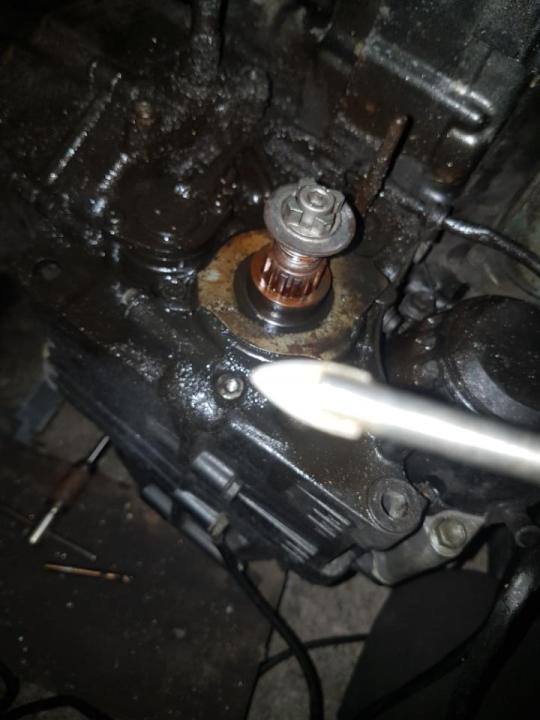
Drills have a feed rate. The circumference multiplied by revolutions =feed rate The smaller the drill bit, the faster the revolutions. There is a general rev chart for drill bit sizes that you cross reference for correct speed. With special drill bits like carbide or cobalt, there rev range will differ and have their own rev chart which can be found usually by contacting the manufacturer. In the real world there are exceptions to the rule. For instance, if I was to drill the output shaft at too quick a speed, the excess heat can help temper further an already hard surface which is the last thing you want. Big difference between that and working it on a lathe with flowing coolant where you can achieve the correct drilling speed.
-
900 quid? Just buy it, think later! Then decide what the plan is. Road bike, drag, stock, custom? Sell off/swap all the stuff you're not going to use to get stuff you do. Efe's are dryin up.
-
If only one guy was helping you, he must have been put in some amount of effort.
-
Used a cutting fluid and short bursts to keep the heat down. Short bursts is all I needed, instant swarf! Engine was on its side so the output shaft was facing up. Easier to keep the cutting fluid in the hole.
-
I know. But when I did a search he was one of very few who had success. And that's as far as the info goes. His drilling technique is not mentioned, just he's been successful. There were many who gave up going by half a dozen threads I was reading. I've done milling and turning courses in the past and know about drills and rev rates but drilling case hardened stuff is always a pain. The 6mm glass drill bit was far more effective the any other drill bit I have at breaking through the hardened outer surface into the softer center. I'm just passing on the info of what worked for me as it may help the next guy doing it and save him all the hours I wasted.
-
As my engine started knocking , I thought I swap engines. The old one was a mk.2 bottom with a gsxr 11K top end, new one a stock bandit mk.1. As I wanted to keep the mk.2 loom and digital k5 bandit clocks, I had to drill the output shaft. After 2 hours with a box of high quality carbide drill bits I was only 4 or 5mm in. I decided to have a break and search the forum for an answer. Same results, everyone having a go, most giving up as case hardened steel is a right bastard to drill. Went back out to the shed and was getting any further after an hour. I was about to give up when I had a brainwave. Why not try a 6mm spear tip glass drill bit? It cut like fucking butter! Just kept swapping between the 6mm glass drill bit and a 7.5mm carbide. I did 3 times as much drilling in ten minutes than I did in the first 3 hours! Just passing on my experience as it might help others in the future.

-
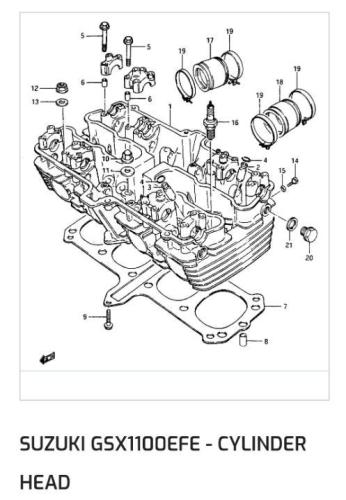
Try Robinson Foundry https://www.suzukiparts.co.uk/shop/online-store/suzuki-parts-finder/gsx/gsx1100efe/e-f-g-1984-1986.htm#!gsx1100efecylinderhead
-
Maybe it is an electrical issue with the coils but running on two can be fuel related too. Are your carbs twin fed? Hardly one the lines going soft with the heat and kinking, thus shutting down that bank of two carbs. I know you stated that you changed the lines but it could be that the line is being pinched/stretched or have some tight angle at the tap. When warmed up, something collapses(?)
-
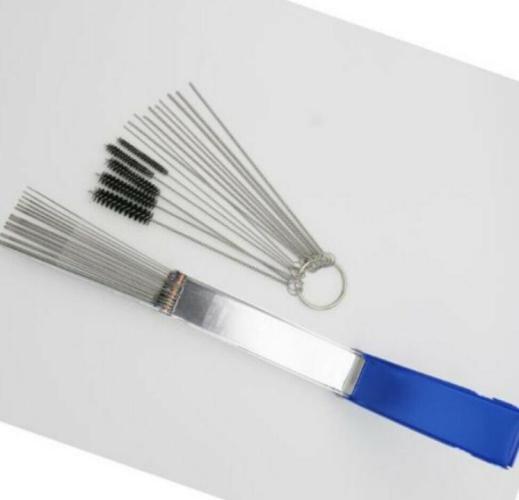
No wire should be used anywhere near carbs. It can distort or damage jets, get stuck in galleries. Every manual that mentions cleaning carbs states it. Beware of those keyrings of assorted wire and brushes being sold on eblag as carb tools. They are really for cleaning torches for gas welding.
-
The carbs you have are made of a magnesium alloy. Under a microscope the surface is nothing but creators and holes. Tiny little pours that fill with crap. Your carbs are clean but are stained, like a tattoo. And the only way to get the stains off is to remove a layer, a micron or two off the surface, i.e. bead, grit soda blasting. There's no point fizzing them for hours. The tank has done its job. Now let it rest before you burn out a transducer or burn a hole in the bottom of the tank If your carbs are going dark, you've either boiled the absolute bollocks out of them. Carbs go black any temp over 65-70(ish)C left in for too long. Or the solution you are using is unsuitable and is reacting with carbs. Or a combo of overheating and wrong solution. You know a solution is wrong when the next day your carbs will be covered in white oxide after they dry. Oh, and a tip. Looking at your flatsides in the tank photo. They are practically fully assembled, bar the top covers and bowls. At the very least, you really should be removing the back plates (that fit to the air box manifolds). Remove the 4 security screws, lift off plates and gaskets. The amount of shit to be found in those cavities is amazing. And you really should be pulling out the accelerator pump nozzles too as you'll never clean any of the galleries behind them.
-
The same 17.5 pilot jet is used in the RS36's, 38's and 40's series as standard b.t.w.
-
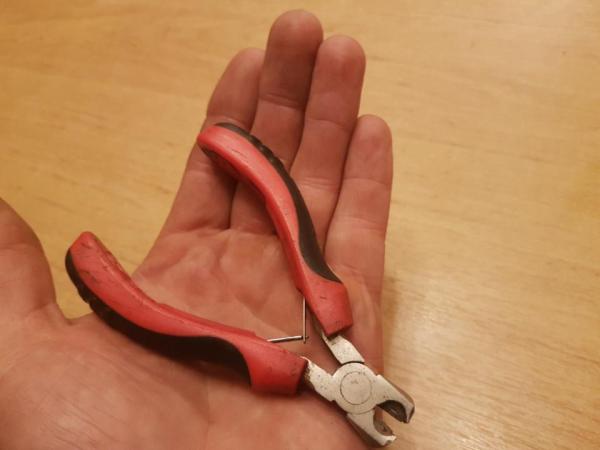
As my main income is from reconditioning carbs, I have to work fast. Pressed pins used to be a ballache consuming time. Now pulling pin is 10 second job with some homemade tools. This my carb tool. A cheap smallest sized pliers found in pound shops and discount stores. It has 2 functions, first one is a pin puller. I cut the head off and ground it down till it just meets the cutter hole. Get the edges really sharp. Now you can slice down on the pins head where it meets the post. It will push the pin out enough to GENTLY twist it back and forth. As I do this, I support the open end post between my thumb and index finger on my free hand. The handles of the pliers clear the carb next to it so nothing gets in the way whatever carb in a bank of 4. Function no.2 This tool also serves as gripper for stubborn brass float needle wells. Sometimes they can have a dried up o-ring and wont budge. The beauty of this tool is it grips the outside of the brass well and causes no damage to the inside. As the pliers head is cut off, it can fit neatly between the 2 pin posts and have the clearance to get in at the brass well. (In the past, I've had to reuse brass wells on super rare carbs where parts are not available anymore and I can't afford to damage)

-
That set could have pressed in pins too. That why I mentioned press fit occurs in other types of carbs. Half the carbs I work on have loose pins and other pressed pins. I'd check the other carbs on the bank. If all pins are tight, more likely press fit, if all the other pins are loose bar one, then that pin is most likely damaged or bent out line putting pressure and grip on the posts.
-
Nope, plenty of carbs out there where the pin is a deliberate press fit on the open end of the pin. Don't know why they bother as the pin can't go anywhere with the walls of the bowl stopping the pin from shifting.
-
I work on at least 1 set of carbs every week that has to the 2 post with a tight pin. As said gentle tapping is one way. But sometimes the open end of the pin is quite tight and can jam in that post causing the post to snap at its base leaving the pin still attached to the broken post. The secret to not breaking the post is to start by breaking the bond at the open end by twisting the pin at the pins head. You trying to screw the pin out of the open end, not press.
-
A bit? It's open fucking season in here! All part of the atmosphere. But seriously, nobody was gonna die if I gave the wrong colour.
-
Any colour you want. Who's going to see it once its fitted under the mudguard?
-
You can do it that way or sleeve the engine mount with a tube 12mm outer and 10mm inner so there no play in this area.
-
If there had of been holes in them, you'd be better off simmering in boiling water for 5 minutes. It breaks down resins in the small brass stuff far better than solvents I find.
-
Yes, completely different. Think the 1100 headlight fairing is wider at the front and shorter at the side compared to 750. 750 has a lower profile too to clear lower hanging clip ons, frame follows this too.