We are TALL. Whenever I shoot off anywhere, be it UK or somewhere else, at least once a day someone will comment on my height. At home, I’m average at best (heightwise..), abroad I seem to be seen as some sort of giant.
I can easily get my feet flat on the floor on the biggest of showroom enduro machines and a EFE doesn’t feel that big to me. However, “not that big” is something different than actually small..
Now, our friend Blubber, he IS an actual giant, he’s like 9ft something, give or take (not really), so he makes our beloved EFE look like a GS500E when he’s on it. To get his project to somewhat fit with his ample frame, he actually went and cut the frame to pieces, lengthened it, heightened it and widened it, conveniently making room for a GSX1400 motor.
B-King and ZX9 parts were hung into place at their respective ends of the bike, getting everything bang op to date to the modern day, with decent brakes and tyrechoice amongst other benefits, besided looking cool.
Paintscheme in mind, this took another turn when Blubber ended up with very tidy bodywork in the colours of the Dutch flag; choice was made to keep it as is. As it’s a proper longterm project, Blubber didn’t want to do thing by halves and went to work on the engine.
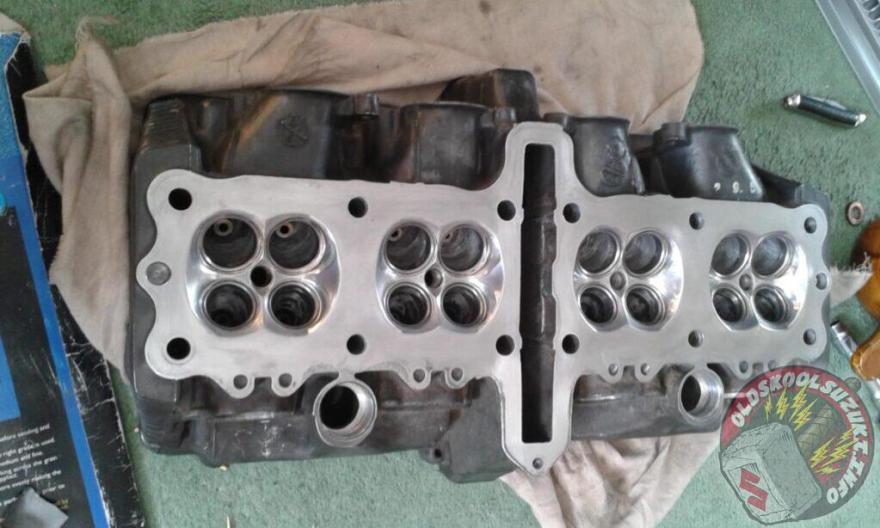
The GSX1400 engine is a good motor on its own, be it a bit boring; 100Bhp or something, not really something to write home about, especially taking the displacement into consideration. However, it’s been found over the years that these engines were built with Suzuki’s age-old Over-engineer Everything ethos, thus leaving a lot of room for improvement.
Some have been turbo’ed with very good results, or you can just go BIG, 1700cc-big. Readily available bits, some even on the used market, make it a viable, if often overlooked, option to go proper mad with this engine, instead of sinking your hard earned into something that’s at least 20 years older, with the added abuse during its life.
Now, as it stands, the bike is running and driving but far from properly finished, as is the same with any projectbike I ever laid my eyes on, I still feel as though this bike deserves the BOTM-medal for this month, because Blubber has taken it this far, with limited space and tools in his little shed (I checked) and still ended up with a bike that for most will look pretty much stock and untouched.
The bike itself is of a standard we rarely if ever see in our little country, all the more reason to celebrate this one. Those that know, will know.
Congratulations Blubber, your 1700-EFE is this month’s Bike of the Month
As February has come and gone, you may have noticed a apparent lack of BOTM that month. They made that month too short; that’s my story and I’m sticking to it. It didn’t help that the weather was utterly miserable and riding bikes in the summer sun was a long distant memory. Cue March and we’re inching ever closer to spring. Yesterday was the first decent day of 2020 here and I even managed to get the bike out.
I don’t ride on the road very often anymore (not here anyway) but if there’s one thing I get the most gratification out off, it’s showing up modern machinery with our older bikes. Having the powerrangers scratch their Rossi-rep lids in disbelief how they just got left for dead by a bike older than themselves, usually ridden buy a guy in jeans and trainers. But, enough about me…
The above is best done on a bike that is very understated and one that, in the eyes of the unknowing, just looks “old” My pink-neon wheeled EFE doesn’t fit this category but the 1100M Oilyspanner built that you see above is one of the best I’ve ever seen.
Even if you
do know what you’re looking at, you’d have to look twice to see all that has
been done to the seemingly stock-looking bike. Starting off fairly standard a
few years back when it replaced a (much) later model GSXR, all was done to have
the older bike get in the realms of modern sportsbikes.
Weight was shed anywhere and everywhere possible; roughly 40kgs (!) saved over stock and with a modern frontend swapped with the endlessly outdated (and questionably sprung) original Slingy USD’s, the rear was balanced out with a very trick raceshock from Nitron.
The buildthread of this bike reads as though a proper hands-on journalist is using it as a longtermer, with a wealth of information on chassis and especially carb-setup. Jetting all done on the basis of experience, “feel” and the use of a private road (officer), the bike has become what it should’ve been in 1991, had our friends in Hamamatsu had the technology of today.
Still very
much a project but you can’t help but tip your hat to the work already gone
into this bike to make it what it is now.
Congratulations
Oilyspanner, your bike is this months Bike of the Month
Comments Off on Oldskoolsuzuki meets Don Hill at Rooster Racing
At the end of January I got a chance to go and visit a man who has probably forgotten more about building and tuning 90s GSXRs than most of us will ever know. His name is Don Hill and he owns Rooster Racing.
What made this opportunity to visit Don’s workshops special was that it’s not something he offers very often. He is almost adverse to attention and publicity, preferring to hand pick the people he builds bikes for. The reason for Don’s approach became clearer as the day wore on.
Don Hill and the Rooster Racing team at Donington endurance legends 2018
Don Hill
I first became aware of Don’s work when my friend Adrian McCarthy (AKA Mole) told me he was going to be one of 3 riders racing Don’s Rooster Racing GSXR powered Harris at the 2018 endurance legends event at Donington. When I was there, I got a quick look round the bike in the pit garage. The build quality and the finish were something very special.
That same year I started my own race career ( if you can call it that). Racing at Eastfortune on my home built GSXR1100 Slabside. I quickly learned that 3 of the fastest GSXRs in my post classic senior class were all built by Don at Rooster Racing. I would like to say that’s why they were so much faster than me but the truth was that was entirely down to me. With Don’s Slabside based 1216 engines routinely and reliably knocking out over 160 bhp, I can’t see my home built Slabby getting close even if my riding skills improve.
Adrian’s Championship winning GSXR1100 slabside built by Rooster Racing
I got chatting to Don in the pits at Eastfortune last year between my races. I had been suffering from some fuelling problems and Mole and I and the rest of the team had been struggling to solve the problem. Don turned up and took around 2 minutes to sort it. We chatted again after my last race and he agreed that I could come down and learn more about what he was doing and write something for OSS.
Rooster Racing
There were two main reasons I was intrigued to know more about Don’s work. Firstly, I was impressed by the performance and the reliability of the engines he was building. Secondly, Don’s talents don’t stop at engine building and tuning. He fabricates the frame and swingarm modifications, builds his own exhausts systems and as if that wasn’t enough, he produces the most amazing paint work too. There aren’t may people who can single-handedly build a race bike to such a high standard. I just needed to know more.
Mole was going down to Don’s to pick up freshly painted body work and wheels for his 2019 wet bike. So I hitched a lift down to meet Don on his his home turf and learn more about the work that he does.
When we arrived Don took us into his main hanger size workshop, he put the heating on and then presented us with us with tea and bacon butties. I liked him already.
While Mole and Don talked I had a wander round looking at some of the motorcycle exotica that peppered the workshop.
Don and Mole talk shop
GSXR Engine tuning
Don was in the midst of building a new Machine shop for his gas flow bench. The flow bench was situated in another location until Don has completed the extension. Don promised me a return visit when all of the work was complete so that we could do a more detailed feature on it.
,We talked about his fastidious approach to head work. He will routinely spend 200 man hours on a head between porting it and gas flowing it. When we talked about costs, I quickly worked out that he probably ends up earning about £3 an hour on a head. It was at this point that I started to realise Don was an out and out perfectionist. He was not motivated by cost or profit. His motivation was quality. This was not Don’s day job either.
Don explained his method of gas flowing a cylinder head. Don would always gas flow with the carbs on. Not any old carbs but the actual carbs that were going to be used on the bike. He acknowledged that everyone had their own approach but this was his. Engines were built to each racers specific requirements. Those requirements often came down to where the bike would be raced and how and where the rider wanted the power to develop. No one engine would be the same.
Don explains the varying engine characteristics that he has tailored for different racers
GSXR frame fabricaion
Don had a GSXR slabside that he was mid way through building for a racer from the ground up. This included all of the frame and swingarm mods and a very trick aluminium breather tank.
Ground up Rooster Racing GSXR Slabside race bike
GSXR exhaust fabrication
Don then talked us through the exhaust systems that he builds to go with his engines. He talked about about the importance of narrowing the headers at the manifold and ensuring that the pulses from the matched cylinders worked in unison at the collector box. I was out of my depth but I nodded like I understood.
Rooster Racing’s hand made exhaust systemsDon explains the virtues of collector box configuration
Rooster Racing paint
Mole’s freshly painted body work and wheels were laid out for collection and they were perfect. Don was clearly a man of artistic talents too as he explained his love for ornamental wood carving and shared some pictures of his work. Looking closely at the paint work than Don had completed for Mole, it bore all of the hallmarks of a perfectionist, just like everything else that Don put his hands to.
Mole inspects his new paint job by Don Hill
Quality and integrity are inseparable
As the morning wore on and Don and I talked some more I realised what a rare individual he was. When I say this, I mean Don seemed to be able to bring the the same methodical, well rehearsed quality, to everything he did. There was also something unique about the way Don viewed the bikes and the riders that he worked with.
When he built a bike for someone he maintained an genuine ownership like concern for the bike and the rider’s fortunes. This was the reason Don chose those who he built for so carefully. He had to be sure that they the rider would be prepared to do things Don’s way. He doesn’t build parts of bikes, he builds a complete performance package. The performance came from each part of the bike working in unison.
Mole was a trained motor mechanic and was no stranger to building his own machines. He had won a number of championships on his own builds but since meeting Don he now deferred to Don on all major decisions on race bike performance. As Mole put it “when Don tells you to do something you don’t argue you just do it”
Rooster Racing’s Harris Endurance bike
I left Don’s workshop with a deep respect for his skills and his ethos. Don understood the high stakes for a racer, having raced for many years himself when he was younger. Racers had partners and families to provide for. The performance, reliability and ultimately the safety of the machines Don built meant more than just winning. Lives were at stake and that responsibility was something that weighed heavily on Don’s conscience.
I concluded that Don was a man of great skill, who would always put quality first. He would never be afraid to walk away if he felt that his approach was unwelcome, unappreciated or compromised. His commitment to that approach and his integrity left me feeling that I could implicitly and completely trust Don. I can’t think of a more important time to trust someone than when they’re building you a race bike.
Oldskoolsuzuki will return to Rooster Racing later in the year. In the meantime, don’t call Don, he’ll call you.
The wound is generally more impressive than the scar it could potentially leave, this trick framed oil boiler looks more than tough enough to take what would appear to be a backhanded ‘pimp slap’ compliment on it’s chin.
In this age of teenagers sporting ‘homeward bound’ neck art (they’ve probably never done a paper round let alone a stint on the ogin) this is a mighty blue illegible tattoo, it’s a miners hob nail to the (now) trendy white soled ‘brahhn’ red wing bootie…the battered original Simpson to the plastic predator. I got that beat-the bull shark to the appendix etc. etc.
Anything but evolution of necessity would (in my mind) ruin this bike, but I think this dude knows his onions (pardon, Monsieur) and wont succumb to such nonsense as to dress his Gaulian gash in fancy paint, polished alloy or a brahhhn seat.
It’s been noticed recently that a lot of people want to know what calipers are a straight swap to upgrade their bikes with no problems, and without having to go to the effort of making up a set of adapter plates.
So if your bike is listed in the same section as another bike below, you can change calipers without any worries.
For ease I shall just call the calipers type 1, 2, 3, 4 and 5.
A lot of site users want to know about fork details, length, diameter, etc. to allow easier swapping of components between models. I’ve compiled this list forks to help you get on your way, but if there’s any missing please let me know the appropriate dimensions so that I can add them in here.
A lot of site users want to know about fork details, length, diameter, etc. to allow easier swapping of components between models. I’ve compiled this list forks to help you get on your way, but if there’s any missing please let me know the appropriate dimensions so that I can add them in here.
Comments Off on GSX-R engine mounts for a GSX Frame
Below are drawings of engine mounts to fit an early air-cooled GSX (round frame tubes) or EFE (square frame tubes) with a GSX-R engine. Both place the engine in the middle which is aesthetically best but may cause some problems with the exhaust headers interfering with the frame downtubes, which can be solved by using spacers or modifying the headers if necessary. Engine mounts for a GSX1100 frame to take a GSX-R engine. By “jonboy”
A Katana with the above engine mounts installed…
Engine mounts for a GSX1100EFE (GS1150) to take a GSX-R engine. By “GJG”
Below are drawings from the engine mounts, as I used them a few years back. I built at least two EFE’s using these plates. They mount the engine pretty straightforward, like in the Katana I send you pics from a few months back. I also included the cutting contours in .dxf format, that could straight be fed into a laser.
Parts description: PL-105 and 106: Take front rubber engine mount, and lower below crank. Need shims or bushes to compensate for offset.
PL-107 and 108: These should be welded in with the engine or cases in place, mounted with the previous mentioned plates. PL-108 is a bit long, and could do with a brace, taking sideward loads to the cross tube from the shock. The stock plate should be removed. The lower cross tube in the frame will need some cleaning up and removing of the stock lower rear plates, before taking PL-107.
PL-110 and 111: These make the removable, welded upper rear engine mount taking loads to the stock bolt holes/bushings welded into the side of the frame.
Making your GSX frame stiffer Written by Mr.7/11, inspired on earlier work done by Tony Foale, Arnout and Tinus.
It may be well known to anybody that creating a stiff frame has to do with connecting the headstock to the swingarm pivot as direct as possible, which is what modern “Deltabox” frame designs do. So the best possible solution is to weld f*cking huge bars from the headstock directly to the swingarm pivots. There is just one problem with that… there’s a huge mother of an air-cooled engine in between that hasn’t followed any diet …ever.
To keep the weight down we remove some before adding any.
And besides she’s so beautifully shaped that we wouldn’t want anything hiding those luscious curves from full view now would we? So we’ll have to resort to beefing up the frame we have as well as possible so the front wheel will keep in line with the rear during heavy braking/acceleration as well as big bumps in the road.
The GSX frame is of the “cradle” type which means the main frame tubes are routed above and below the engine. We haven’t got many options for reinforcing the lower cradle as there are exhaust pipes, oil cooler lines and the oil sump between them and we don’t want to create problems while performing regular maintenance. So we leave it alone with it’s primary task to keep the engine in place concentrate on the part of the frame that runs above the engine.
Take a look at the picture below. The weak point of the frame is the green section between the headstock (yellow) and the swingarm pivot area (blue). If you look at early GSX-R frame designs you see that on race bikes they have allways tried to beef up that area with additional plates. There’s also a rumour this is what Yoshimura used to do with their GSX superbikes. Suzuki have allready paid lots of attention into making the headstock as stiff as possible so the effect of additional bracing here will be minimal. If you intend too keep the standard airbox and the battery in it’s original place then options for bracing around the swingarm pivot will be minimal too. So if you would like ot improve the stiffness of your old dinosaur I’d make modification C. first, and consider dumping the airbox in favor of separate K&N filters to be able to add D. and E. When you’re at it you might as well go along and add braces A. and B. but I don’t consider them to be essential.
Be warned that reinforcement C. can hit the inside of the tank if you make it too big and will also make it hard to find enough space for the air filters! You should make all reinforcements from cardboard first anyway to check that they don’t interfere with anything.
A. these tubes support the headstock against torsional movement. The plates B. support the frame tubes to prevent them from bending due to the load created by tubes A.
The cross-bars D. stiffen the area above the swingarm pivots. The tube connecting both sided is placed at the same height as the engine mounts to keep the engine in place under acceleration. If we replace the cross-bars with a pyramid D1. we add even more stiffness to that area and prevent the swingarm pivots from moving back and forth in addition to up and down. It may look a bit awkward and I question if it adds anything as you must not underestimate the strength and function of the rear subframe. This might be why Yoshimura adds gussets to the subframe on the Katana 1135R, but they have also changed position of the shock mounts considerably. They probably did this because they use a very short swingarm to decrease the wheelbase and so improve steering into corners and if they kept the original mounting point the shock would be too upright making them too hard.
Examples of frame braces on the Yoshimura Katana 1135R
The connecting rectangular tubes E. help to distribute loads from the swingarm pivots to the rear of the frame, as well as providing a mounting point for the rear brake amongst other things.
F. There’s very little room to triangulate the space in front of the cylinders because of the exhaust pipes but it is possible. You may need to dent the tubes a little to make them clear the exhaust pipes but this is better than making the V smaller. Tightening the two center exhaust clamps will prove difficult too.
Now that the headstock and swingarm pivot areas are beefed up the connecting tubes are supported by plates C.
You should also consider making B. and C. box sections, so placing a plate on both sides of the tube with a strip in between to close the box. Or use rectangular box-sextion like I did (60×20)
Tubes only need to be around 16mm in diameter with a 1mm wall thickness. Box sections need to have 1mm wall thickness and single gussets 3mm.
Below are images of a braced GSX1100S Katana frame. The bracing is designed by Mr.7/11and welded by Postma Motoren from Haarlem (NL)
Usually I don’t get horny from stiff objects but this is a completely different matter…
You can allmost feel the flow of the forces trough the frame tubes
The big cross means “no airboxes allowed” and will probably be painted red
The use of rectangular beams in the subframe means it’s easier to bolt stuff onto it like electronics, brake pumps, nitrous solenoids etc.
Privacy & Cookies: This site uses cookies. By continuing to use this website, you agree to their use.
To find out more, including how to control cookies, see here:
Cookie Policy