Making your GSX frame stiffer
Written by Mr.7/11, inspired on earlier work done by Tony Foale, Arnout and Tinus.
It may be well known to anybody that creating a stiff frame has to do with connecting the headstock to the swingarm pivot as direct as possible, which is what modern “Deltabox” frame designs do. So the best possible solution is to weld f*cking huge bars from the headstock directly to the swingarm pivots. There is just one problem with that… there’s a huge mother of an air-cooled engine in between that hasn’t followed any diet …ever.

To keep the weight down we remove some before adding any.
And besides she’s so beautifully shaped that we wouldn’t want anything hiding those luscious curves from full view now would we? So we’ll have to resort to beefing up the frame we have as well as possible so the front wheel will keep in line with the rear during heavy braking/acceleration as well as big bumps in the road.
The GSX frame is of the “cradle” type which means the main frame tubes are routed above and below the engine. We haven’t got many options for reinforcing the lower cradle as there are exhaust pipes, oil cooler lines and the oil sump between them and we don’t want to create problems while performing regular maintenance.
So we leave it alone with it’s primary task to keep the engine in place concentrate on the part of the frame that runs above the engine.
Take a look at the picture below.
The weak point of the frame is the green section between the headstock (yellow) and the swingarm pivot area (blue). If you look at early GSX-R frame designs you see that on race bikes they have allways tried to beef up that area with additional plates. There’s also a rumour this is what Yoshimura used to do with their GSX superbikes. Suzuki have allready paid lots of attention into making the headstock as stiff as possible so the effect of additional bracing here will be minimal. If you intend too keep the standard airbox and the battery in it’s original place then options for bracing around the swingarm pivot will be minimal too. So if you would like ot improve the stiffness of your old dinosaur I’d make modification C. first, and consider dumping the airbox in favor of separate K&N filters to be able to add D. and E. When you’re at it you might as well go along and add braces A. and B. but I don’t consider them to be essential.
Be warned that reinforcement C. can hit the inside of the tank if you make it too big and will also make it hard to find enough space for the air filters! You should make all reinforcements from cardboard first anyway to check that they don’t interfere with anything.

A. these tubes support the headstock against torsional movement. The plates B. support the frame tubes to prevent them from bending due to the load created by tubes A.
The cross-bars D. stiffen the area above the swingarm pivots. The tube connecting both sided is placed at the same height as the engine mounts to keep the engine in place under acceleration. If we replace the cross-bars with a pyramid D1. we add even more stiffness to that area and prevent the swingarm pivots from moving back and forth in addition to up and down. It may look a bit awkward and I question if it adds anything as you must not underestimate the strength and function of the rear subframe.
This might be why Yoshimura adds gussets to the subframe on the Katana 1135R, but they have also changed position of the shock mounts considerably. They probably did this because they use a very short swingarm to decrease the wheelbase and so improve steering into corners and if they kept the original mounting point the shock would be too upright making them too hard.

Examples of frame braces on the Yoshimura Katana 1135R
The connecting rectangular tubes E. help to distribute loads from the swingarm pivots to the rear of the frame, as well as providing a mounting point for the rear brake amongst other things.
F. There’s very little room to triangulate the space in front of the cylinders because of the exhaust pipes but it is possible. You may need to dent the tubes a little to make them clear the exhaust pipes but this is better than making the V smaller. Tightening the two center exhaust clamps will prove difficult too.

Gussets © Tony Foale
Now that the headstock and swingarm pivot areas are beefed up the connecting tubes are supported by plates C.
You should also consider making B. and C. box sections, so placing a plate on both sides of the tube with a strip in between to close the box. Or use rectangular box-sextion like I did (60×20)
Tubes only need to be around 16mm in diameter with a 1mm wall thickness. Box sections need to have 1mm wall thickness and single gussets 3mm.
Below are images of a braced GSX1100S Katana frame.
The bracing is designed by Mr.7/11and welded by Postma Motoren from Haarlem (NL)

Usually I don’t get horny from stiff objects but this is a completely different matter…

You can allmost feel the flow of the forces trough the frame tubes

The big cross means “no airboxes allowed” and will probably be painted red

The use of rectangular beams in the subframe means it’s easier to bolt stuff onto it like electronics, brake pumps, nitrous solenoids etc.


 B: Top of tank mount to top of top yoke
 C: Between centre of tank front mount bolts
 D: Between LH lock and centre (then multiplied by 2)
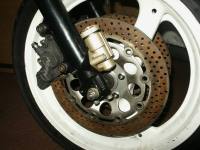
 The research:
  My ‘D measurement’ (remember to multiply by 2 of course!) meant an approx 60mm stroke damper so I ordered a 63mm stroke Ohlins damper from BikeStuff (cheers Rich!).


 for a GSX1100 frame to take a GSX-R engine.


