jonny1bump
-
Posts
2,249 -
Joined
-
Last visited
Content Type
Profiles
Forums
Events
Everything posted by jonny1bump
-
 Initial pricing I have is roughly 25 a set but this is 4 off will reduce more peeps that won't them to cover set up cost.
 -
I personally prefer them to be ally they never wear out. If we can get a running total I can ask for quote to set Cnc up. I don't mind making couple myself but can see this exploding lol. Got me thinking perhaps I even put his engineering business in trade section. So 12 so far is that correct. Need get list going not sure how do that on a forum chat.
-
Brilliant nice picture that's saved me a job. I can make them but fiddley on my manual stuff at home and not got much free time. Let me have word with mate down south if peeps want some for a batch build or something.
-
Totally.
-
Im sure I remember way back it was proved curved cooler works better then straight cooler. Running different compression ratios crazy idea. All sorts of experiments are carried out on track does not mean it's good idea.
-
Anyway here is pic bear with me for actual carb pics unless can be found from original site.
-
Not sure if want make this a sticky too. Rene did promise ages ago would post stuff just taken me a while.
-
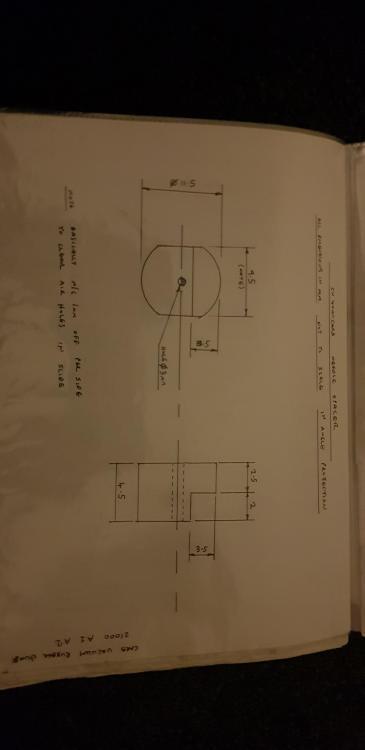
The days before cad or my version. Cardboard aided design.
-
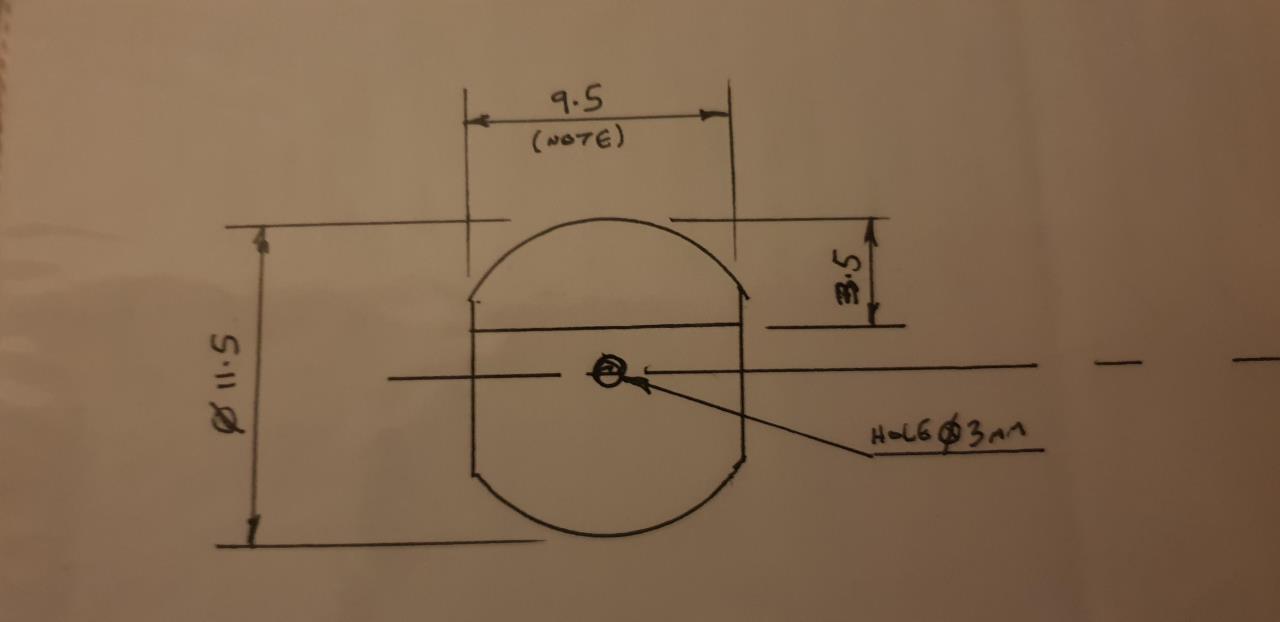
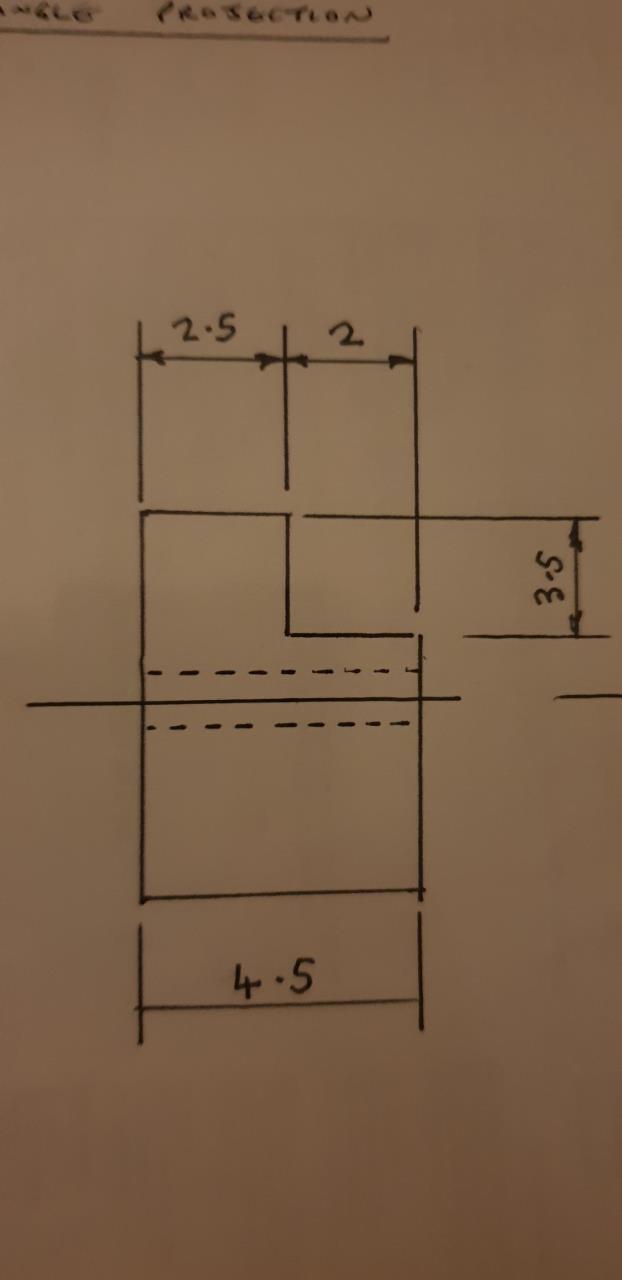
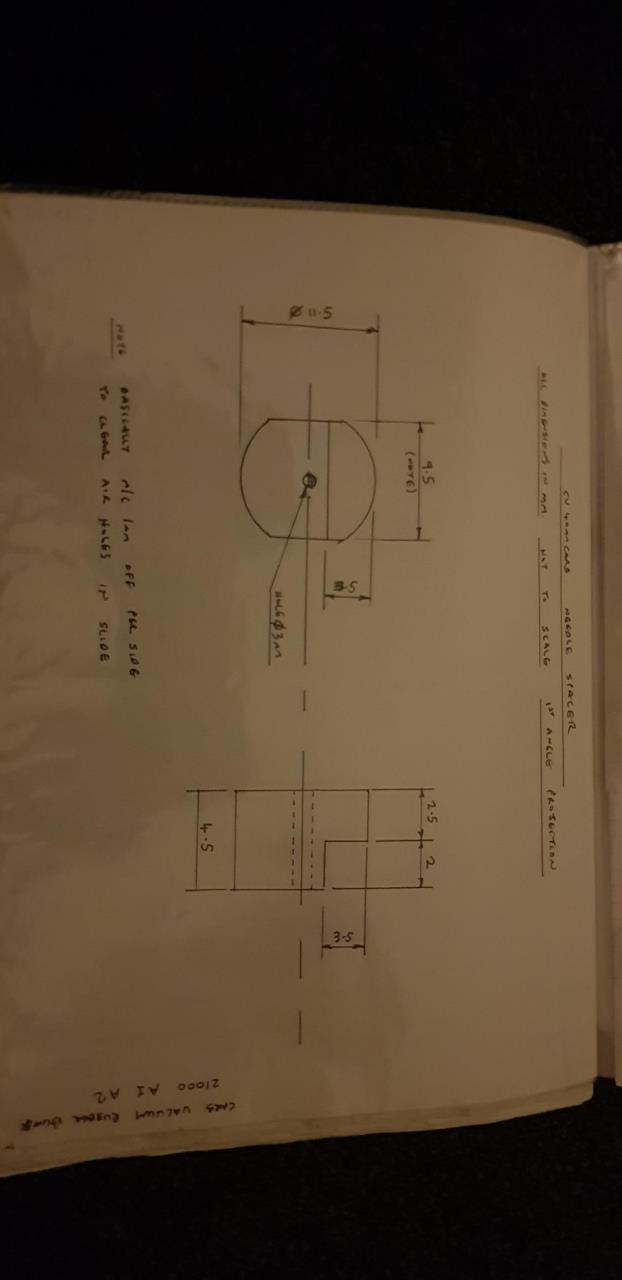
Many moons ago I designed and posted a mod on the old site a really good improvement that could be made on the cv carbs. Basically the plastic washer under the needle wears significantly through rotation and if they do no rotate they groove severely. Also the way slide is designed with a step so the plastic washers causes the needle to sit at an angle causing even more wear on the Suzuki emulsion tube top area causing ovality and richness, which is compounded even more if using rubbish designed dynojet emulsion tubes. These aluminium spacers replace the plastic washers and hold needles firm and square. They are fiddly to make but worth the effort. Searching through old drawings found my original design. Unfortunately cannot find my original pictures. Will have to find where put old carbs and take them apart. There was streetfighter site of some sorts that must got my original drawing and started making them, UKLee pointed this out when we were building one of his projects.
-
Found my original drawing from way back.
-
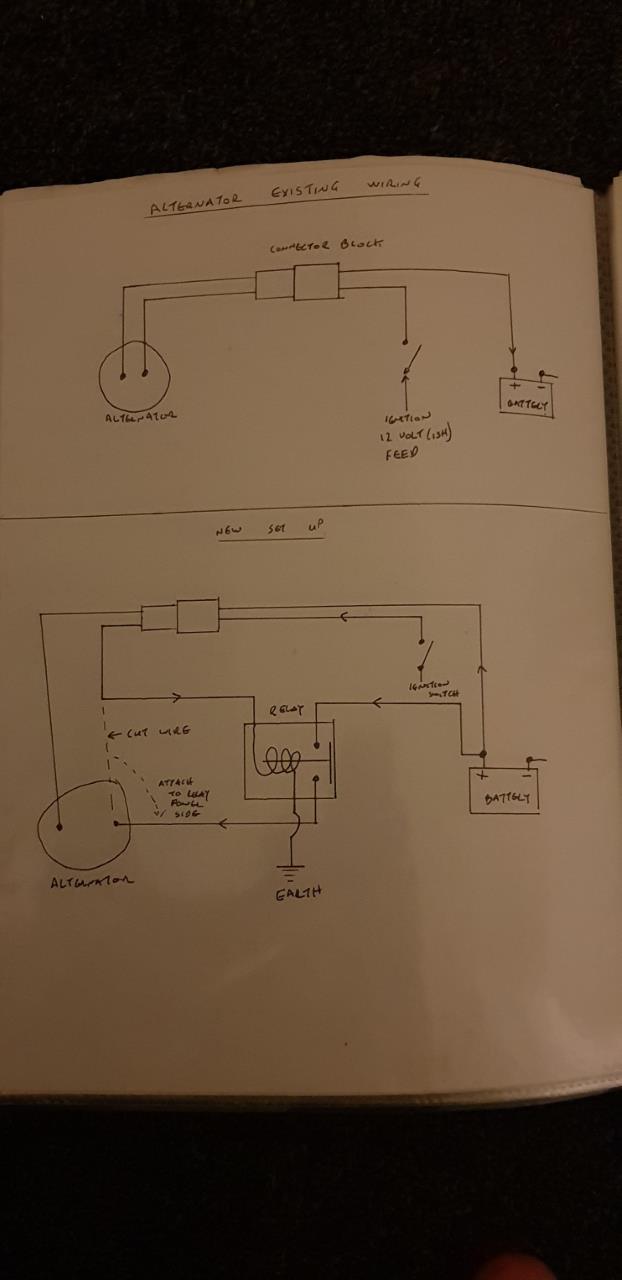
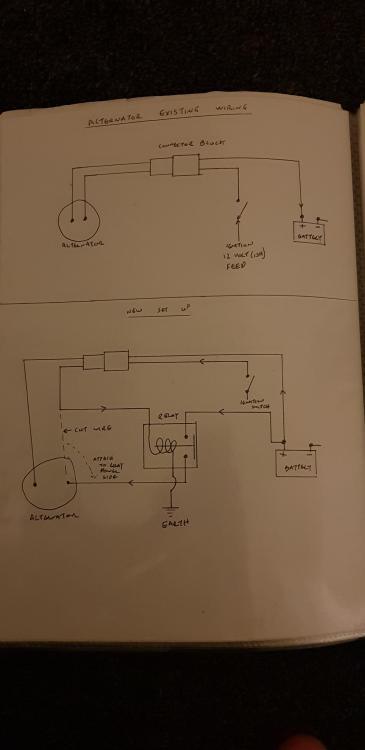
I connected the wire that you have marked to B straight to battery so direct feed with true voltage to take out any wirring corrosion. You could do as you said or method I used with inline fuse if your worried about protecting the wire. This wire is basically telling alternator to wake up and work and is comparing the two voltages so imperative the alternator receives true reading to prevent it ramping up the output voltage.
-
Not sure anymore if honest think used it as a drift. Have to have a look. Basically you want the worm just to start working.
-
Was using a heavy duty spring and one normal on diaphragm clutch should have added. Current set up proper hybrid using clutch cover pull so light yet still handles the extra power. Well it does at moment hopefully won't break this time.
-
Remember to put everything back on same carb it came from.
-
Any downside to mounting the oil cooler lower?
jonny1bump replied to Zweihammer's topic in Oil Cooled
Remember still using original curved cooler for main oil flow to bearings etc. -
It's does become quite heavy. Make sure rod long enough so worm is starting to move, is greased and free. Don't use short lever.
-
No worries
-
Any downside to mounting the oil cooler lower?
jonny1bump replied to Zweihammer's topic in Oil Cooled
Here you go.
-
You would happen to know thread they use?
-
By rear rotor do you mean cush drive or brake disc. Performance parts limited are agent if it's cush drive. Brake disc completely depends on what model bike it's been set up for.
-
Just give them another clean and take pilot screws out this time.
-
Any downside to mounting the oil cooler lower?
jonny1bump replied to Zweihammer's topic in Oil Cooled
I've got secondary cooler below main been there for years.