Joseph
-
Posts
1,928 -
Joined
-
Last visited
Content Type
Profiles
Forums
Events
Everything posted by Joseph
-
Windscreen glue or the like usually
-
Wow that looks good
-
Bench drill is a bit wonky but hey I got it centered and it worked out ok
-
Cool. That makes total sense. Thanks for the clarification Now it's off to the welders then
-
Quick question Got my hands on the last bits for the plenum : the intake pipe I have a 10mm OD tube for the pitot. I chose that because thats what recurrent info i found online (i still have no idea what I'm doing, i'm just going by what stuff i find online and especially here) Any preference based on these three angles ? (On Ol' Red the tube was inline with the plenum intake, like the first photo, for example) Or do i just choose whatever suits the space i've got ? Would i need to do a slash cut on either of those setups or just the 45 / 90 degree ones ? Ta
-
Can't do dyno either. Nobody offers dyno carburetor set up in the country i live in
-
I saw that you wrote that but unfortunately i'm going to have to stick with the singles on this bike
-
Currently trying to set up my 1127R engine with BST34 I have KN single pods and the exact same exhaust as you, currently on 140 mains, 3 turns and middle notch needles, it's sluggish when you try to give it beans, so sounds like i need to up the game ?
-
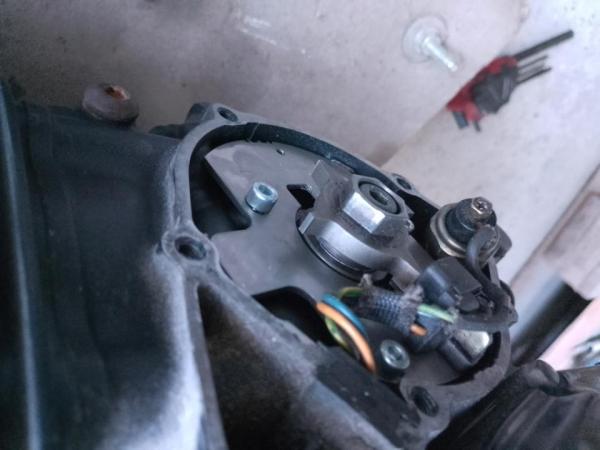
Yes it goes through to the other side, the Ignition itself is not in an oil bath but there is a small passageway to the sump. It's a really smart and trouble free solution
-
https://oldskoolsuzuki.info/forums/topic/20173-scavenge-pumpwhat-you-using/
-
That is a 10mm spigot, used with 10mm 1/4 turn valve
-
Got a few last bits from the laser cutter : Since the GSX1400 doesn't have cam oil ports on both sides of the head i had to come up with a solution :
-
The problem with finding an adaptable one is that due to the mounting position it needs to be super long with a super long stroke. Like it's been said Hyperpro carry one that meets the specs. Ohlins also has one in their catalog but you'd have to have it made to order, which is possible over this side, probably you can inquire at the official supplier where you are Otherwise another solution is to fit one accross the forks, hidden in the fairing, you need to weld/fabricate a mount on the fairing stay or something down those lines, but then you can use any short damper commonly found
-
The damper on the 1989 1100 can be rebuilt because it can be taken apart/unscrewed. All the others are crimped, so not straightforward for a home mechanic The slabside dampers were much better and can be adapted. But unless you're on a mission to restore to original specs like said you'd be better off buying new and aftermarket
-
It's laser cut by company local to me in France It's 2mm stainless and i don't know if i got lucky because often laser cut gives a notchy edge but the few i had them do of this part came out great
-

Gsxr1000 k4 frame dimensions
Joseph replied to Graeme's topic in Water Cooled, V-Twins, Singles and 2-strokes
Ok. I'll see about it probably this weekend -
Gsxr1000 k4 frame dimensions
Joseph replied to Graeme's topic in Water Cooled, V-Twins, Singles and 2-strokes
Haha. Thanks I'm just wondering whether K3 and K4 is the same ? If so i'll have a look at his bike -
Gsxr1000 k4 frame dimensions
Joseph replied to Graeme's topic in Water Cooled, V-Twins, Singles and 2-strokes
My next door neighbour has a K3 1000, if thats any good he'll definitely let me fondle it's back end for you -
Plenum base is looking nice too
-
Spigots are pressed into the base plates, now getting ready to send all the ally bits off to the TIG welder since welding is not my greatest talent, aluminium welding is not possible Also visible is the amount i can take out the cylinder head to open up its intake potential by matching the 36mm carbs
-
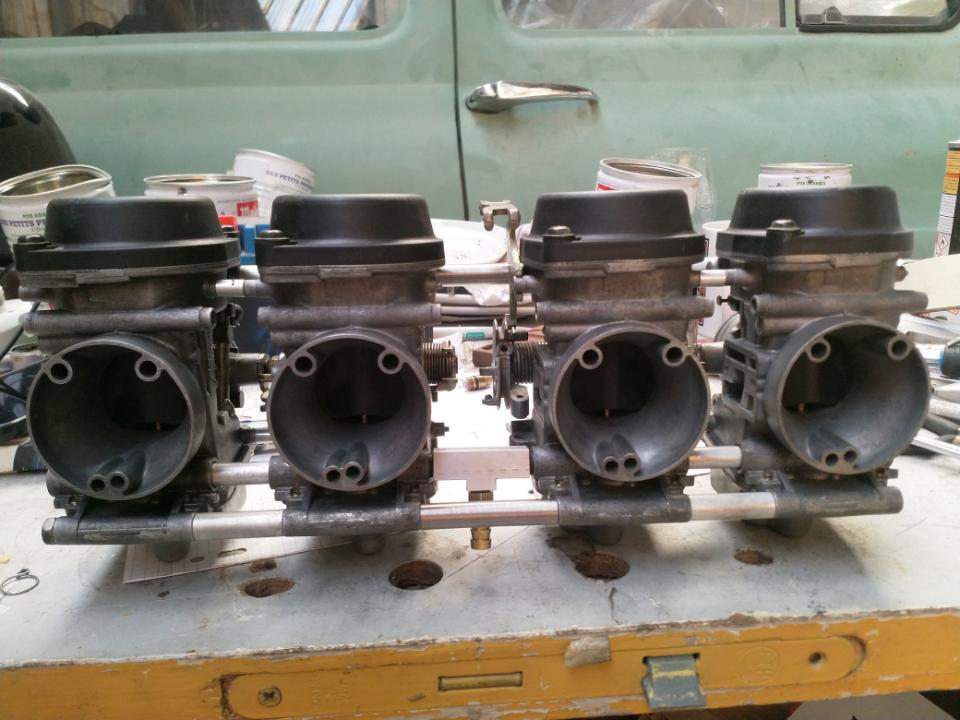
The rack got stretched Just a mock up build, i needed to see how long a tab i needed to weld onto the carb nº2 butterfly control, because as you can see it way out. Choke bracket also needs doing. Luckily enough the two mega long 6mm screws are long enough to thread into carb nº4, so thats a thing I don't need to address

-
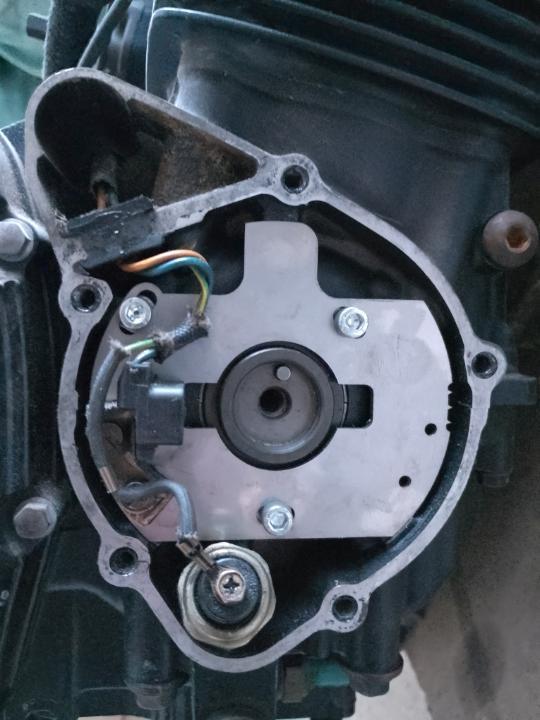
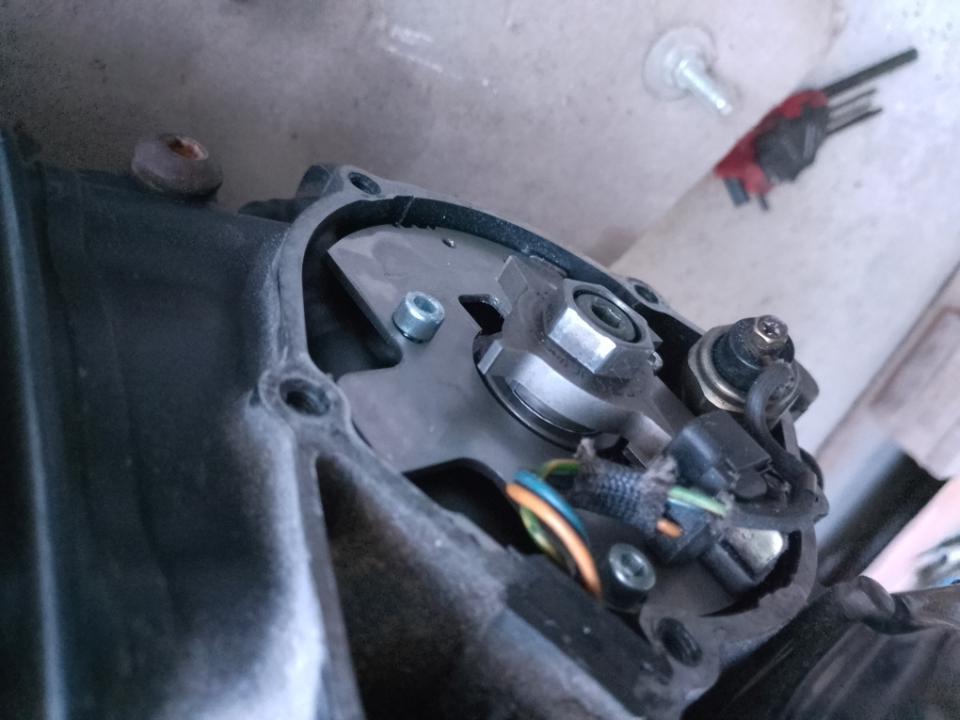
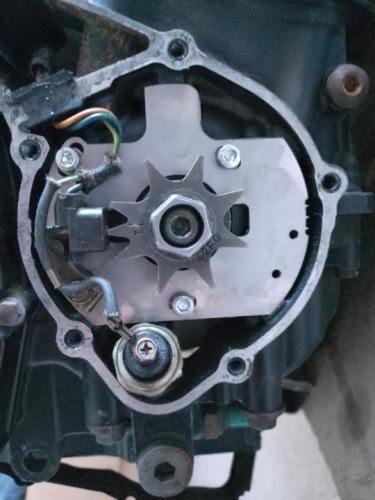
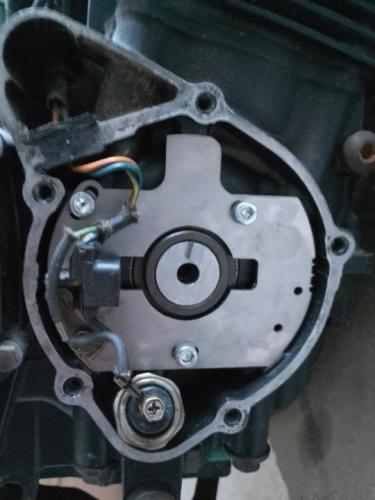
Also pictured is the adjustable advance ignition plate i designed. Didn't invent the concept but it's come out super clean, adjustable +5 to -5
-
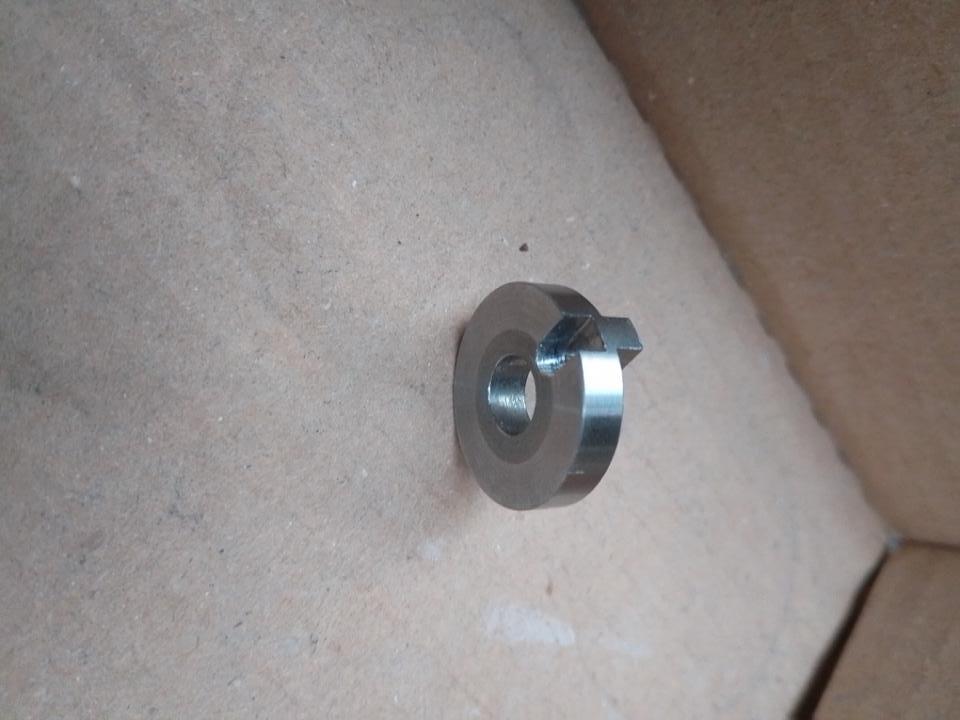
Out with the old : Spacer in : Rotor lined up :

-
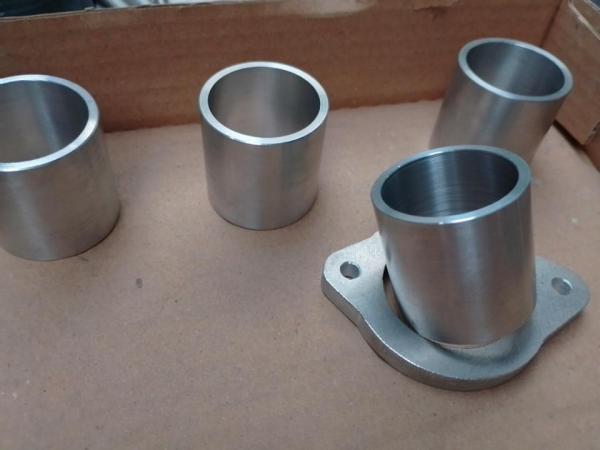
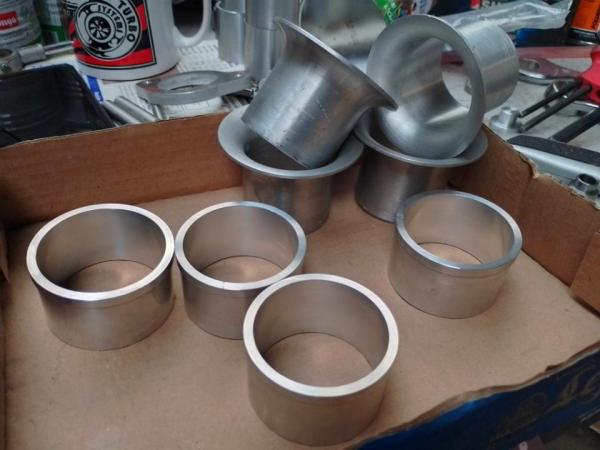
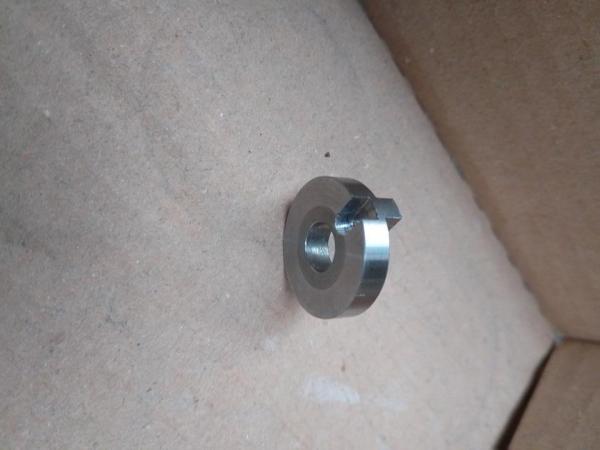
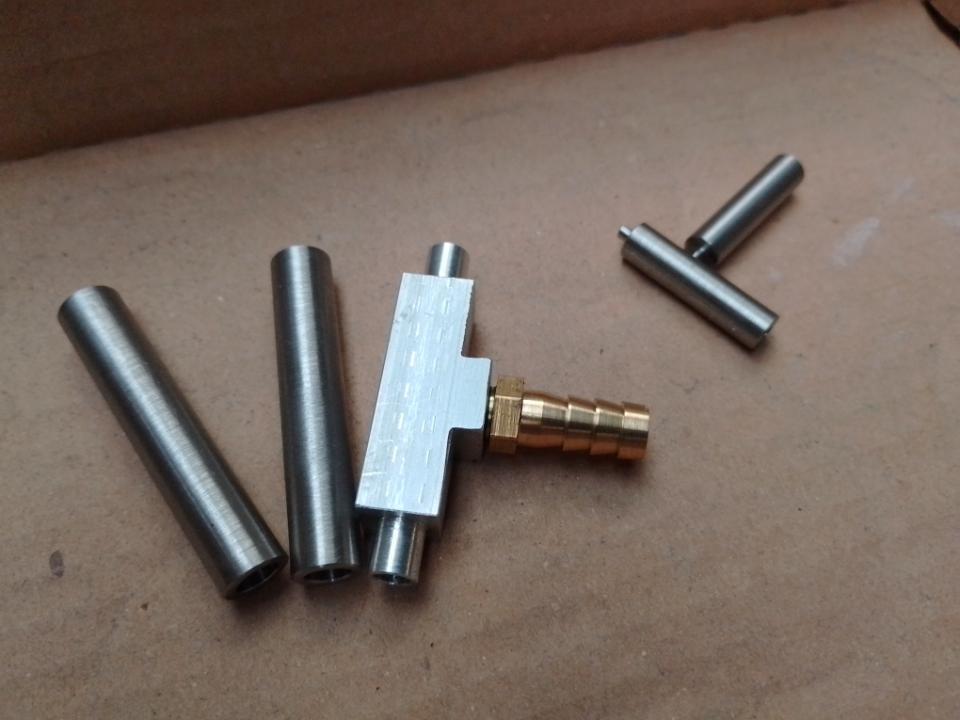
A bit of an update. So, when i need lathe jobs, I have to spend money on a man because i don't have the tools or know how to machine parts, but he's delivered once again Alloy spigots for the intake pipes and plenum outlets : And the parts required for the caburettor conversion (spacers, mainly, because 2 and 3 carb need a big gap added), along with a nice little extended alloy T junction feed to fit with a brass spigot for the fuel feed : Finally, this little jobby to make up for the difference in height of the bandit rotor compared to the 14 rotor : So unless i've completely forgotten about some major aspect of how an engine works, this is all that is needed to convert a GSX 1400 to Bandit 1200 analog engine management ? I'll put it all together tomorrow, it's getting late now I'll probably arse something up if it start now