Gammaboy
-
Posts
1,448 -
Joined
-
Last visited
Content Type
Profiles
Forums
Events
Everything posted by Gammaboy
-
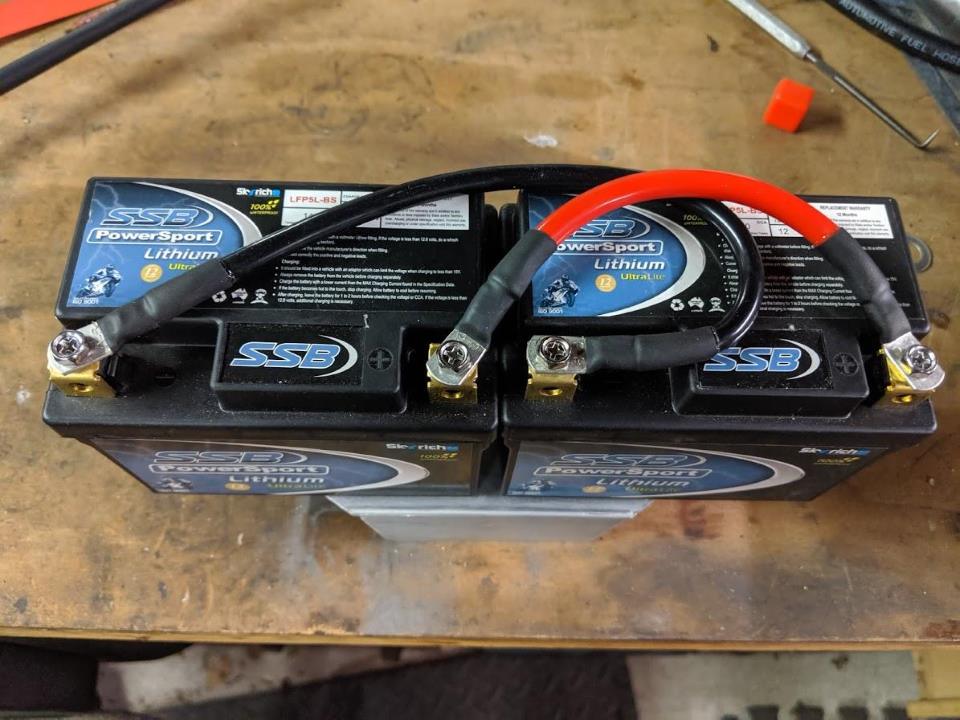
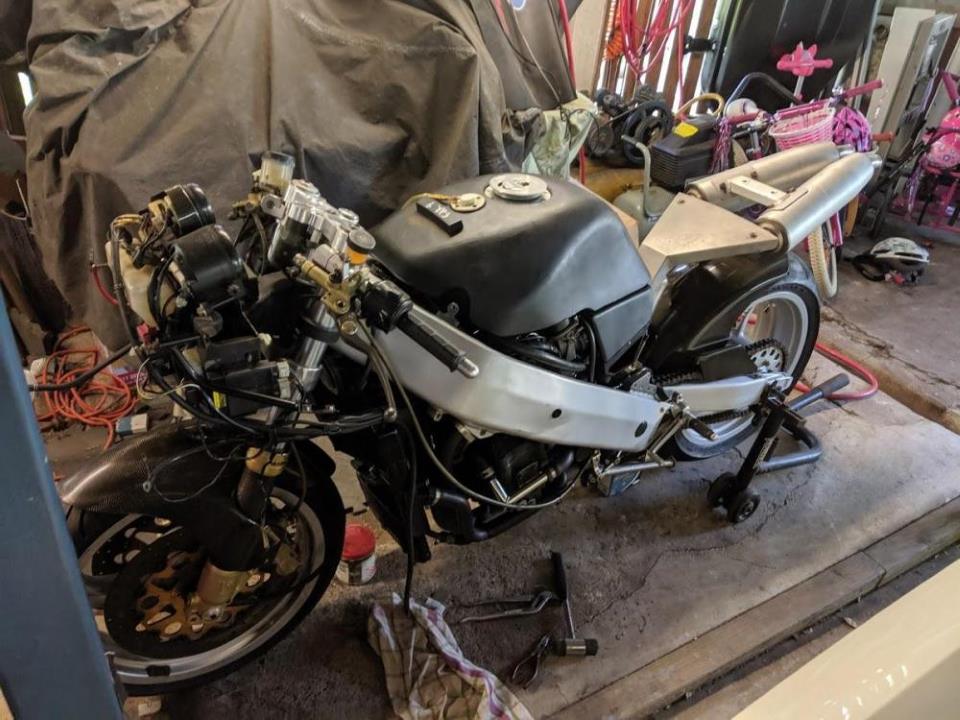
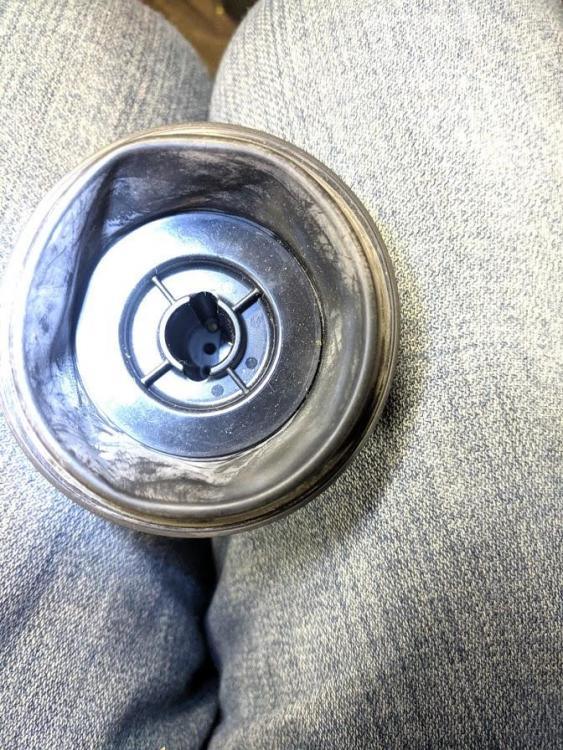
Ok, once again, there are photos I forgot to take... but, got some progress happening. A quick photo of the batteries sitting on the platform with the link cables. And the platform sitting in place. I will strip and repaint the front subframe at some point. The tab sticking out of the subframe is for hanging the CDI off - standard Suzuki 1100 unit. Not sure if I'm going to just fit an advancer, or go to a Ignitech. So, I'm still fucking around with exhaust fitment - the headers from the other bike made a tiny difference, and I can't be fucked swapping them back, but I *think* I have a plan now. SRAD tap conversion - well the SRAD tap has provision in the casting for the outlet barb to be in one of three positions - plan was to fit a 90* elbow to the existing position (drilling/tapping to suit), and drilling and tapping one of the positions on the opposite side for the other elbow. Did that, fitted it up, and the hose routing from the "front" elbow sucks completely. Wound in a blanking plug, and tried the other spot. Not great, there's ~2mm clearance against the seat unit, so I'll grind it down a bit, but not sure i'll stick with this plan. I'll include a pic of the modded tap in the next update. May just say fuckit and buy a new OEM one, which I didn't know was available when I grabbed the SRAD tap... anyway, between that and the exhaust malarkey, I had the shits a bit. So last night, i had ~30 minutes to spare, so I thought I'd whip the clutch master off and see how fucked it was, given that the piston was stuck in the bore at full travel. Good news was, the fluid in the lines and reservoir, while not great, was not utterly manky.... which was promising. So I removed the sheet metal nut on the pivot (discovering it was fitted upside down!), dropped the lever and pushrod out and tried to have a look - but the boot that protects everything is locked in place with a pressfit ring and wouldn't let me see anything. Put a thin allen key up the end to try to dislodge the piston. Nope. So, violence it will be. Two taps of the soft faced hammer and it was free. Movement really freed up with cycling it in and out a couple of times, and blowing in the banjo bolt end confirmed the feed port was clear... one thing left to do. Screwed it all back together, bled the master up, and then bled the slave. Slave bleeder access on these is renowned for being fucked. The bleeder itself is hiding behind the frame rail, only visible from the top with a torch. Managed to get an 8mm ring spanner onto it, cracked it open and then snaked my bleeder hose onto it. Pump hold pump hold pump hold... and we're bleeding. a couple of reservoir refills and all the air is out, tied the lever down, fucked around getting the bleeder tight, released the lever and gave it a go. Clutch is remarkably light, and the sprocket cover flex indicates it's working perfectly. Knocked it into gear, pulled the clutch in, and tried to turn the back wheel... and bam, movement. Clutch hydraulics work and the clutch pack isn't stuck. I'll take that as a win!

-
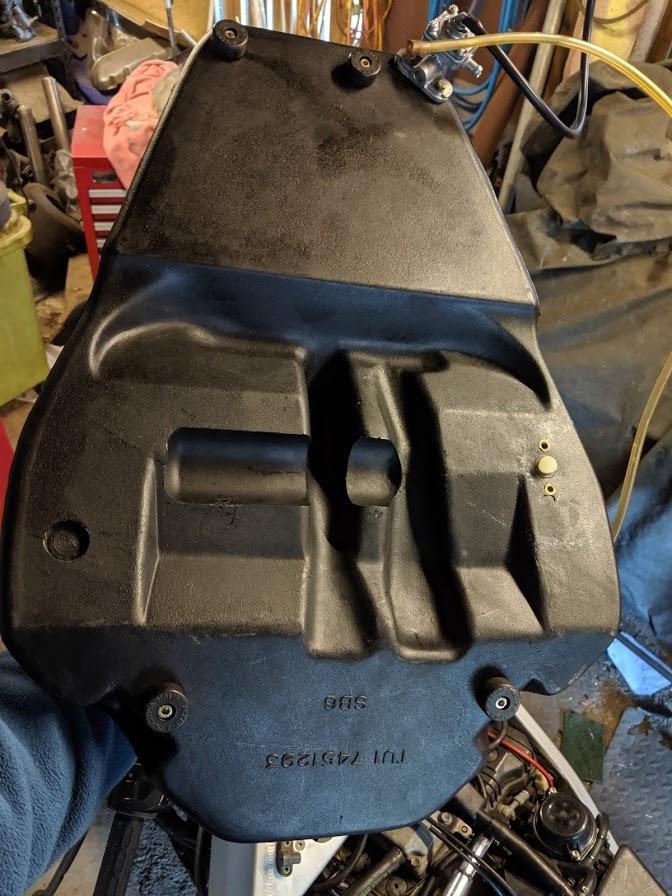
Incidentally, if you see a U712, it's from a Bimota SB6.
-
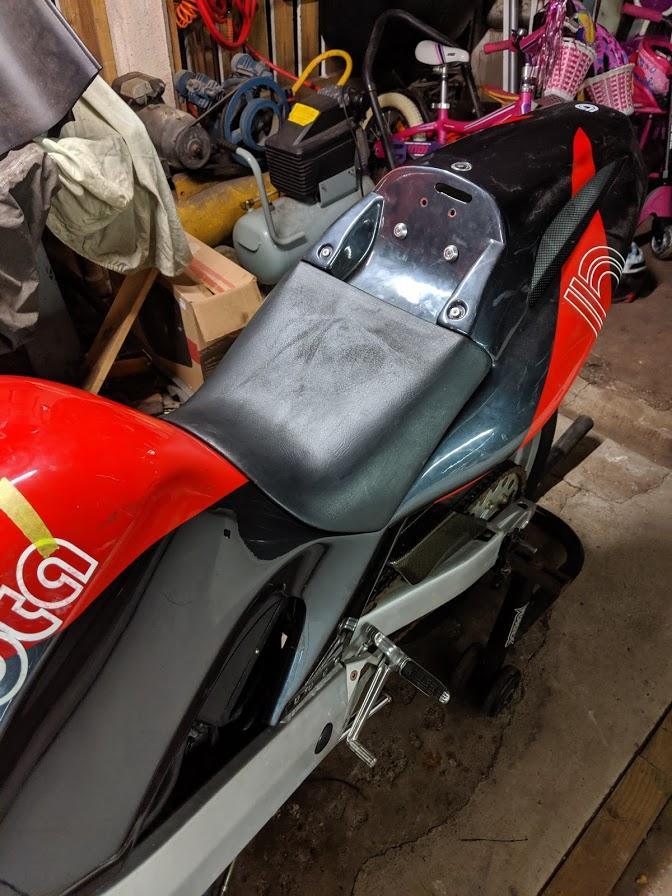
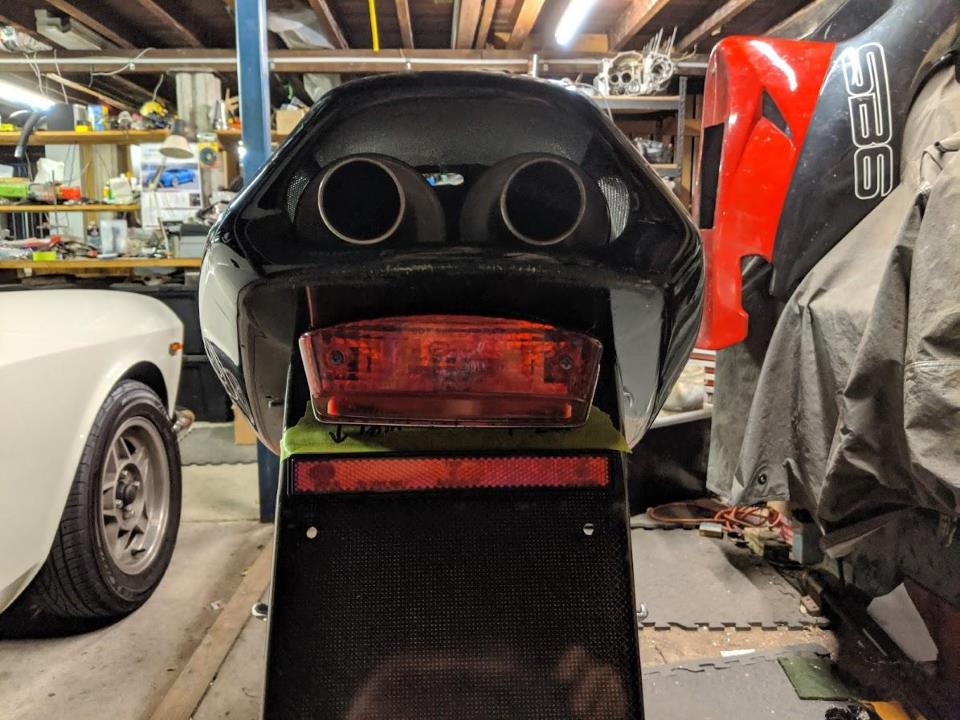
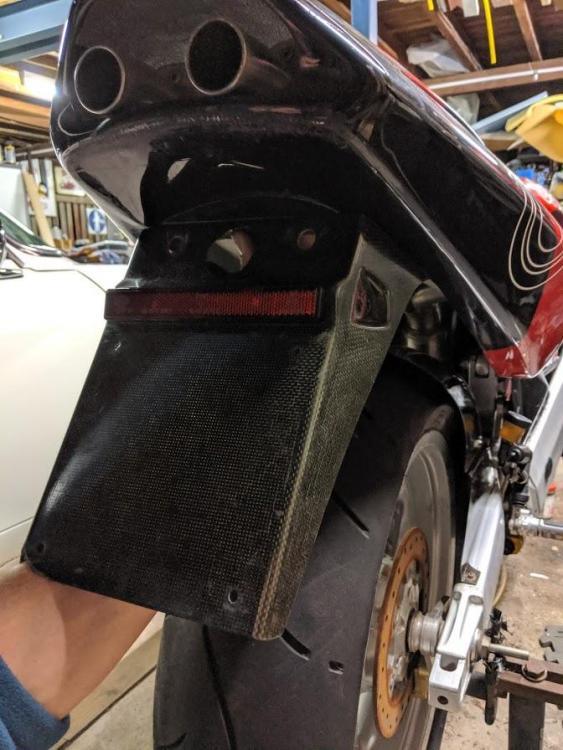
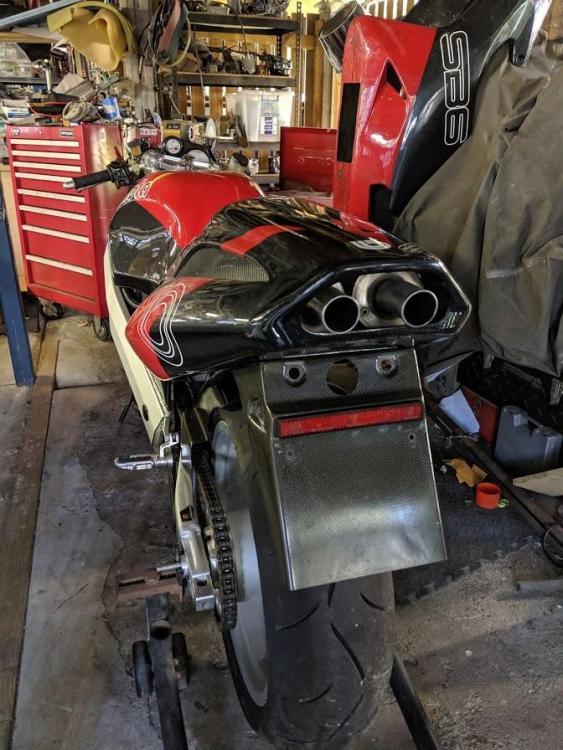
Well I finished filling it with oil - not really that bad a job - 6mm driver bit held in a 1/4" ring spanner to get the filler bung out from behind the frame rail, then a flexi rubber funnel thing to fill it (slowly). So, about a week ago, I had a delivery of some bits that came from Denmark... Now, I know I said I was going to make my own seat, but I had the realisation that I really want to get this thing on the road sooner rather than later, so I grabbed one from the same guy I was getting the rear mudguard/brakelight mount/plate holder and rear sub-loom from. The photos he sent me of the carbon plate holder made it look pretty rough, with a chipped corner and the finish being a bit rough in general... but once I popped it out of the box and cleaned it up, and then hit it with some cut and polish, it came up pretty nicely. Seat was in pretty good shape too. So, trimmed the bottom 1/2" or so off the plate holder and bolted it up. The I realised I needed to source the rubber isolators for mounting the tail light, so packed it up for the day.... The next night I realised I actually had a set of isolators attached to the *other* tail light that i had (it came from a DB3 with the short loom - had been intending to use it's connectors to make the tail light loom, but the complete one was cheaper than buying the 6 spools of wire and the terminals), so in went the isolators and on went the tail light... Clearly, drilling the holes was an after lunch job... with a bottle of chianti forming a large part of the lunch... Of course, I guess you should expect this shit on a "Hand Built" $35,000 motorcycle.. lol. a few minutes with the dremel and a small sanding drum sorted it out. What this photo also exposed was the issue with the exhaust tips, which I've been struggling with for the last few days. Went back to the guys I bought it from, and borrowed the mufflers off their parts bike - nope, no significant difference. Suspect it's something in the front half of the system - appears to be pushing the front of the mufflers up hard against the bottom of the seat area, resulting in the tips being hard against the bottom of the cutout... Tonight's job is modifying the SRAD fuel tap to be dual outlet with 90* barbs to let me run the fuel lines the right way. If I'd realised the SRAD tap was going to be such a fuckaround (The guy who's used one previously wasn't using the stock airbox, which makes a massive difference in that you can actually run the fuel line out of the tap without issue), I'd have just bought a new OEM one (twice the price of a SRAD unit though, although, when you take into account the time i've wasted fucking around with it, the fittings and 1/8 bspt tap etc, it runs pretty close). Tomorrow should hopefully see me borrowing/swapping the headers for the parts bike set - *hopefully* that will sort the exhaust fitment issues. I also finally used my mini sheet metal brake to make the platform for the batteries, and also knocked up the jumper cables that connect the batteries in parallel - this appears to be the one place so far where running the plumbing/wiring a different way to stock is actually a good idea. Of course, I forgot to take photos - will sort that out.


-
Mablethorpe contender
Gammaboy replied to fastgs287's topic in Water Cooled, V-Twins, Singles and 2-strokes
Mate, a wire wheel won't scrape the ugly off the Busa, you need a big fucking cutoff wheel. -
I spoke to P3 composites who did the heat shield, heel plates and frame protectors a little while ago - he doesn't do wet layup carbon anymore, and I don't think he has the moulds for the heat shield anymore either... anyway, I was planning on replacing or adding to the stainless heat shield with some of the better heat shield products that are available now. Got part way through the oil change process last night, old oil drained (came out in pretty good shape), filter off, new filter on and drain plug back in, didn't do the fill though, need to source a bit of hose and funnel for filling through the cam cover breather. Might see if I can hunt down a SB6R filler neck at some point too. Also started dummying up the little Lithium batteries - they're about 40mm shorter than the stock batteries, so looks like I'll be knocking up a platform for them to sit on so they're still clamped properly. Actually, come to think of it, I wonder if the overflow tank will fit under there? Spose I could fabricate an overflow tank to fit there if not.
-
Gsxr SRAD Long range / endurance fuel tank
Gammaboy replied to a topic in Water Cooled, V-Twins, Singles and 2-strokes
Build an extension to the main tank that runs under the seat like a modern bike? This was done on a SV650: It's made out of 3mm plate and supports the seat unit in this case.... -
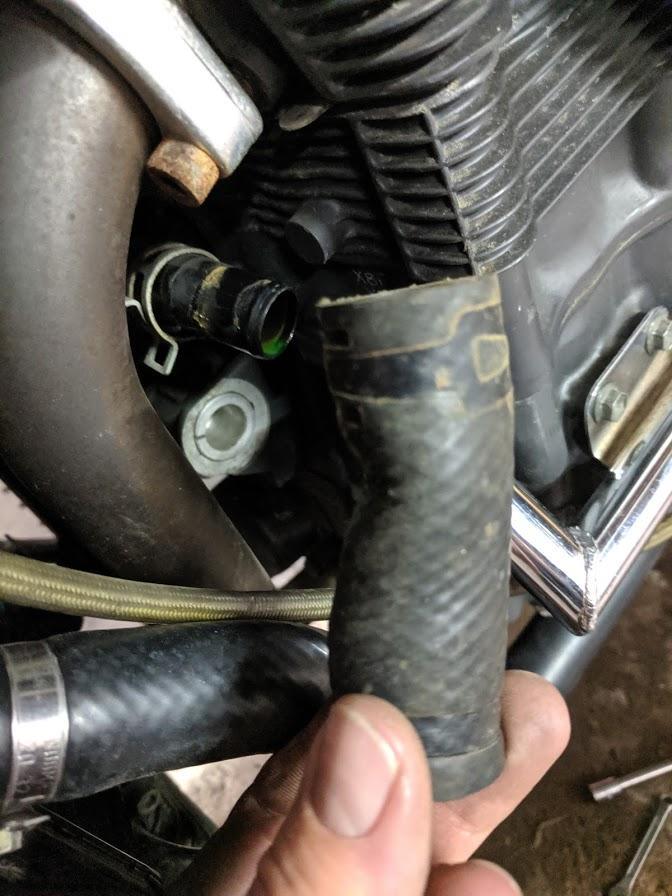
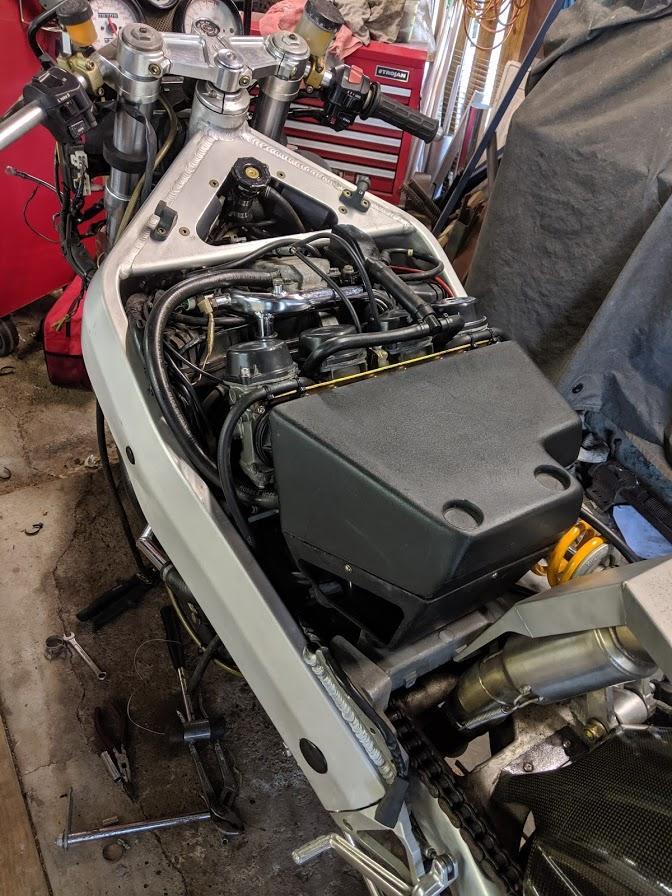
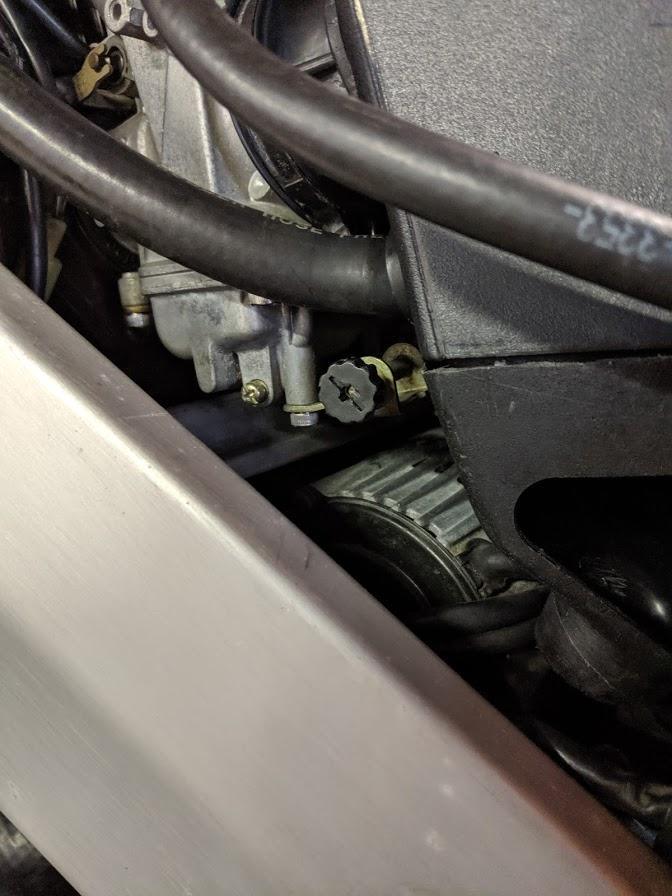
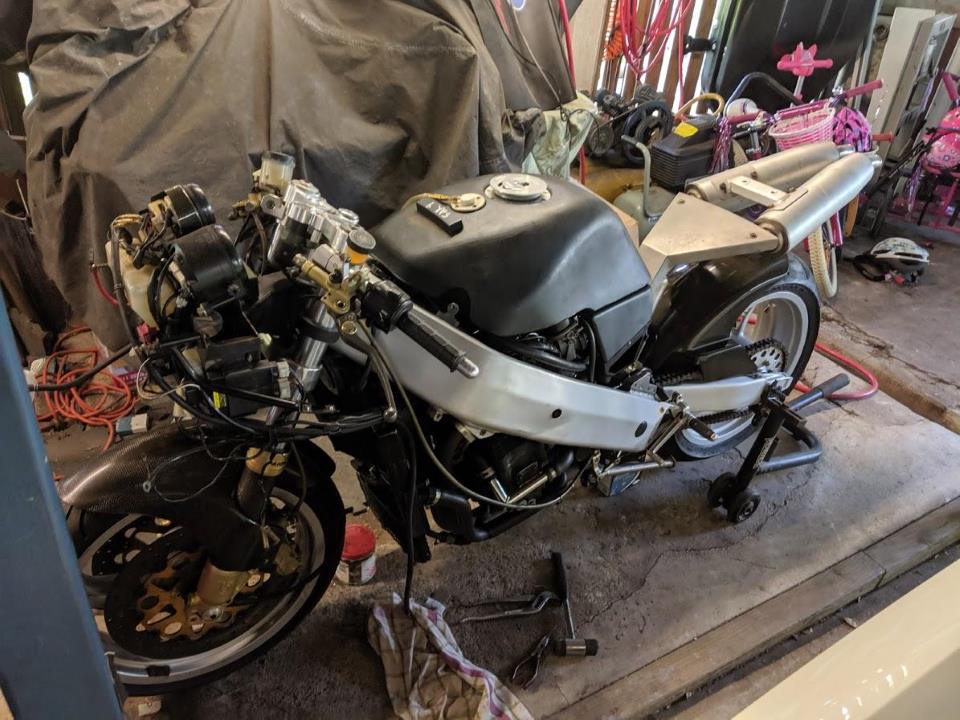
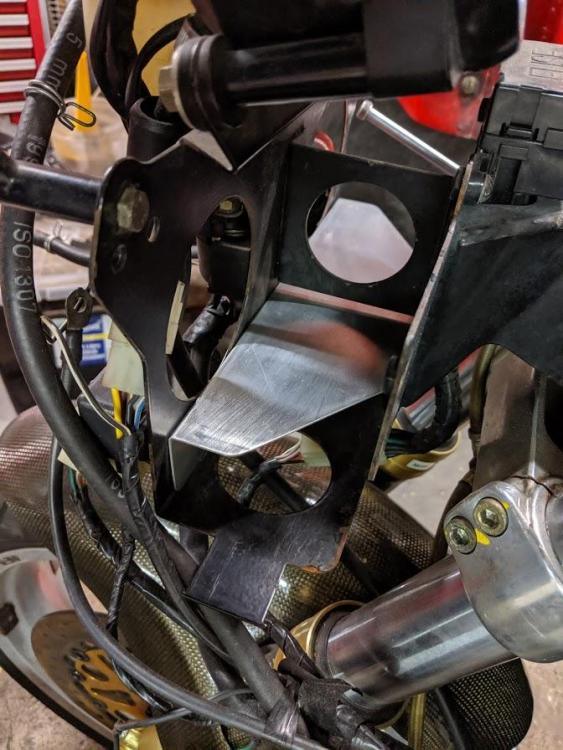
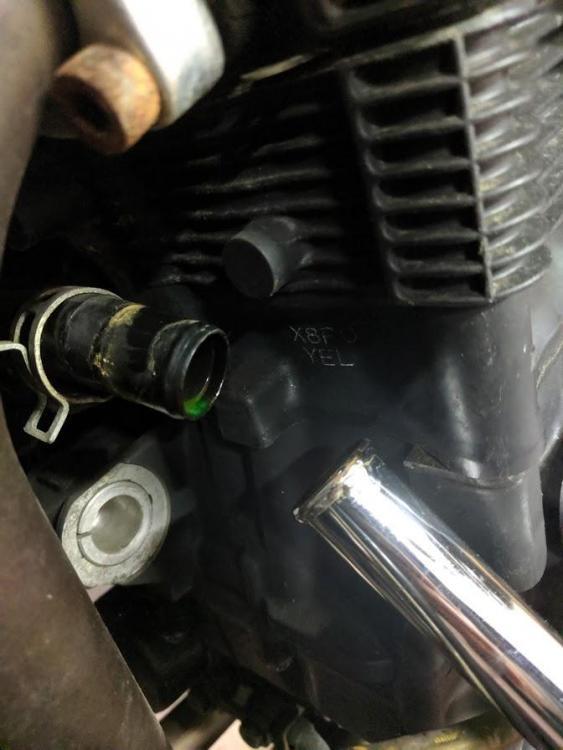
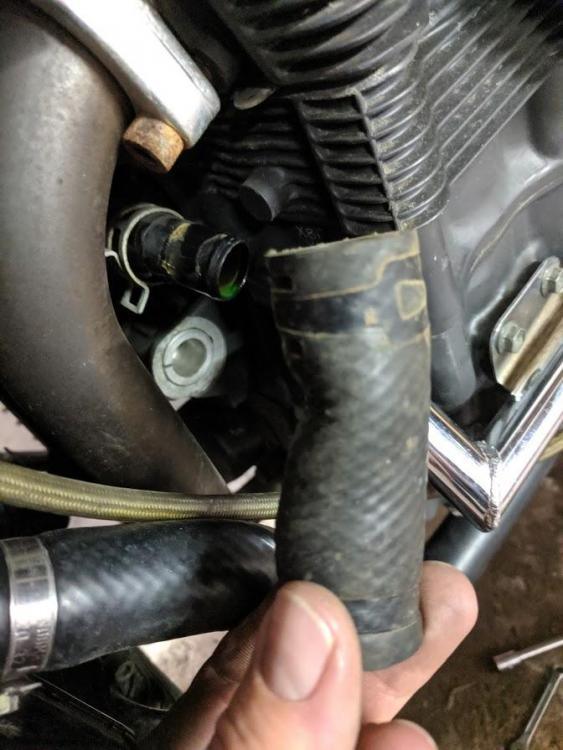
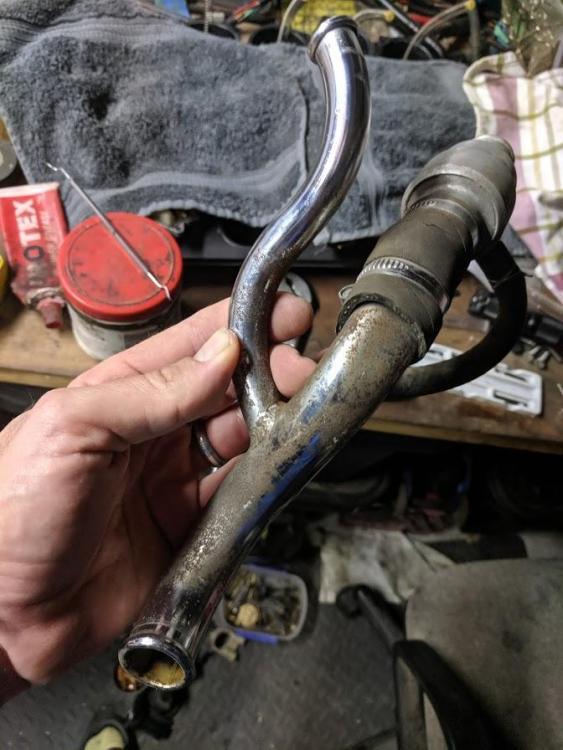
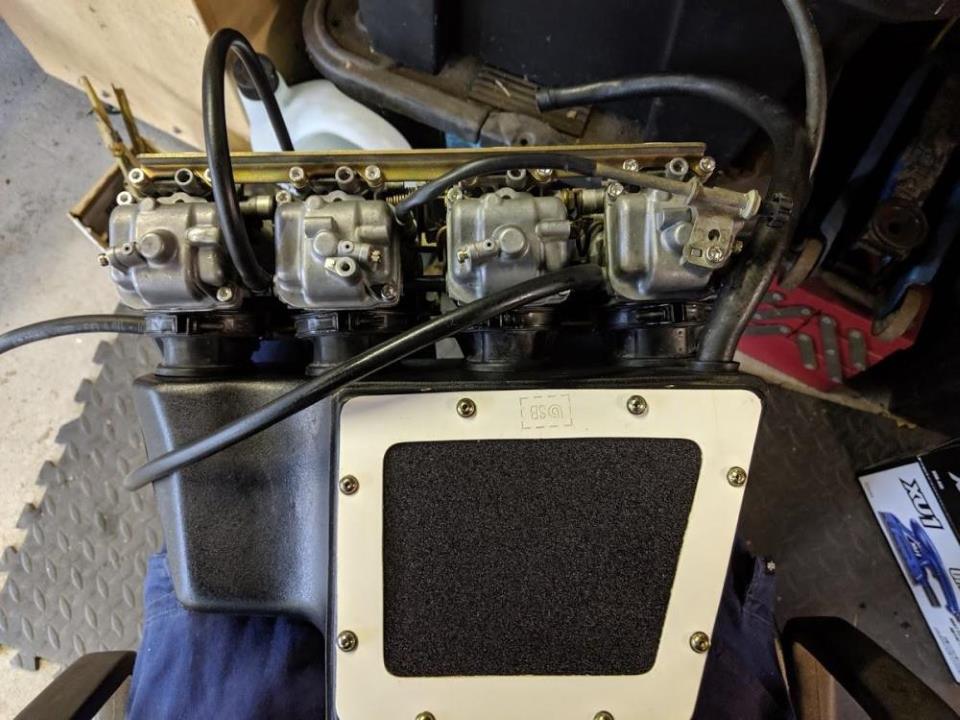
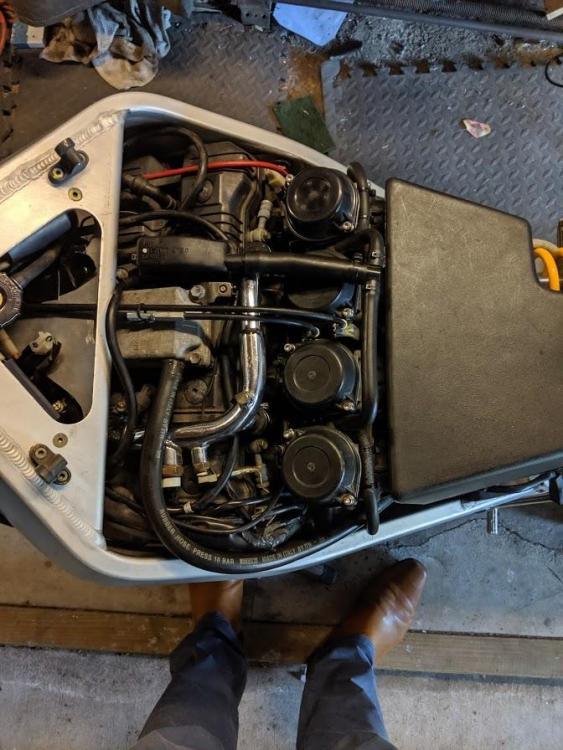
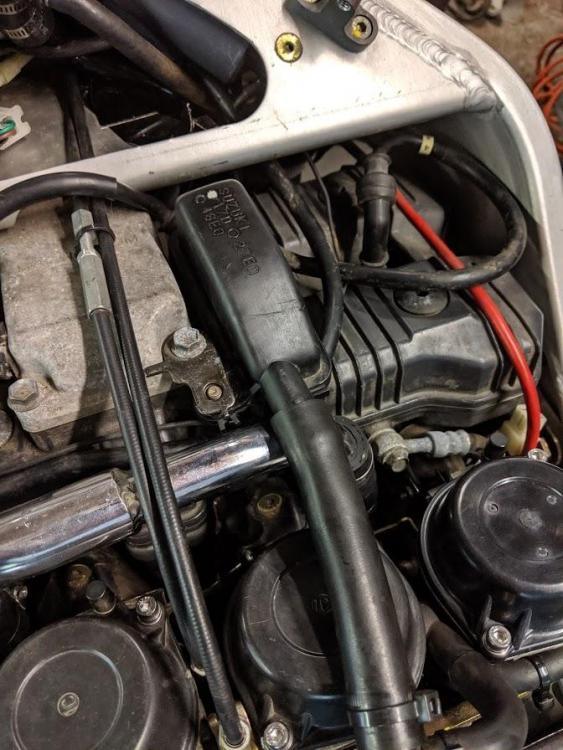
So, I managed to get a solid slab of Saturday to work on this thing, which was great, but fuck it was kicking my arse for a chunk of it. I'd pulled all the coolant pipes out of it with the aim of replacing all the old fucked rubber... of course, there was gems like this, straight hose used to connect a bend... turns out the GSXR piece for the top of the rad was the perfect shape to use here. Original hose was a bit crimped and fucked... All the stuff on the side of the bike was a breeze, and 2 out of the 3 chromed bits polished back up nicely. Could tell just by looking at it, that this one would be much harder work... and in fact the chrome was fucked, so it got a coat of black killrust. Anyway, getting all the hoses/pipes/thermostat reinstalled and located right in and under the headstock was a bitch. Install with hose clamps loose, move shit around as best i could, fit radiator neck (the only bit bolted to the frame), refit radiator, check thermostat clearance, remove rad, tweak thermostat so the bypass hose sat right, refit rad, do up the hose clamps I could reach... Because I only had the one top hose, I used the straight piece intended for where I used the top hose - may wind up replacing with a top elbow, but seems to be ok. (Incidentally, because of part supecession, the length of hose used between the carbs is about 3 times the length used, so you only need to order one - the piece used across the front of the block is similarly over twice the necessary length). Also looks like this thing had a new rad fitted before being pulled off the road, which is nice. Sat down and cut and oiled the new air filter - comically small for a 150hp bike, really. Installed the airbox to the carbs first to get everything lined up, then in with the filter: While we're on this photo, note the location of the idle adjuster bracket, this will become important later... Also knocked up and oiled a new filter for the carb vent filter thing, and drilled the housing for a zip tie to make up for the latchy bit being fucked. And bang, on with the carbs and airbox... Should be able to just drop the tank on and it'll all sit bang on supported on the little rubber bits on the bottom, right? Nope. Spent 15 minutes tryting to figure out what the fuck was going on - decided the venty filter thing attached to the cam cover was the culprit... pulled it off, nope, what the fuck. Why isn't the back of the airbox sitting down where it should either? Knew the float bowls are swapped between #2 & #3, and ground down a bit on #4 for clearance against the upper shock mount, but when I looked, there was 1/2-3/4" clearance - why would they bother? Something was definiteley stopping the carbs sitting down in the rubbers properly... and there it was. The idle adjuster. Whoever had been into the thing before me, had assembled the adjuster to the bowl the "Suzuki way" not the "Bimota way", so it fouled on that fucking crossmember! Carbs back out, flipped the bracket over, and bang, down they sit. See below - this is the "Bimota way". The "Suzuki way" has the adjuster hard in the corner of the crossmember. Cool. But what about that fucking venty thing holding the tank up? Tried tweaking the bracket a little - nope, no chance. Udid the screw that held it to the bracket (which is a low head cap screw like Bimota uses *everywhere* on this thing - this should have been my flashing big red warning light!), and just tucked it under the mounting bracket - bam - tank fits. At this point, I'd messaged another SB6 owner who currently has all the bodywork off his, and he sent me a picture of his venty thing. Of course it's bolted to the wrong fucking side of the bracket. Bimota, you cunts. Seriously? Anyway, his is about 100 frames newer than mine, and the crankcase breather runs quite differently (as does his plug leads - no two bikes the same huh?), which I'll probably copy when I redo my breather hose - which is about 1" too short to sit in the right spot for the tank to finally sit down completely. Anyway, everything where it should be (apart from the breather hose)... And the bottom of the tank, Carbied SRAD fuel tap sat in place (need to either convert it to dual outlet, use a t-piece or machine up a new top half without the dogleg and to put the outlets in the right spot)... Can see why it's so tight for clearance. And yes, the overflow tube needs replacing. Spent some time cleaning it with a combination of carby cleaner and wax and grease remover. The wax and grease remover did an excellent job on bringing up the carbon guards and around the gauges, removing tape residue etc - it's actually in way better shape than I initially though... although I did discover that a bunch of the filth around the rear shock is the remains of the bump stop - which is completely gone. Sigh. Tank sat on: Next job is an oil change, sort out the fuel lines (and the fuel level switch), get the new batteries into it and kick it in the guts! Then some fiberglass work, and some more cleaning.... by which point some of the parts i'm waiting on will hopefully have arrived.


-
Fib and say it's 1100 so they test at the lower RPM?
-
Any half decent machine shop can rebush the small end down to 18mm. Hell, a good one can offset bush it to tickle the rod length a mm or so.
-
Fucked is what those threads are.
-
Gsxr1100M bodywork on gsxr1100W
Gammaboy replied to RICKY's topic in Water Cooled, V-Twins, Singles and 2-strokes
WP750 tail with the top half of a L or M fairing would be a good look... -
And in theory the anodising should take care of that!
-
That'll teach me to rely on memory and not look at the parts fische. Hmmmm. wonder if one of the variety of clutch gears would work with the 1250 primary. Have seen inserts used to allow smaller mains fitted in car engines (putting 351C cranks in 351W blocks to give a taller deck height with the small diameter mains to allow it to rev - back before SVO blocks were a thing), wonder if it could be done sucessfully here?
-
Well, yeah, it'd be much cooler if it was consistent... 1st gen Yosh Tornado fairings would be a great look on it.
-
Has someone tried to jam AN or JIS fittings onto BSP threads?
-
It's a full tilt Endurance racer, who gives a fuck about style. The Fairing is a Yosh Slingy Superbike unit isn't it?
-
Gsxr SRAD Long range / endurance fuel tank
Gammaboy replied to a topic in Water Cooled, V-Twins, Singles and 2-strokes
Build a secondary tank to sit in the seat unit? -
750/1100 Hybrid Gearbox?
Gammaboy replied to Danm54's topic in Water Cooled, V-Twins, Singles and 2-strokes
They don't, but the 750WN has a cable clutch. -
Clutch cover and cylinder head - there's no mounting points to hag the engine from (and yes, the very first SB6s used WN heads with no head steady point, but they at least had the oil gallery blanking plugs to use).
-
Smaller mains *might* work with 750 cases - I believe the 1100 and RF900 shared main sizes, but the 750s are smaller... Primary gear size is probably the killer though. Sealing issues at the front of the cam chain tunnel would be a pain, but not insurmountable if you look at what they do to put gsxr heads on GSXs Starting to sound like a big bored 1100 is the only answer for me at some point in the future - pity, 1250 engines are pretty cheap down here, and a 1250cc SB6 wouldn't wear front tyres out very often.
-
It's like a muffin tray but the pockets are oval (works better for sitting needles and stuff in as it turns out!). Spacing RSs for the WC1100 is one part of the problem, the other part is the clearance with the crossmember (And a lesser problem is the factory airbox supports the back of the fuel tank). To fit FCRs you need to pocket out the cross member for float bowl clearance, and grind the right hand side of the upper shock mount... I've also seen pics of an install of a set of TMRs on a SB7 - the shallower float bowls on the TMRs meant that for the SB7 the carb rubbers needed a wedge spacer under them to kick the the carbs up a little for clearance - depending on the difference in height between the 750 ports and the 1100 ports (What's the bet they're at exactly the same height from the deck - higher ports on the 750 head making up for the shorter barrels - wouldn't surprise me in the least), the TMRs *might* clear on an 1100... anyway, would need some mods to the airbox and rubbers, scratch built airbox or pods and a tank support to make it work. The Carbs have only done 8,000ish KM - figured it was a good idea to try to keep them happy with the stepped washers. The washers that came out of my parts carbs have about a 1/2mm step worn in them! Given the issues with fitting non CV carbs to these things, what I'd really like to find is a Yoshimura MJN setup for the CV carbs - they were available in the mid 90's apparently, but are super rare.
-
Got a chance to finish the carbs last night. Apart from the o-rings for the balancing tubes being the wrong size and having to scour the floors and benches for the old ones (found 5 out of 8 - some came from the 750 carbs I chopped up), it's all good. Of course I forgot to take a photo of the completed carbs (They just looks like some carbs). Bench balanced by shining a torch down the progression holes and looking for the edge of the throttle blade. Also fitted the stepped carb washers from @jonny1bump- I measured the needle protrusion with verniers before fitment, and again after and was surprised so see it was bang on the same - I'd assumed, looking at the washers, that they'd sit a little thicker than stock, but they're bang on - I didn't realise the stupid step in the slides was quite that tall! Crap photo of the step in the slide - difficult to photograph - was shining a torch down it to try to get it to show up. Stepped needle washers vs stock - you can clearly see why they cock off to one side and wear the emulsion tube oval. Wife was happy to have her friand tray back. (I think she's used it maybe once?)

-
Other option is 1250 sprockets onto 110W cams - bolt spacing is less critical compared to the inner bore... but it only matters if you're using the 1250 crank with the 1100 head. Looking at photos, it looks like the 1250 has a stacked gear shaft arrangement (Looks like the drive cluster is a cassette install into the case?) - part of why the clutch cover is so huge I guess. My interest in the interchangability revolves around keeping the 1100 cases - would be very interested to know if the 1250 crank can fit in the 1100 cases and drive a clutch of some combination of parts - the left side of the crank is easy to cut down.
-
Watercooled Bandit, I believe, yes. @Cheeky4648would probably know for sure.
-
For future reference, you can convert these to a removable screen using a GS1000 screen - you need to carefully finish rolling the edge over with a hammer on the GS screen so it'll fit in the pickup housing.