imago
-
Posts
2,437 -
Joined
-
Last visited
Content Type
Profiles
Forums
Events
Everything posted by imago
-
GSx1100 Dresda Solitaire (I may have had a Clivecident).
imago replied to imago's topic in Trick Frames
I reckon trimming the lower front edge to follow the frame line and putting a grille in the scollop will help the look?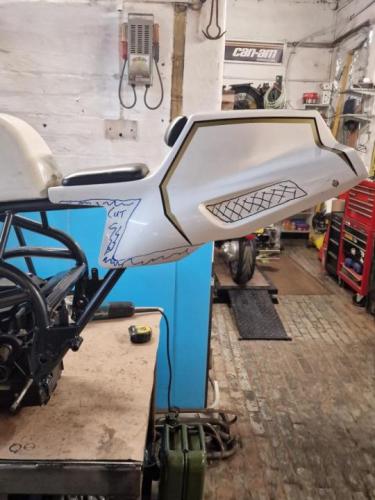
-
GSx1100 Dresda Solitaire (I may have had a Clivecident).
imago replied to imago's topic in Trick Frames
I'm starting to come back round to keeping the RG tail unit. The stripes aren't bringing anything to the party, but I reckon in metallic grey it could work well.
-
GSx1100 Dresda Solitaire (I may have had a Clivecident).
imago replied to imago's topic in Trick Frames
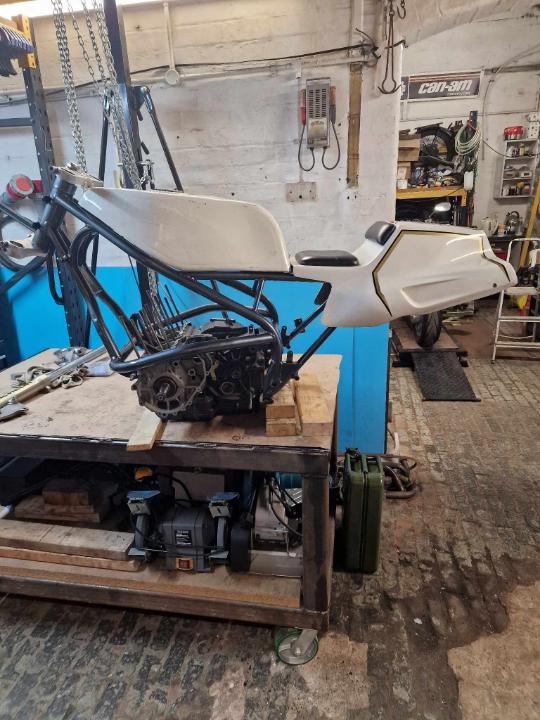
Now that some of the parts are coming back and others like bolts etc are imminent I can start bringing them together.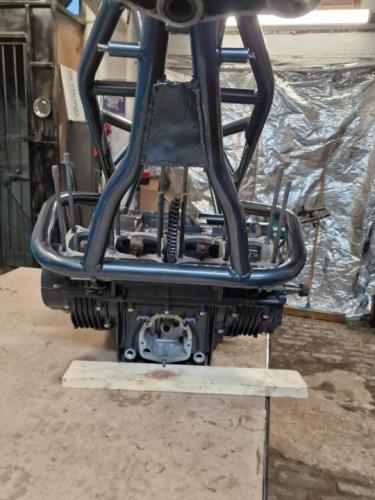
-
GSx1100 Dresda Solitaire (I may have had a Clivecident).
imago replied to imago's topic in Trick Frames
Come now, we both know that's an unachievable dream. On a serious note, Now that the Dresda and Throwback are sorted I can use one for the other ET that'll get built at some point, and the other will get moved on. I've never been more happy that the G is a shaft drive other wise the spare swing arm would be the start of a trip down another project rabbit hole. -
GSx1100 Dresda Solitaire (I may have had a Clivecident).
imago replied to imago's topic in Trick Frames
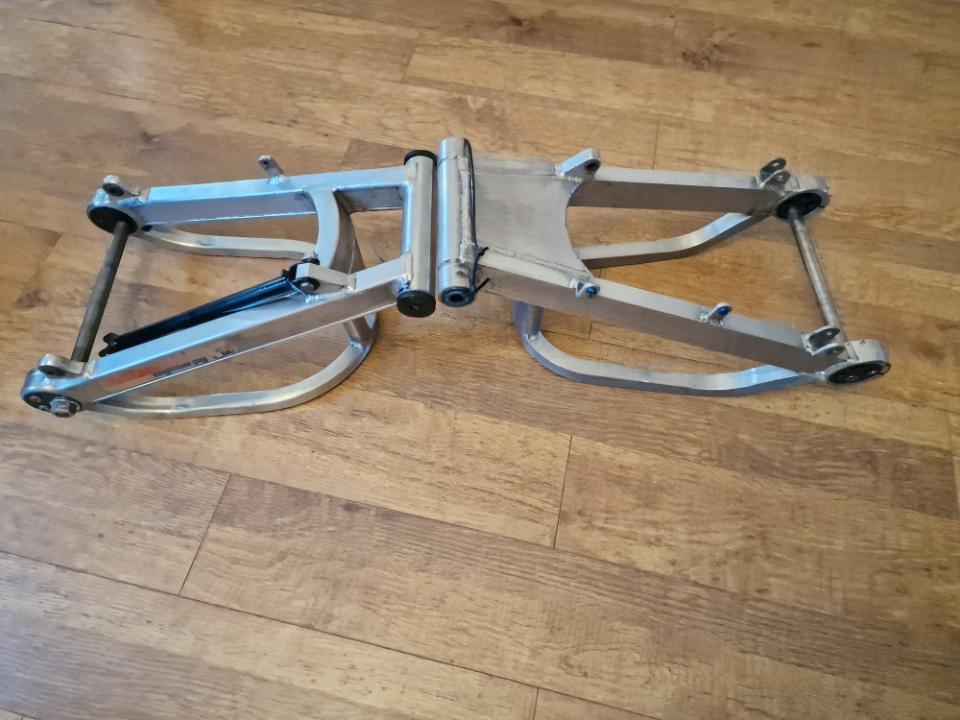
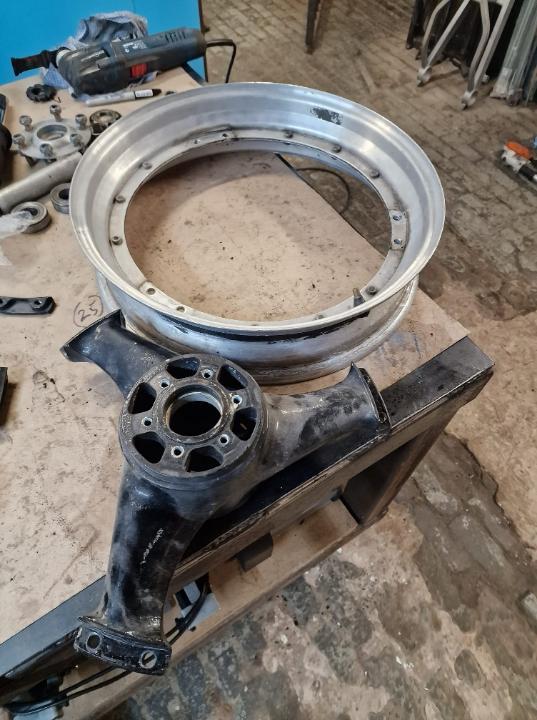
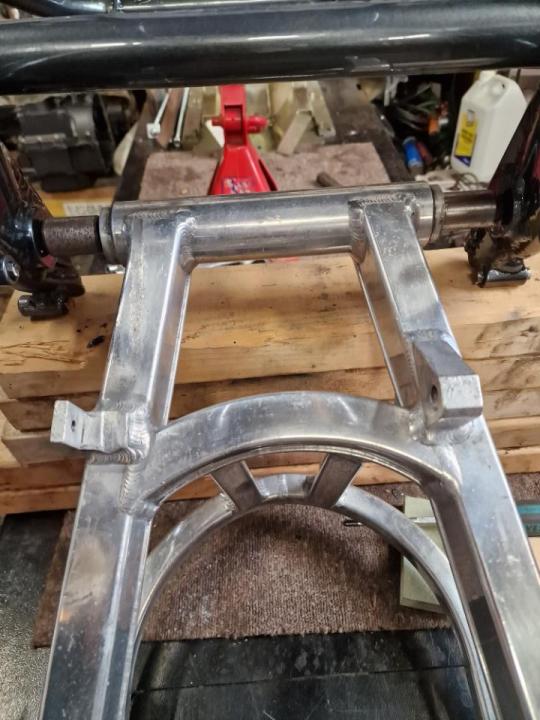
Today's episode of "I've had a Clivecident" is entitled "Careful what you wish for." I wanted a JMC for the Throwback and eventually got one after nigh on a 2 year search for the right one. Then I wanted one for the Dresda, but couldn't find one which suited it as the ones available were either too rough or the very deep box section type which would have looked odd on a light tube frame. So I chummed the waters and put out requests. The search went well, and fairly quickly I got sorted with the arm in the pictures above which is off being polished. However, what I'd also done was to say "yes I'm interested' to a bloke with a pair of Metmachex, one from a GS and one from a Kwak. The post arrived today.

-
GSx1100 Dresda Solitaire (I may have had a Clivecident).
imago replied to imago's topic in Trick Frames
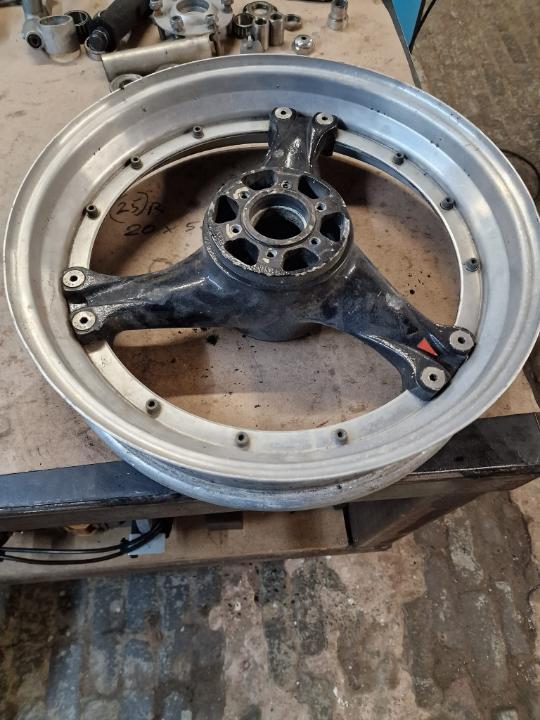
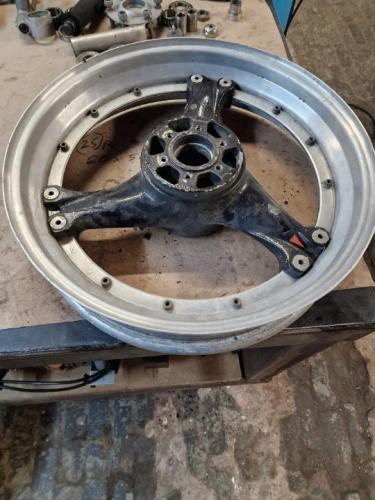
What a massive ball ache getting old tyres off of delicate rims is when the tyres have gone rock hard. Anyway, they're off so the rims can go for polishing and the centres for powder coat.
-
GSx1100 Dresda Solitaire (I may have had a Clivecident).
imago replied to imago's topic in Trick Frames
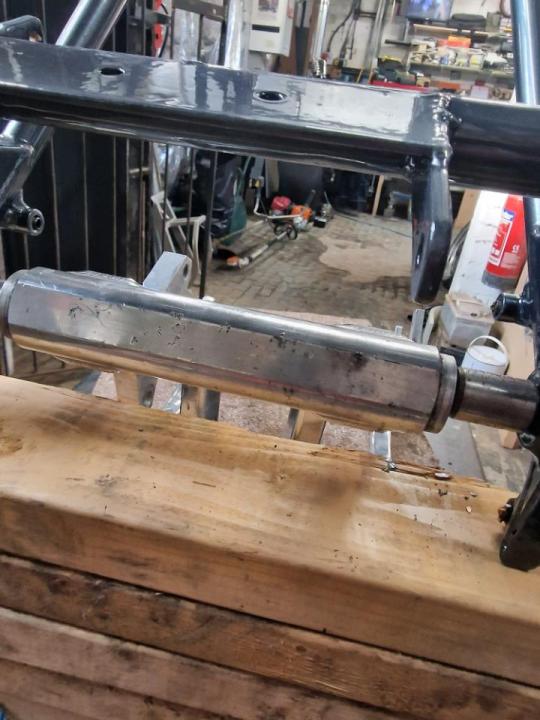
The back end and wheels were both simpler and more complicated. The wheels were a matter of ordering bearings to suit the spindles, so they can be stripped down now for powder coating the centres and polishing the rims. During all the bearing removal and faffing with the wheels I noticed that either whatever they were fitted to before had a sprocket on the right of the engine, or the tyre was fitted the wrong way round. Swing arm spindle will just need a sleeve and spacers, so the usual top hat business there but I've yet to decide on a single stepped sleeve for each side, or a single sleeve and a pair of spacers. The rear caliper carrier will have a bearing on that so I'll need to sort that out first.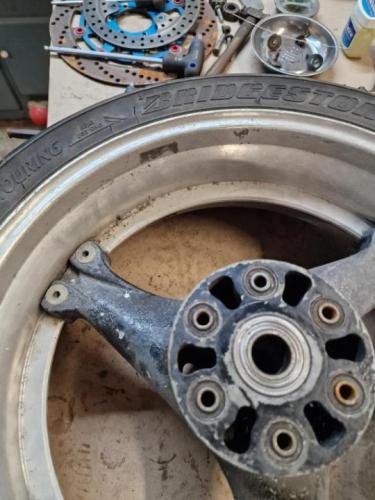


-
GSx1100 Dresda Solitaire (I may have had a Clivecident).
imago replied to imago's topic in Trick Frames
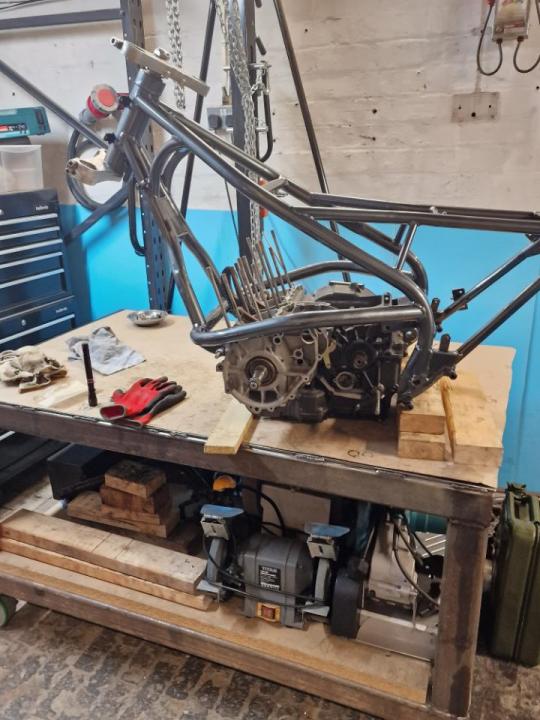
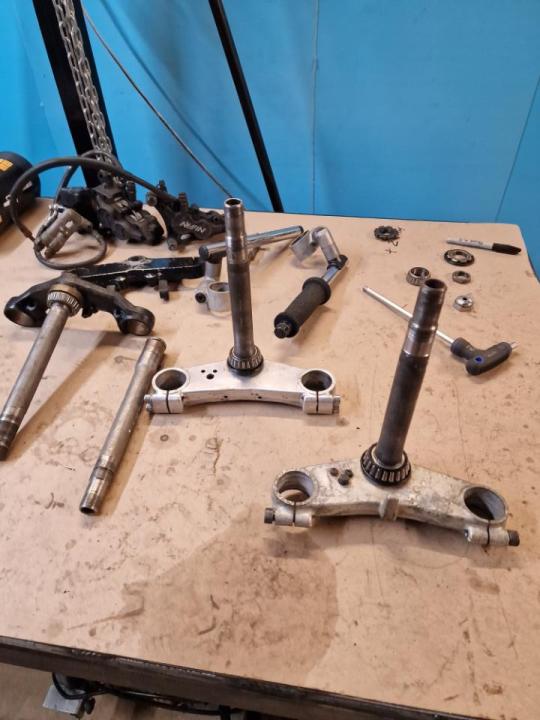
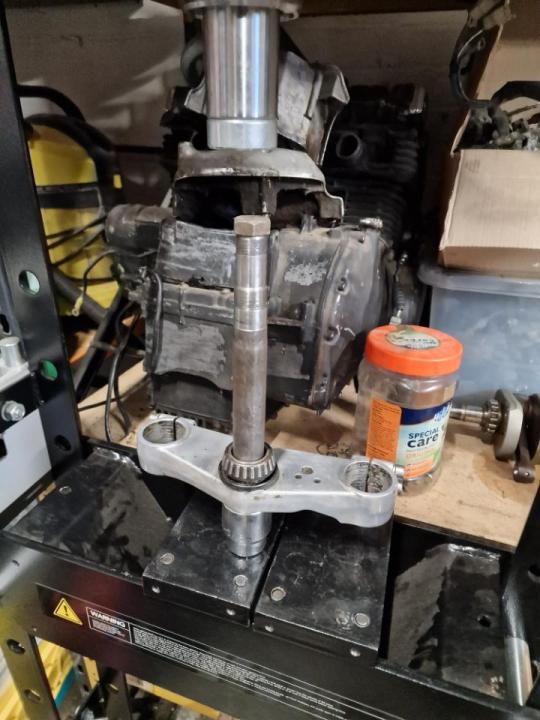
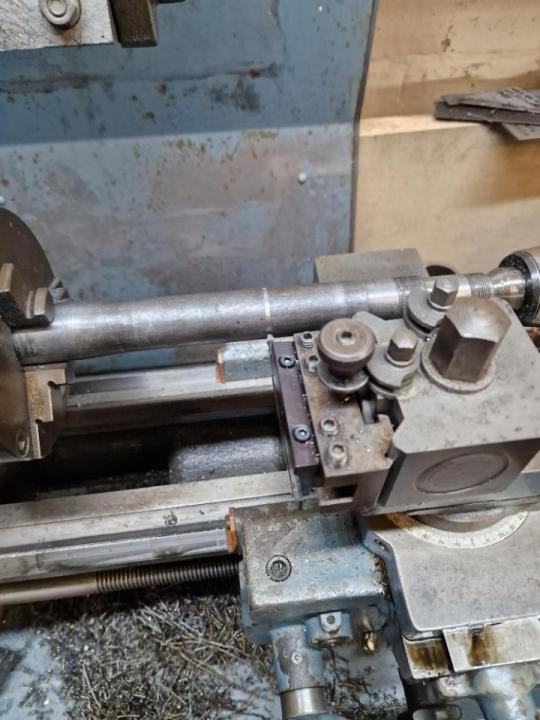
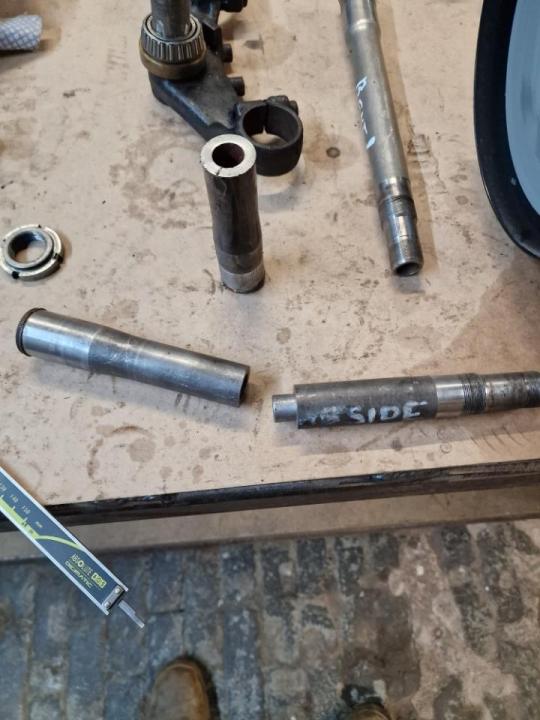
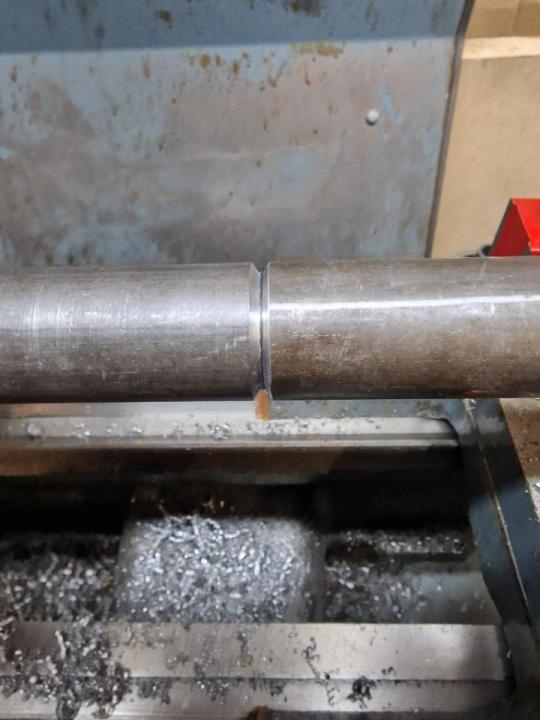
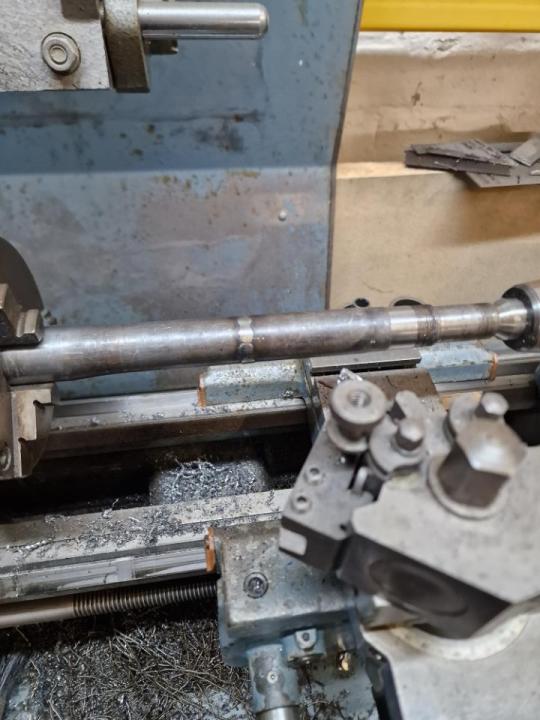
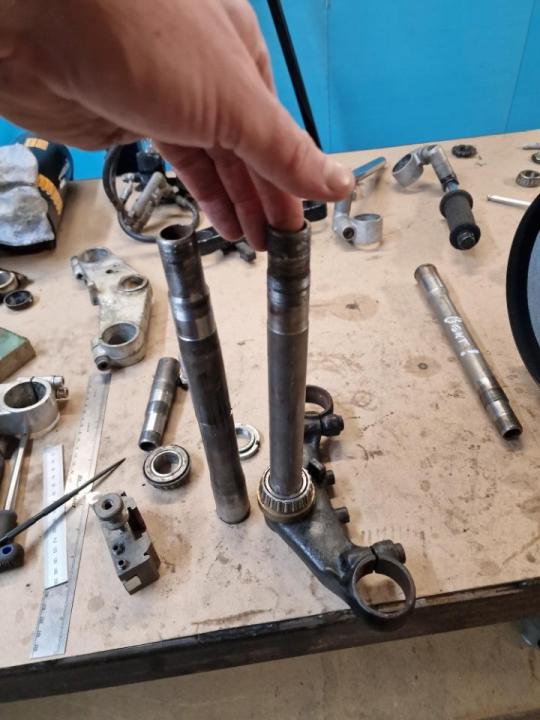
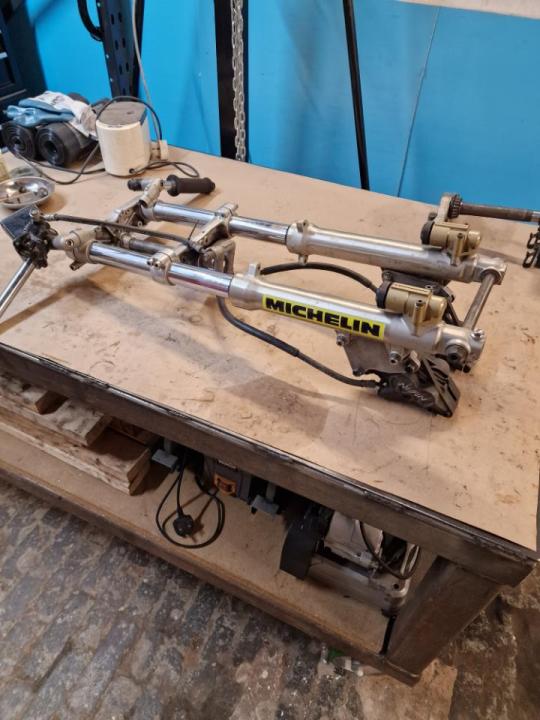
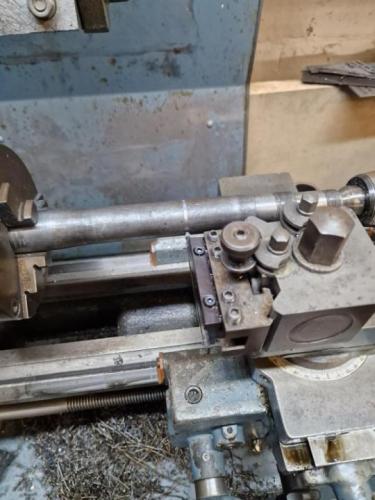
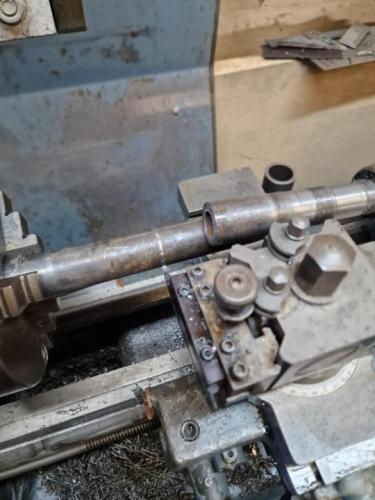
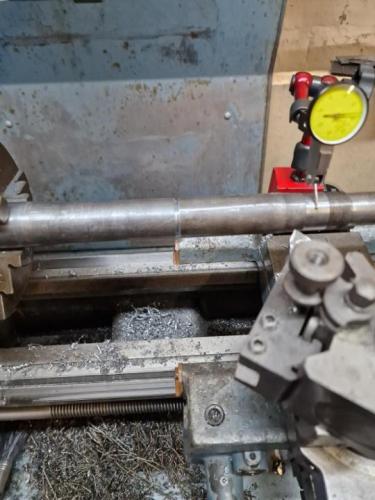
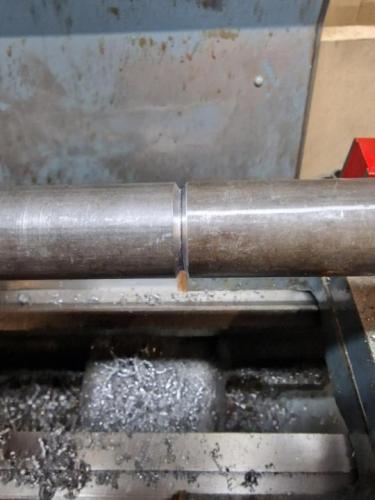
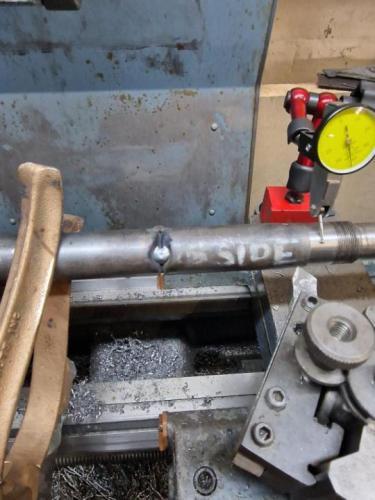
Finally got to move things on a bit today. Lots to do to get it rolling and all the various bearings, shafts, and spindles to play nicely together. I decided to start at the front so the first thing was to get the yokes to fit the frame. A quick measure up revealed that the slabby stem was 28 mm too short. A rummage through the yokes I had turned up nothing particularly useful. The plan then was to press out two Slabby stems and make a longer version with a bit of cut 'n' shut. The bolt in the top of the stem is there to prevent the end collapsing or distorting under the press. Stems out and the first is marked up and put on the lathe for parting off so that I have a nice accurate and square cut. With the stem base cut to length from that stem I could measure the top section from the next on and cut it so that it was 28mm longer plus the 3mm for the parting tool width. Now that I have two halves to make a whole of the correct length I turned down a slug to push into the stems and keep everything in line and used it to put the two halves together. Put it onto the lathe to double check the length, and to make sure it's holding straight. A bit of 'tap-tap' and the run out is 0.1 mm so I'll take that. Then cut a 'V' onto the two faces of the joint and four tacks with the MIG 90 degrees apart. Weld it up, knock the top of the weld flat while it's on the lathe, press it back into the yoke and that's the stem extended.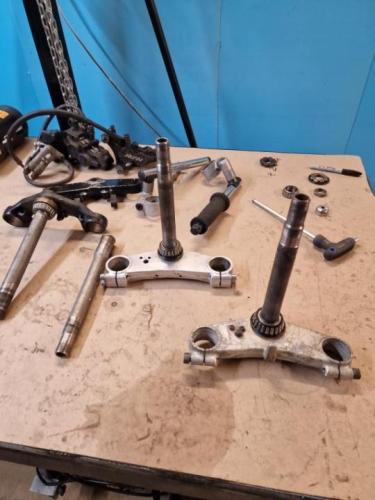


- 300 replies
-
- 10
-

-
GSx1100 Dresda Solitaire (I may have had a Clivecident).
imago replied to imago's topic in Trick Frames
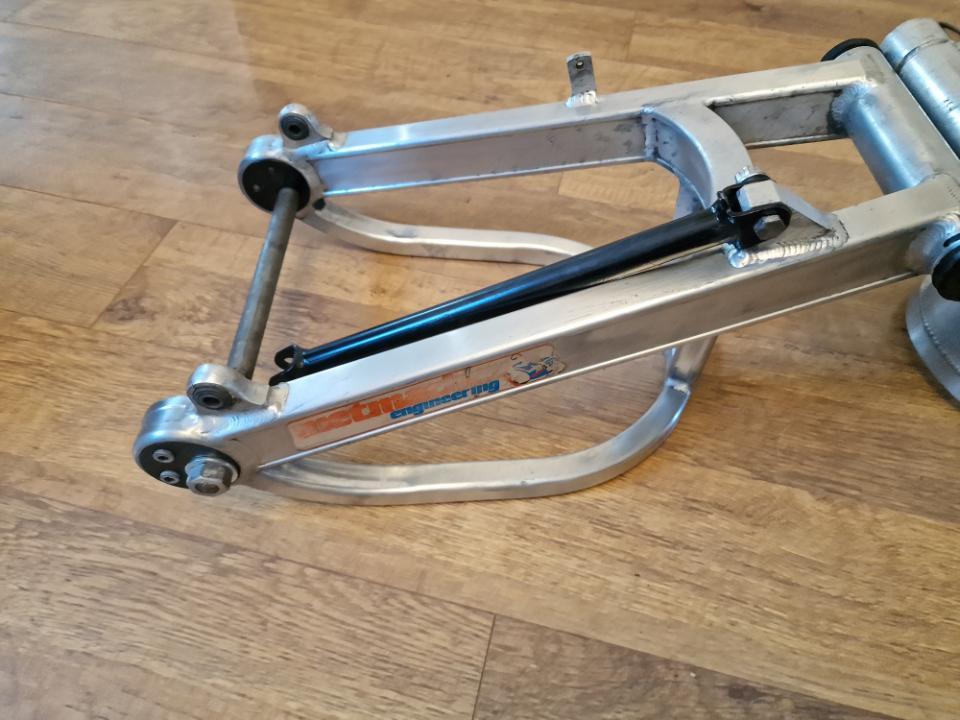
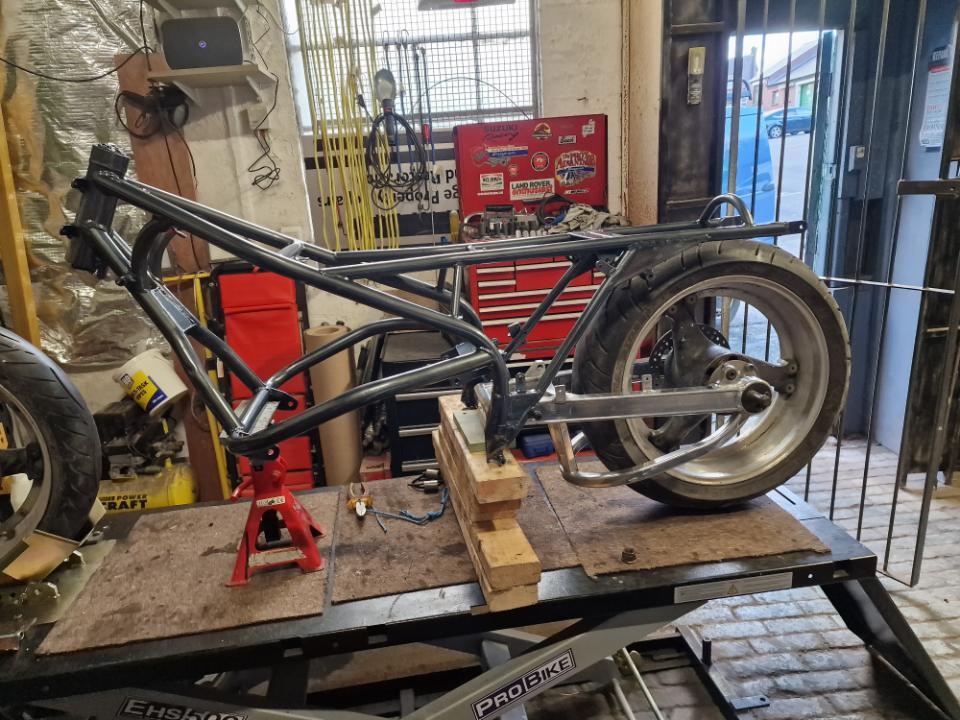
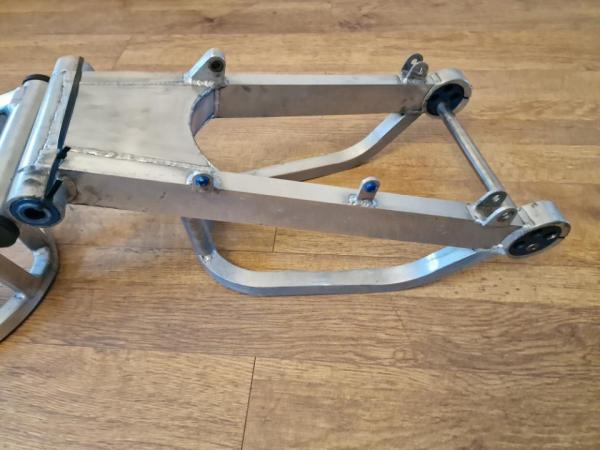
More by luck than judgement I ended up with one of the swing arms with the slimmer box sections. With the Saxon wheels from Tom (previously Paul's) it looks really well balanced. I reckon leaving the arm polished along with the rims and getting the wheel centres in the same powder coat as the frame it will look spot on. It'll be frustrating to strip the wheel and send them out now that it's all here, but well worth it once they're done. The only thing I'm missing now is a seat unit, and I've got to decide on a paint scheme for it. At the moment the favourite is something using shades of sliver/grey. -
GSx1100 Dresda Solitaire (I may have had a Clivecident).
imago replied to imago's topic in Trick Frames
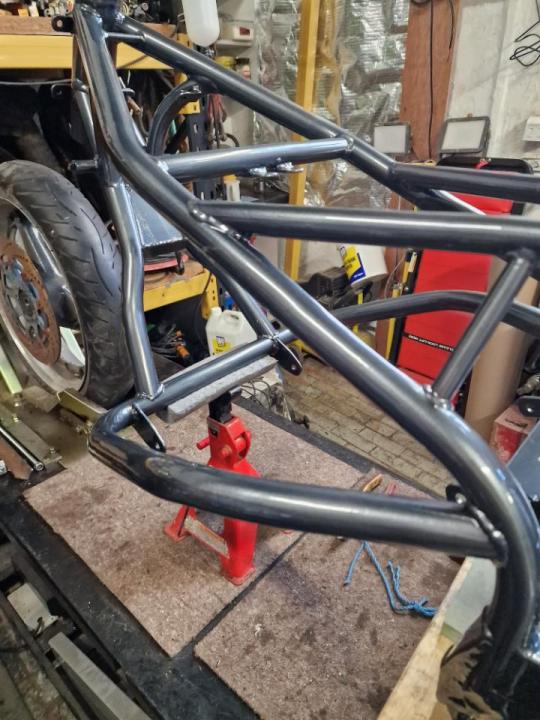
Following (another) bike part collection odyssey I now have the Saxon wheels from Tom, a decent JMC in lieu of the shagged Davida, and the frame is back from the powder coaters looking the bollocks in its metallic grey. I'll have a brief fit up tomorrow, and then the next thing will be to strip the wheels so that the rims can be polished up and get the centres/spokes of for powder coating in the same metallic grey as the frame.

-
GSx1100 Dresda Solitaire (I may have had a Clivecident).
imago replied to imago's topic in Trick Frames
Should be done tomorrow ready for Friday hopefully. It's a little longer than it would be ordinarily because it's in metallic grey rather than black so he can't do it with a batch of other stuff he's putting through. -
GSx1100 Dresda Solitaire (I may have had a Clivecident).
imago replied to imago's topic in Trick Frames
Absolutely, and that's the intention. Then I can get on with the rest of the build and just leave the arm to sort as and when I get the right one. -
GSx1100 Dresda Solitaire (I may have had a Clivecident).
imago replied to imago's topic in Trick Frames
The powder coater just rang to say that after blasting the arm he found a bodge repair. I'll take a look when I get it back but as it was only an 'until I find a JMC' arm I'm not going to waste much time on it. -
GSx1100 Dresda Solitaire (I may have had a Clivecident).
imago replied to imago's topic in Trick Frames
I find it's much easier to put warmer gear on when cold than it is to cool down when you're roasting. -
GSx1100 Dresda Solitaire (I may have had a Clivecident).
imago replied to imago's topic in Trick Frames
Not a huge up date in terms of work done, but a big step forward in terms of on the road. Had a letter through from the DVLA to say that they're issuing the V5 to me. That's good news partly because you never know with the DVLA, but mostly because the V5 will have a correct 'Q' plate, with the frame's VIN not an old Suzuki and also the make is listed as "Dresda Suzuki". So a legit and correct V5 in other words which is hugely helpful when the time comes to move it on. Other than that the frame should be back sometime next week so I can start to move things on. Still can't make my mind up about the colour for the tank and seat unit but taht'll come. -
With something like that the potential negatives outweigh the potential benefits. Value wise a bike like that is only worth parts value as that's what it may end up being, and that's only if you can be sure it wasn't nicked in Poland.
-
Personally, I'd suggest that you walk run away, the possibilities for bad outcomes are endless.
-
New aftermarket fork stanchions or originals rechromed...
imago replied to Zappa's topic in Oil Cooled
I replaced the stanchions on a set of B12 forks using the ones made in Italy, Athena I think? They were £325 for the stanchions, seals and oil. Quality seems very good no issues. -
GSx1100 Dresda Solitaire (I may have had a Clivecident).
imago replied to imago's topic in Trick Frames
It's hard to know which way to go with it in terms of a half fairing, full fairing or no fairing as it wasn't a planned build so I'm sort of making it up as I go along based on things/bits I like. The thinking behind no fairing to start with is that it will make it a quicker build initially, and if it looks odd without one it'll be easy enough to add one where as removing one would mean wasting money and time buying, fettling, fitting and painting only to shove it on a shelf. So I'll fit it up without and see how it looks then go from there. -
GSx1100 Dresda Solitaire (I may have had a Clivecident).
imago replied to imago's topic in Trick Frames
The clip ons are definitely staying, it's not as if I'll be going touring on it so it should be bearable for a bit of hooning. Really not sure about the fairing. At the moment bodywork wise I'm thinking a seat unit similar to that photo or the XR55, something 'blocky' to go with the tank. If it does have a fairing I'd go with a twin headlamp half fairing, Harris style. However I'm currently leaning towards no fairing at least partly because there's going to be too much nice stuff to cover it all with a fairing, and partly because I'm not sure it'd bring much to the party anyway. -
GSx1100 Dresda Solitaire (I may have had a Clivecident).
imago replied to imago's topic in Trick Frames
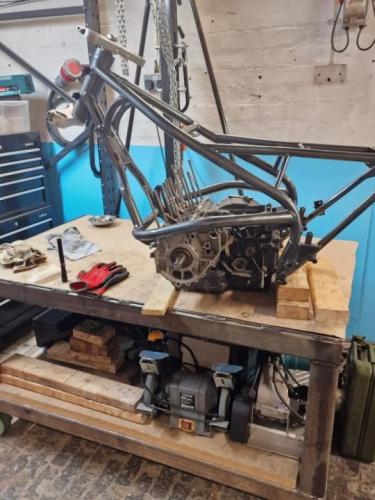
It's a very frustrating time here at the workshop. I picked up the rather splendid Slabby front end from @jb but the frame is away for coating so I can't do anything with it. I've yet to collect the wheels and the bodywork is still firmly in 'tba' territory.
-
Looks like Wiseco put a number on the top, you can see it in the pics here on SPS.
-
@davecaragave me the Denso part number X27ETR and I got them from the imaginatively named https://www.sparkplugs.co.uk/ and I believe Dave knows them. The trouble with NGK is quality control, I think they've given up on it. Consequently you get some that don't work straight out of the box, and others which last a few miles. I swapped from NGK on the 1100G and it was night and day difference in the running. It might be over fuelling, but I definitely change the plugs first and give it a run before you dig into anything else. Usually a mis-fire is fairly obvious, (a weak spark less so) in which case the next most likely culprit will be fuel. Choke valves sticking part way open, jetting, float heights etc. No idea on the pistons, not too well up on oil boiler aftermarket stuff.
-
At the risk of being Captain Obvious, the fuel's getting there but not getting burnt. So I'd suggest starting with the basics, and first on the list would be to take the NGK plugs and smash them to fucking dust with a great big hammer. That will make you feel better, and also get rid of the weakest link in the ignition system as they're utter junk. Then when you get Bosh or whatever replacements it's on to sorting out whether it's over fuelling or under sparking.
-
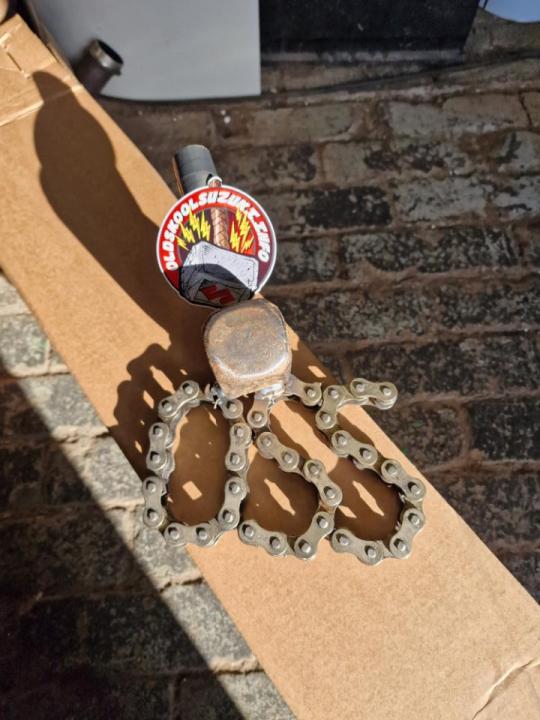
During a chat with @davecaraand @PaulmI mentioned that it was a shame that bike of the month had fallen into disuse and it'd be nice to have some sort of trophy for those who attend shows. Not necessarily for the "best bike" as this is OSS after all, however who gets it and for what isn't up to me, I just got to make one as I'd suggested it. Anyway, it will be awarded to the first recipient for something at Newark and this is it. I'll give it a clean up and affix a disc for the sticker before then.