


Jpich85
-
Posts
372 -
Joined
-
Last visited
Content Type
Profiles
Forums
Events
Posts posted by Jpich85
-
-
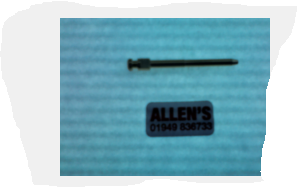
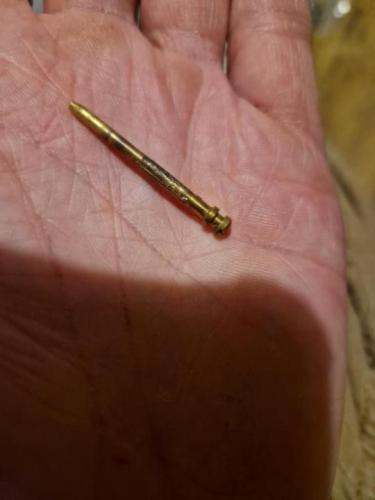
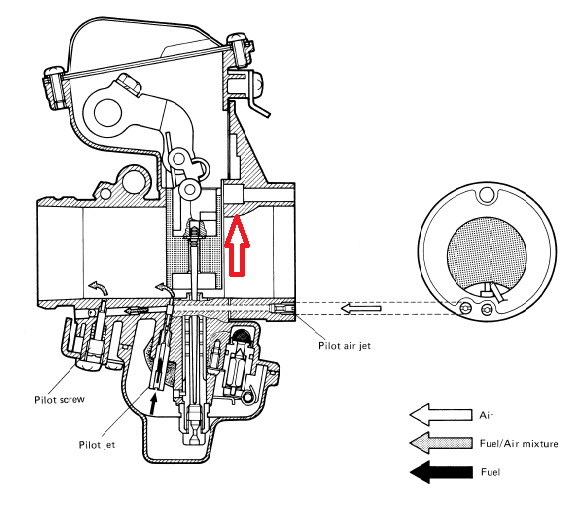
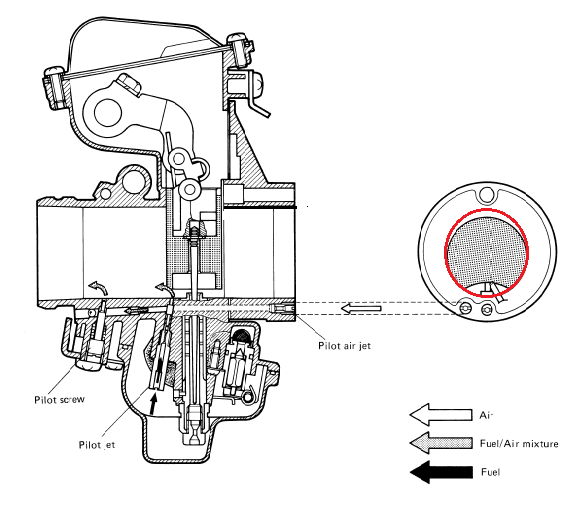
Does anyone know the part number or where I can buy a new accelerator pump nozzle for my vm29ss for my gsxr 750 1985? Some one had removed it with a pliers and crushed the small hole in it.
I've ordered two separate ones and both have been wrong but the guys assured me it was the correct one for my carbs.
I'm not sure if the jdm models had different nozzle but they don't even fit and look completely different.
The top picture is the one that I've been receiving but obviously it's completely different to my original at the bottom.
-
14 hours ago, Buzuki said:
Les or more everything you need to know is explained in three page on these 10 Year old topic : https://www.say what now!?.com/threads/how-to-convert-vm29s-to-tm33s.323315/
Great thanks mate that's perfect
-
 1
1
-
-
12 hours ago, clivegto said:
This is a set that has been done.
Nice Clive, did you bore the face plates out of them? Are you running pod filters too? I'm not sure whether to keep the air box or change to pods, I'll hopefully be getting a fancy yoshi pipe for it by the time the bike is ready, need to save up a bit for it first lol
-
16 hours ago, Buzuki said:
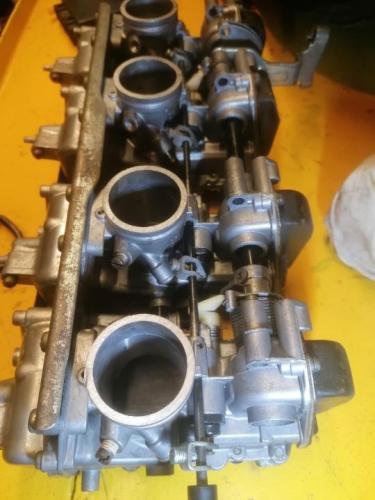
Basically it`s not to complicated to machine those VM29SS carbs (but have to be very very careful !!!) , since you only need to re-bore only upper side of the inlet plate to about 32 - 33mm diameter , outlet side is already 33mm wide if I remember correctly ,
after this operation you have to play with slightly bigger main jet , and yes IMHO those VM flatside carbs bore widening have sense only if you have full open 4-1 race exaust system ,
btw , that first GSXR750 generation was from the factory limited to 100HP peak power on the exaust system pipes inner diameter and carbs inlet diameter (29mm) .


Great thanks for the advice mate, I'll get them off and pop them in the lathe see how they spin, I didn't realise you'll only be cutting off the one edge but I'll have a better look at them tonight, would you know what new jets would be a good starting point to start with?
-
1
-
-
I'm in the middle of restoring my carbs for my gsxr 750 1985 and have seen a lot online about boring them out to 33mm, I just wanted to ask does it improve the bike much and worth doing?
I thought I might as well do it while they are a part if it's a good improvement to the bike.
I could machine them at work if it's worth it.
-
1
-
-
4 hours ago, wraith said:
No you don't need to replace the piston rings when removed the barrels, and with the compression you say it has of 150 across all 4 cylinders that's not bad
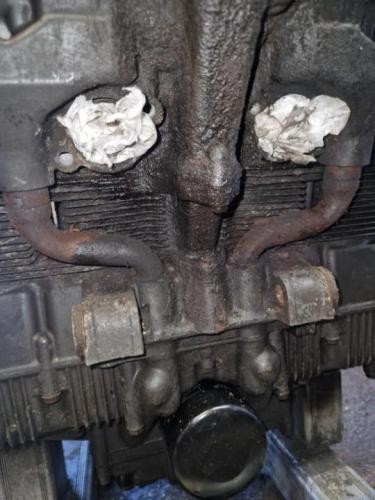
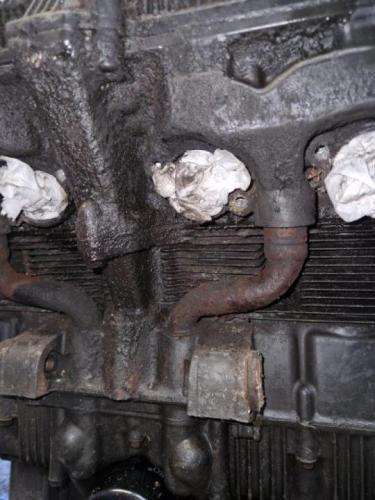
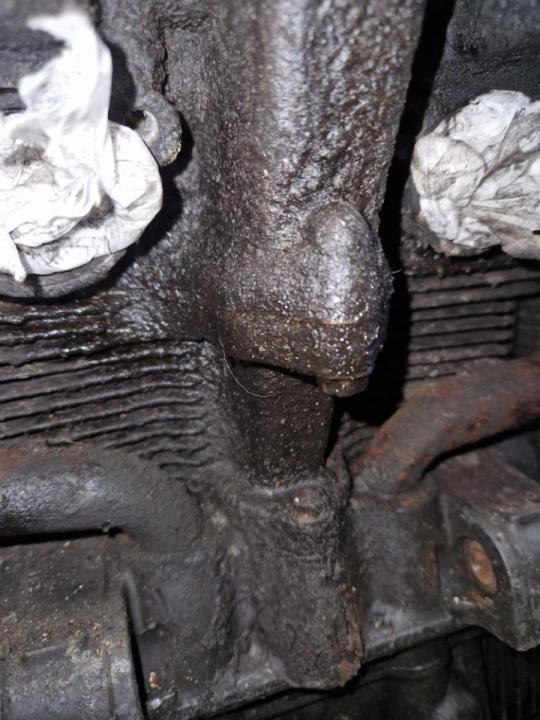
Yes them front drain tubes do look a bit bad but when/if you take the head off, you will need to remove them to replace the rubber oil rings on them.
On air cooled motor you always replaced the base gasket if you replace the head gasket or removed the head, not 100% on the oil cooled motors as they use a different type of gasket and the head and base gaskets can be resprayed and reused but until someone with more know says yes or no, I'd replace or respray and refit.
Thanks mate you boys gage helped me come up with a plan of action just hope no gremlins pop up afterwards lol
-
Thanks everyone, I've decided it's probably best to give this a top end rebuild as it does look like it's had a lot of use and maybe not the best looked after, I don't think I'd be comfortable going any deeper like splitting the cases and checking over the crank and gearing, although I'd like to I just don't think I'd be able to do it,
I'll get a gasket set and some new down tubes and fit them and I'll follow tyour tip @Swiss Toni
after looking at the price of piston rings I'm not sure if it's worth the money just to replace them for the heck of it.
I've seen some people hone the barrels? Is that something I should do before refitting the pistons or is that for fitting new piston rings?
I'll relap the valves and check them over too and the cams.
-
Thanks everyone I'll give that another look then,
If I was to change the head gasket and I kind of won't to change those oil tubes as they are really rusty,
Would I need to change the base gasket also?
Would I need to replace the piston rings too if I remove the barrels to do the base gasket or can you still re use the piston rings once you remove the piston from the barrels?
It's a restoration job on this bike so want the engine to be up together.

-
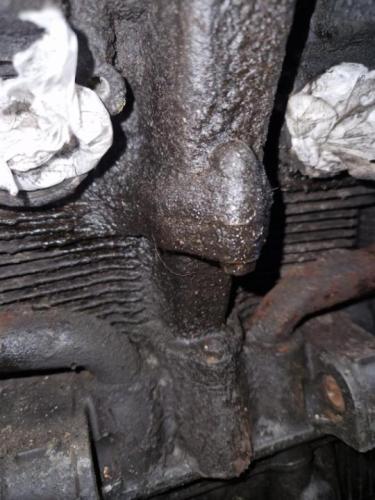
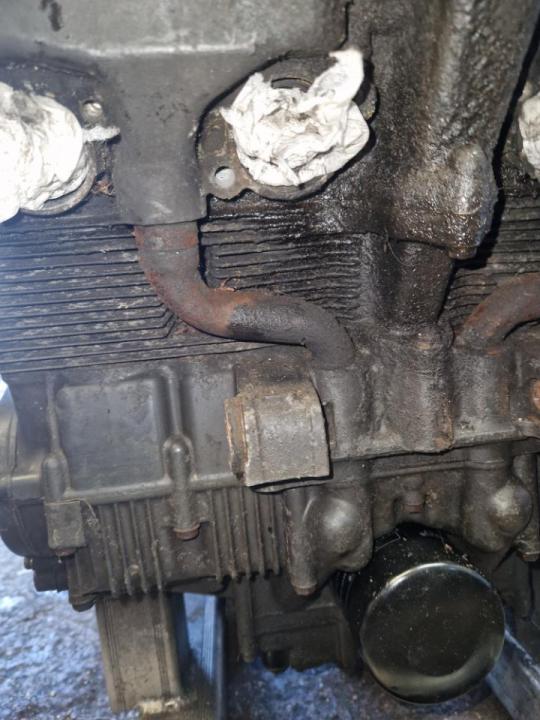
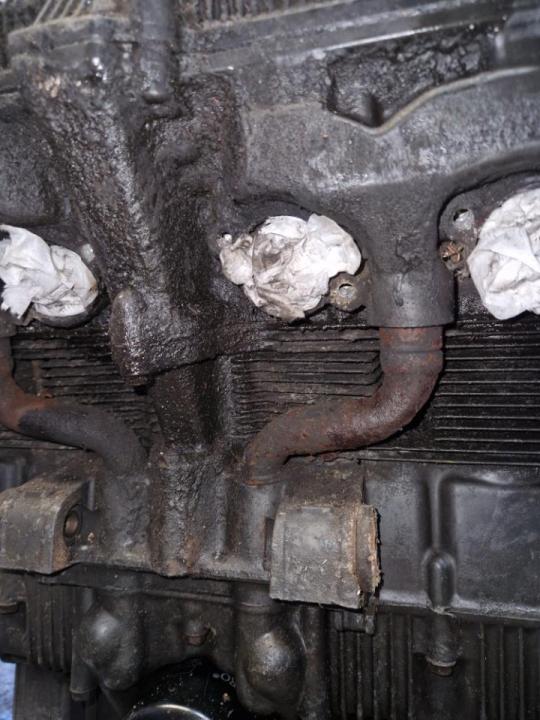
I pulled the engine out from the back of the garage after its been there for over a year, I thought I'd run a compression test on it to see if it was OK just to paint and fit back in the bike.
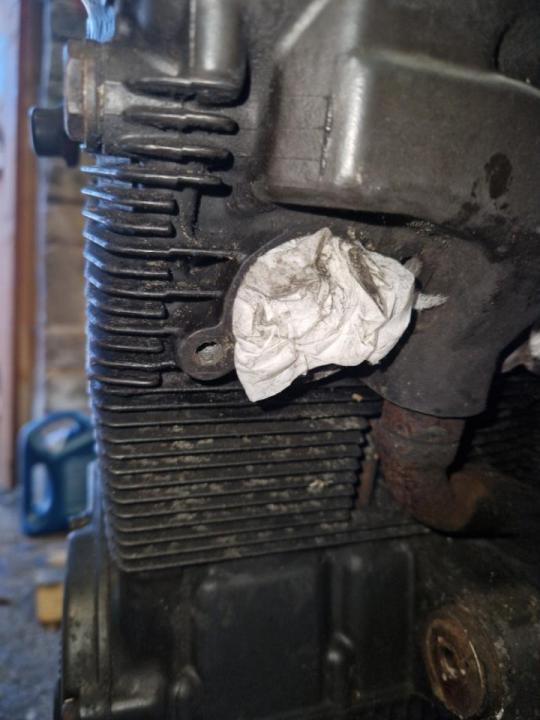
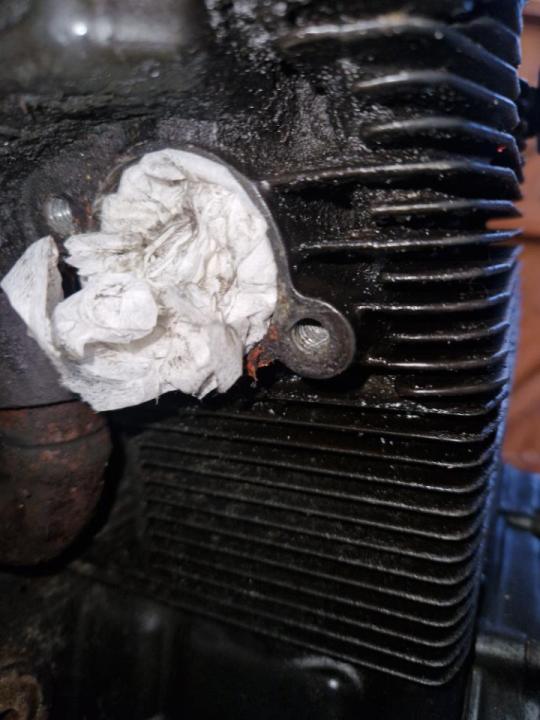
I bench tested it and was getting 150 across the 4 cylinders but afterwards I noticed it was wet with oil along the head gasket line.
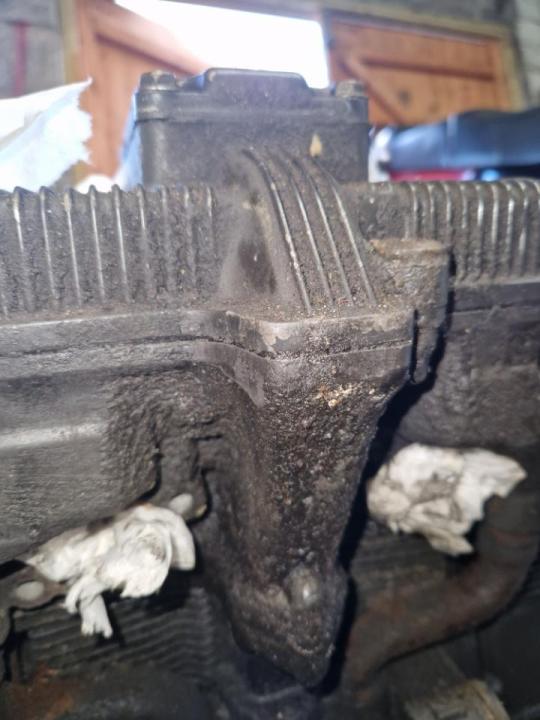
I know this engine looks in a dirty state anyway but it definitely wasn't wet with oil when I started the test and it's been drained of oil for a year.
I won't to fix whatever issues it's got and I'm thinking it'll need the head off and new gaskets and a look to see what's what on the pistons.
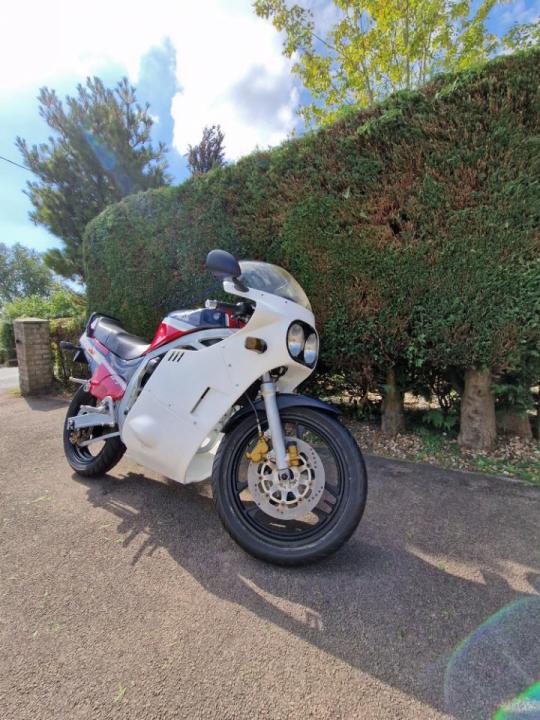
It's from a 1985 slabside 750 with unknown milage.
If I do take the head of is it worth doing the piston rings while I'm there but obviously that'll be more money.
I'm not sure what's best to do this will be my first big engine work I've done.
Someone people told my it's the camcover gasket but it's not wet with oil there so I don't think it's that.


-
2 hours ago, bluedog59 said:
If you can get it to seal with a bolt and copper washer you can still bleed it, you'll just have to do it via the m/cylinder. It may help if you do it on the bench or at least, with the calipers unbolted.
Thanks mate, I have a few things a can give a try now then, I thought rebuilding the brakes and bleeding them would be a fairly simple job but it's turning out to be one of those jobs that's a right pain lol
-
Thanks for the imput everyone, I have a few things to try, not ideal but I think it's worth a try before I look at other calipers, I thought maybe I could use a m7x1 bolt and a crush washer to just blank off the nipple and bleed via a banjo bleed valve but I'm not sure if that would work as I won't be able to reverse bleed it completely.
-
3 hours ago, Swiss Toni said:
You can only tap a ball bearing on a seat if that seat’s meant to seal with that particular ball bearing. I think if you tried it with a bleed nipple seating, you’d round the seat out, make it worse! As for trying to grind the seat with valve paste … yes, it would work, if the hole wasn’t threaded! As it is, the nipple would bottom out, and you’d have to over tighten to get a face to face grind. Stick with the tape!
As for the half to half seal, try a sheet of 400 wet & dry on a mirror. Don’t go mad. Give it a rub and see where the high spots are.
And, tighten the bolts evenly to spec. on re-assembly!Inside to out!
Thanks Tony, I was thinking about turning the valve down so it turns in the threaded hole and hopefully use the grinding paste.
-
2 hours ago, bluedog59 said:
Are the bleed nipples leaking up the thread or out the hole at the top ?
I would have thought tape would only stop a leak via the thread ( which then raises the question of how if it's not coming out the bleed hole as well ? ).
Tape may seal it but do you want to trust it when you're hard on the brakes ? It's your life at risk at the very least.
They are leaking out the hole in the top on two of them bluedog, I'm not sure how to fix it, I've seen some nipple repair things you can get for them or even fill them in and maybe bleed from a banjo bolt bleed bolt, I was thinking that grinding paste method but if turn the threads off so it would screw it the hole and fix the bleed valve to a piece of stainless bar and put it in the drill and spin it up a few times to try and create the seal back. It's not ideal but maybe worth a try, those slabside calipers aren't the best.
-
2 hours ago, Dezza said:
I would be trying to answer the question: why are the bleed nipples and caliper seal leaking? Faffing about with PTFE tape, if successful, masks the underlying problem. When you had the caliper halves powder coated, did someone go beserk with abrasive blasting media and fuck up the surfaces where the seals go and the threads for the bleed nipples?
Yes I was thinking that too dezza, something must be up for them so to be like it, I had a different bloke do them this time so maybe he did go a bit crazy with the blasting.
-
16 hours ago, coombehouse said:
PTFE tape on the threads of the bleeders has worked for me in the past although they really should seal on the taper on the bottom body.
For the caliper halves, the o rings are normally a square section seal. Are you using these or a generic normal o ring.
Thanks mate, i read somewhere that you can use a valve and some grinding paste and sort it mature a new seat, also if you hit a ball bearing in the seat it can create a better seal, do you think there's any true in those?
If tried various o rings and the oem ones but they still leak, I think the surfaces are slightly pitted so it's not dressing sealing fully, I thought about trying to smooth it down slightly to create a flatter surface but not sure if that'll work.
-
I've been trying to sort my slabside brakes out, I got them so powder coated with new pistons and seals, I bled them up and thought that was job done but the bleed valves keep leaking and also one of the o rings that join the calipers together keeps leaking too,
I've tried a few different sizes o rings but I can't get it to seal properly, has anyone had this and managed to solve it? The surface on the inside of the calipers isn't great as they are so old but I was hoping it would seal.
Does anyone know how to fix my leaking bleed valves too? I've tried OEM bleeders but they seemed worse?
I'd like to keep them if I can repair them if possible as I've spent a bit of money on them already.
Thanks
-
Luckily I managed to solve the issue now, it was something as simple as a bad earth to the engine block lol, I should of know but after some help from you guys and a little thinking I thought that was probably the issue as after I'd painted everything and powder coated everything something must not of been as it should, I've ran a new temporary earth to engine block and it worked as normal again, just need to think where to permanently put one and still look clean.
Thanks everyone for there help and advice.
-
4
-
-
Thanks @Dezzaand @Devilmanand everyone else, I appreciate your advice, you've given me some good points and I'll give them a decent look over on the weekend and Wednesday hopefully.
Unfortunately no i didn't use the special tool, I know I should of but thought I could get away without it but maybe I was wrong thinking that lol.
Don't think it's related but when all this happened the temperature on my acewell speedo started reading max, the engine was stone cold but the speedo keeps reading maximum even now.
It's probably a separate issue I'll need to sort but thought it was weird how they both happened together.
-
1
-
-
1 hour ago, Gixer1460 said:
Whilst you state you've added components and done some re- rewiring, both of which need some level of electrical understanding, your questions regarding what voltages to look for and what happens when bridging the starter soli, seem to indicate little knowledge? Its concerning me as a badly made wiring harness / poorly earthed component might not fail immediately / fail tomorrow / next week or year but it will cause problems, often with unrelated components or in worse cases melt the loom! Electrical problems being diagnosed over the internet are a guesswork nitemare - good luck, and btw, most of the suggestions are basic principles that shouldn't need suggesting! Flame me if you want but its why I tend to shy away from electrical queries!
Thanks @Gixer1460I know my questions may seem stupid but I just like to clarify what I think it might be with you guys who obviously have a lot more knowledge than I do, regarding the voltage i wasn't sure if you should expect bang on what the battery is reading or maybe a little less or a lot less.
Unfortunately I don't have a lot of knowledge on electrical side of things.
The fact that when I bridge the relay though that nothing happens seems really strange I think that may help me pin point it if I can find it why that's happening
-
1
-
-
1 hour ago, Dezza said:
When you checked and confirmed the starter motor was OK, did you use the same battery and earth connection? You may have a dud battery / dodgy main earth, i.e. battery negative to earth, which in its present state may be OK for light loads but not be able to handle the biggest load of all, when cranking the starter.
Hi @Dezzano I didn't I just put the negative to the engine and ran a wire to the terminal on the starter and it worked OK, I see what you mean though it seems to make more sense to use the earth from the wiring harness to see if that works, if not then I guess it could suggest a bad earth.
I think the fact that when I bridge the terminals on the starter relay nothing happens may help pin point what it is but I'm still trying to figure that out lol
-
1
-
-
1 hour ago, Wee Man said:
What size of wire did you use for battery to relay and relay to starter?
@Wee ManI'm not 100% but I picked the closest size to the original cables that the factory used, I'll double check though. Its been ok though for a few weeks now suddenly its playing up.
-
1
-
-
1 hour ago, clivegto said:
This happened to me last week on my Harris. After checking the battery and swapping the starter relay it turned out to be that the 2 starter motor bolts had come loose just enough to stop it earthing properly. Hope yours is an easy fix.
Thanks @clivegtoI hope so too, I didn't think of that, I'll check that too.
Is there a way of checking if you have a good earth or not? Maybe with a multimeter? It did start when I jumped it straight to the starter motor.
-
35 minutes ago, fab said:
do you have a clutch switch? if so check it or bypass it.
Thanks @fabit's a gsxr 750 1990, I don't think it has a clutch switch but I'll double check.
-
1 hour ago, Devilman said:
Obviously first port of call is to check the battery voltage, both unloaded (nothing switched on) and loaded (say, all headlights on, holding down the "pass" button too so you have dip & main beam on at the same time for bigger power draw).
Once you know the battery is good, Check the connections at the battery, starter relay and starter end, they may be all corroded and require cleaning for a nice, clean connection with minimal resistance / voltage drop")
If you still got problems after this, come back to us and we can see what else might be causing issues
Thanks at @DevilmanI'll give all of that a try, most of my connections are new as I made custom ones to fit my battery placement, I've been running it ok for the past few weeks, if it's not cranking when i bridge the starter terminals but I'm getting voltage to the relay, what could they mean? What voltage am I looking for? 12+ volts?
Thanks
-
1
-


Vm29ss accelerator pump nozzle
in Oil Cooled
Posted
Thanks Toni I'll give them another try. It's weird i can't find anything online that's like the one I need