

Upshotknothole
-
Posts
920 -
Joined
-
Last visited
Content Type
Profiles
Forums
Events
Posts posted by Upshotknothole
-
-
2 hours ago, BillyR said:
id be tempted to use some R6 wheels, so light theres a noticeable improvement in chuck-a-bility.
I want to keep it semi period correct looking and the W wheels make it easy to keep using the stock speedo drive. My 7/11 has all K series 1K wheels and suspension and benefits greatly, but this one I don't really want to use anything newer than W parts. This is my one and only roughly period correct bike.
-
 1
1
-
-
10 minutes ago, Joseph said:
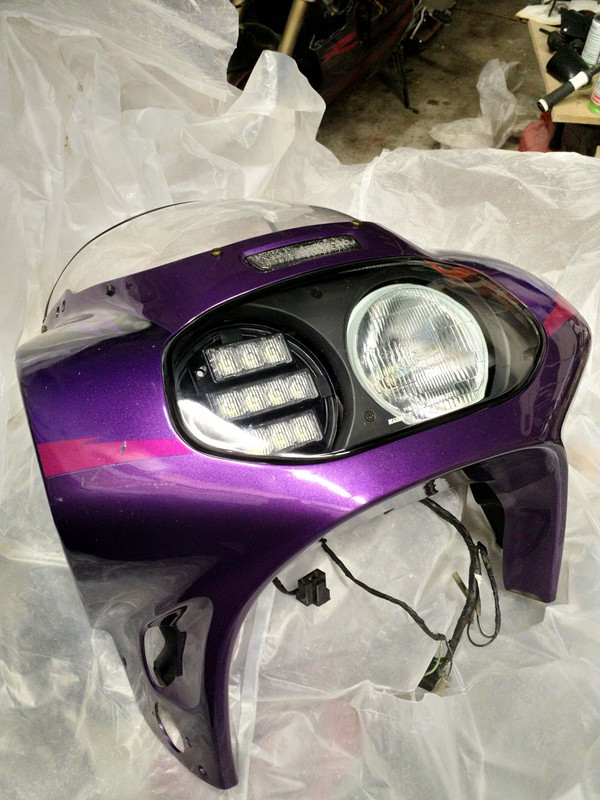
To fit those hi power led strips I designed a plate that was laser cut, tabs welded, then fit to the headlamp bowl, both were powedercoated black and then reassembled the whole package
Cool, I'll look and see what I can figure out with my W unit. I'm guessing the weight savings in the headlight was noticeable with it off the bike once the glass was removed.
-
15 minutes ago, Joseph said:
Spatulas for plasterwork are a good tool for the job (a couple of narrow 1-½ inch wide blades) it's a difficult job to do even once heated up, that glue wasn't designed to leave its place
Propane heater should be good. A heat gun won't allow heating of the whole thing, and you really want to get it all up to temp evenly all round (the heat gun is also too hot for the needs of the job)
I put the oven on at 210-220°C to do mine
Just noticed you have the american 92 bike, the link i posted is for the WC '92
They're similar enough that the job will be the same and I found the 91 M headlight cover on that site. Thanks for all the tips, was it pretty easy to change out that glass lens for the LEDs once the main glass is off? I wouldn't mind swapping in something a bit more modern. I'll post up when I start attempting to do it.
-
3 minutes ago, Joseph said:
Yeah i did the oven door deal
You can just buy a headlight protector cover fixed on with little tabs
https://www.slipscreens.co.uk/product/suzuki-gsxr750-wn-wp-gsxr1100-wn-wr-headlight-protector/
Thanks. Any suggestions for getting the glass off? Like I said, I've got a donor W unit that I don't mind sacrificing before trying anything on my good one. Do you think propping it up in front of a propane heater in the garage would work? I'd imagine a heat gun won't be able to get enough heat into all of it to get it off. Do you have any photos of yours after you did it?
I'll go ahead and order up one of those covers before I start.
-
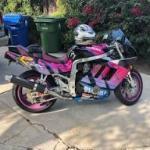
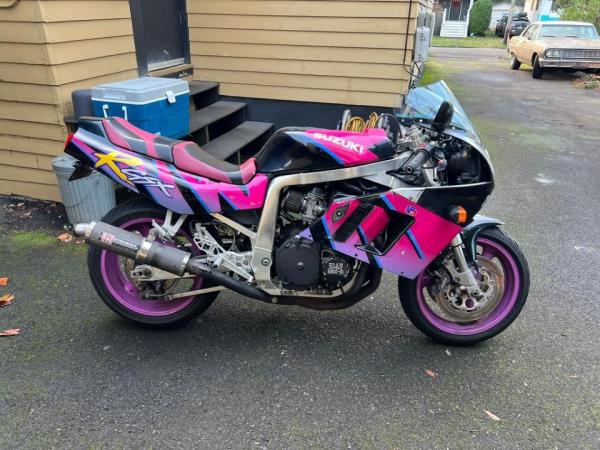
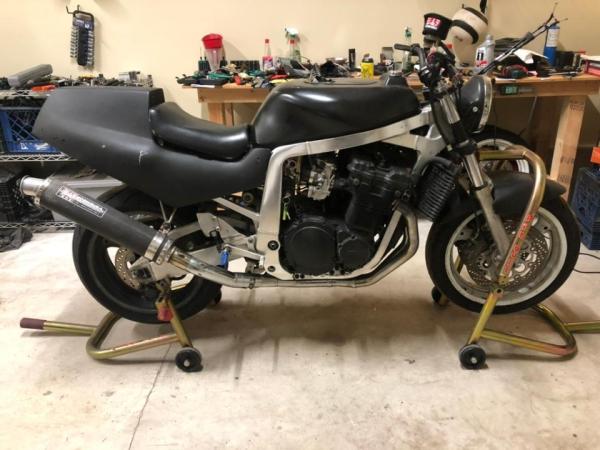
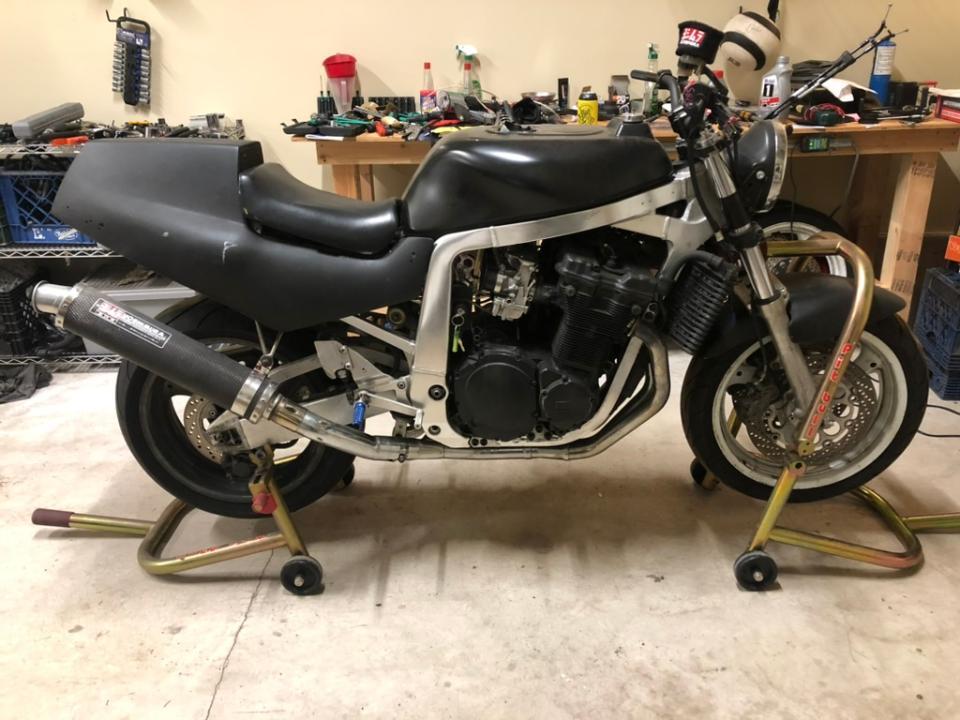
So I've got a US 92 GSXR 750 in the best and fastest paint scheme Suzuki ever made. I need to swap the emulsion tubes and give it a tune up, but I want to make it a little bit more exciting again. Basically I want it to be more like the short stroke 88 750 I had in my youth with RS36s that was all top end power.
It's currently snowing where I live, I'm bored and there are a few things I've been wondering about doing for a while now to this bike. First off, I want to keep it 750 based, I've already got a 7/11 and an 11/12. I want to keep one bike that revs fast and has a peaky top end.
955 big bore kits. I know there are a few people on here that have done them. Do they still keep a similar power band? Do they suffer from using stock cams? I've given up on ever finding hotter cams for this engine.
Carbs, eventually it'll get flat slides, but I've been holding off for now in case I do bore it out to 955. I've got a spare set of RS38s in my garage, but I don't want to completely kill the bottom end. So I'll stick with the stock 38 CVs until I figure out what I'm doing with it.
Crank, recently saw a lightened and balanced crank on APE's web site which got me thinking more about the big bore kit. Guessing lightening the crank will help with keeping the engine peaky with the larger pistons.
Head, should probably at least have a port and polish. Oversized valves as well or can I try and keep the costs down slightly?
Suspension wise I need to swap the front end, probably for a 750W. I've also got straight spoke W wheels and a braced swing arm waiting to go on it. Just need to get the wheels powder coated to match the paint.
Fairings have been the biggest pain in an ass. Who knew that a single year, single country model paint scheme would be so hard to find. The black plastics aren't that hard to find, but the sticker kit just doesn't exist anywhere. Thinking about getting a full set of aftermarket from Fiberman in Ireland. I've already got Airtech fairings on another bike and I'd like something a little nicer. Then get them painted in a similar pattern to stock, still heavy on the 90s vibe.
That stupid hunk of glass over the headlights. The M/N 750s were fat pigs, and the headlight glass definitely contributes to it. I've heard if you sit it on the oven door and let the glass get really hot for awhile, it'll soften up the glue enough to pry it off. I've got a 750W headlight with a bunch of broken tabs that I don't mind sacrificing as a first attempt. Has anyone done this? Any pointers? Then I figure some clear acrylic cut to shape over the headlight opening in the fairings will be good enough.
I probably won't get to this thing until next winter, have 3 other bikes in pieces taking up all the spare room in my garage currently that I need to deal with. And when it comes time to do the engine work, I've got a spare 1127 that I'll throw into it with the stock CV 38s just to see how it feels as a 7/11. Thanks for reading all of my ramblings. Before it really gets nice here again I do plan on doing a tune up, replacing the emulsion tubes as they've been shot for the past couple of years and doing the valves. Hoping that will pep it back up a little.
-
2 minutes ago, clivegto said:
Won't using shallow carb tops not allow the slides to reach the top on full throttle on a carb thats designed with deeper carb tops ?
That's always been my take on the carb tops. Seems like the volume and the height would be designed to work with specific diaphragms and slides.
-
1
-
-
Those GSXR/teapot intake boots are also one of the ones that Suzuki decided to discontinue, and are in the highest demand because they're the only ones that fit Mikuni RS carbs without serious alterations.
-
1
-
-
Buy a case of those plugs so you'll have spares in the future.
-
Get it fitted yet?
-
1
-
-
Sometimes really all they need is to be ridden and all the cobwebs blown out.
-
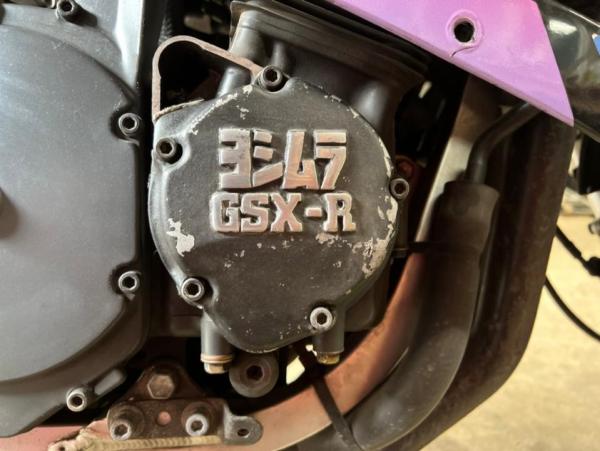
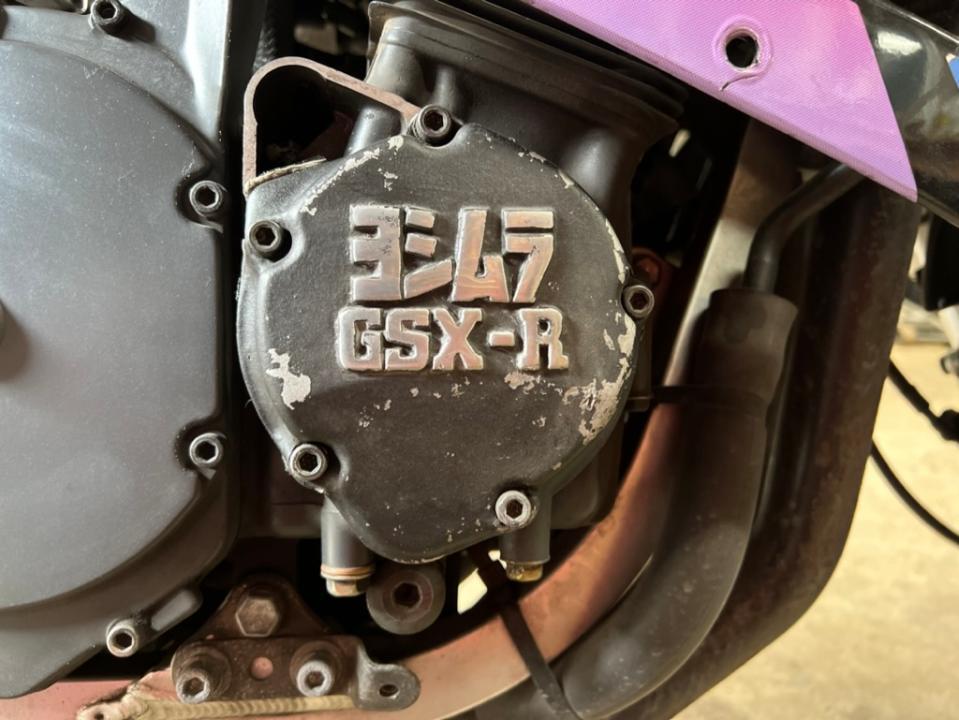
The Yosh ignition covers also remove the oil pressure sender from there.
-
A good quality 520 or 530 chain is fine for these engines. Chains have gotten a lot stronger in the decades since these bikes were new and called for heavy duty chains.
-
2
-
-
23 minutes ago, Dezza said:
If the carbs are indeed the bst 38s from a 1990 750 (L) and you have the appropriate rubbers, they should go on the engine. A 1987 750 is a slabby, and the bst 38s are a physically large carb but I do not know if this engine, frame, carb combo will work as a bolt on. Something may be fouling preventing the carbs from going on.
Do you have the original carbs and rubbers? You can then check to ensure that the new carbs have the same spacing as the old ones (if not carbs are from a W with different spacing) and/or the rubbers result in an incorrect spacing when mounted on the engine (rubbers from a W???).
Basically, check that you haven't ended up with the bST38s from a 750W. Many breakers fail to describe these carbs properly (I wonder why...) resulting in people ending up with a nice set of big CV carbs that won't fit their oilcooled engine.
Also, check that the rubbers are mounted correctly: 1-4, left to right sitting on the bike.
If the intakes are right, it should all work. But, like you said, the BST38s are big carbs, second largest that you could get in an oil cooled engine. The thing that has me wondering is they said they got new intake boots, and Suzuki discontinued them a while ago. Guessing they maybe got some of the Chinese intakes that are all over Eblag and don't include the right parts.
Just had a look on Eblag and they're listing the knockoff GSXR intakes for 89-90 750s now, which doesn't make any sense to me at all. Different engines and different carbs between 89 and 90. BST38s aren't even close to fitting 88-89 intakes either.
-
1
-
-
Carefully remove the cap off of one of the carbs. There's a small o-ring under it that you don't want to lose, and a large rubber diaphragm that you need to be careful with as well. Lift the diaphragm up from the carb body and the slide will come up with it. Hanging out the bottom of the slide is the needle. Once it's out of the carb, you can carefully pull the needle out of the slide. Make a note of where all of the spacers are on it. Small adjustments go a long way with the needle height. Usually if the needle is worn, there will be obvious scrape marks or wear signs.
Emulsion tubes are a lot more work to get to, and the wear on them is a lot less obvious. For now, if the needles have multiple slots for the clip to go, you'll want to move the clip up to the next higher notch, lowering the needle slightly when you insert it back into the carb. If the needles don't have multiple slots, this won't work and you can reassemble the first carb that you opened up.
If you're able to lower all of the needles one notch, take it for a test ride and any bogging you had in the mid range that was due to worn emulsion tubes, should be slightly better now.
-
1
-
-
Lowering the needles a notch or two is a quick and easy way to test if the emulsion tubes are worn without the hassle of removing the carbs. You can also check the needles at the same time to make sure they're not worn. Stock carbs or do they have a jet kit?
-
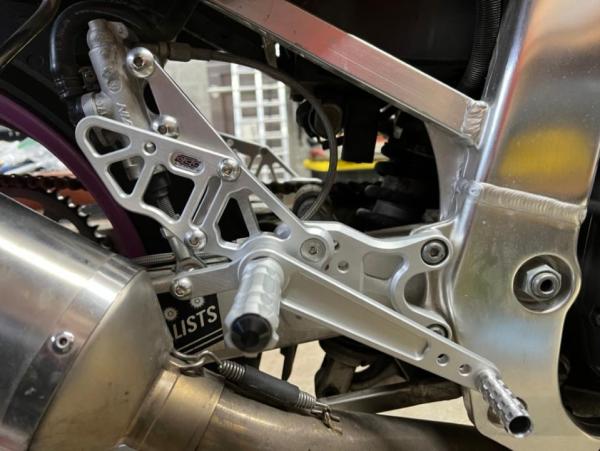
I have the ACC rear sets on a slingshot as well, and really like them.
-
2
-
-
You should be able to keep the stock rear fender when it's all done.
Start by removing everything off the tail, especially those black luggage/tie down bars. The tail should slide on from the rear, and then start figuring out what needs to be cut away. Once you start removing some material and keep repeatedly taking it on and off, it will loosen up a bit.
I've had this tail for maybe 20 years? Been on a few different bikes, and I've always been able to run the stock under tray, the full fender would fit if I still had it. It uses three bolts and the seat to keep it in place, and the tail light helps keep it straight in the back.
-
All of the Airtech stuff is like that. They're designed for race bikes mainly, and they expect you to trim them to fit your setup. I've had one of their solo tails on a slingshot for ages and it's all hacked up and custom mounts to get it to roughly line up right.
I'd start by removing everything off the sides of the sub frame, get the tail mounted in place, and then figure out how much you need to trim off the bottom of the tail to get it to fit around the stuff that you can't move. It's a bitch to work on the bike with the tail in place, but it's only 3 bolts for me to remove mine. They also get a little bit more flexible with age and pulling it on and off a lot.
-
On 1/21/2024 at 9:10 AM, Diego_1100R said:
HI,
I read the whole thread; glad you solved it.
Now I just wanted to know: did you also lower the level in the bowls to 1.5mm above the closing surface or did you keep it at 5mm?Thanks
They haven't been around here in almost 2 years, doubt you'll get an answer from them.
-
Here's the ACC rearsets if that helps at all. Uses a rose joint screwed directly onto the MC shaft.
-
1
-
-
Can't say I've ever seen those on a slingshot here in the states. Standard frame otherwise?
-
8 hours ago, Dezza said:
A remote earth lead direct from the starter to the frame may help because it will bypass any dodgy connection between the frame and engine cases. This worked wonders on my Harris
") .
.
Grounding it off of one of the rear bolts that hold it in place?
-
Here's the part number for it. 31100-19C03
Suzuki used them in the slabbie 750s, 1100s, GSX600Fs and probably a few other bikes that we didn't get here in the states. There are a lot of cheap chinese versions of these starters online as well.
I'm guessing the 750F starters will probably work too, and they used those in a ton of bikes. Pretty sure the only difference in any of the starters was the number of teeth, as long as that matches up it'll work.
-
Check the leads from the battery to the relay and the relay to the starter? That starter may be 37 years old, but so is the wiring that's powering it. Oxidation on the starter button or the clutch switch if you still have it hooked up can also cause problems. I've had to clean a few starter and clutch switches that were causing intermittent starting issues.
Looks like the slabby 1100s used the same starter as the gsxf 600s. Not sure what year your bike is but check the part number and there should be a newer bike that you can find a starter more easily from.


Frank
in Oil Cooled
Posted
Welcome, start with a new battery, check the connections and go from there. Neutral light stops working before other stuff when the battery is pretty dead.