Spelli
-
Posts
56 -
Joined
-
Last visited
Content Type
Profiles
Forums
Events
Everything posted by Spelli
-
Part is ordered. carriage is a bit steep at €20.00 but it is a lot better that trying to cobble something together from Mis matched parts. let’s just hope it is the right one when it comes !!! Thanks again for the help Mike.
-
I have checked the part number listed on the cms web site and that part number from goparts looks correct. that is absolutely fantastic success. What a ⭐️ Thanks Mike.
-
Thanks Mike, really appreciate your help with this. the listing only quotes the part number. Is this the right part number? how can you check if it is correct ?
-
Thanks for the input. I will give the seller a call in the hope he can measure it for me. I can only hope.
-
https://www.Eblag.co.uk/itm/163469974337?epid=848026946&hash=item260f91db41:g:I-AAAOSw9uxeci8M just seen this on Eblag. Supposed to be for Gs 250/400. looks very much like it. Anyone tried to fit one. ?
-
I am struggling to find a master cylinder repair kit for my 1980 gsx1100et. I have replaced all seals ect in both front and rear callipers and also the rear master cylinder but I can not seem to find a suitable kit for the front master cylinder. looks like the original is no longer available. Tourmax do one for the rear but not the front. all places I have tried so far have come to a dead end. Any advice about where I can find one? Is there an alternative kit that in which the seals would fit ?
-
So I have decided to go down the Molasses route. Having taken a look at my trial using brick acid, while it has certainly removed the rust but I did not like the look at what it had done to the rusty bolt. don’t fancy doing that to my tank. I am not in any rush. So it is the long slow method for me. I will update in 3 weeks or so. Most of the rust has been removed already so it might not take quite as long. It will give me some time to sort the brakes out next.
-
Thanks Dezza, & Swiss Toni it seems like there are a lot of different ways to achieve the same thing. I have always fancy’s giving Molasses a try but have heard conflicting opinions on its effectiveness. But at least it is not going to be as potentially harmful to the paint. If it is good enough for Allen Millyard then it is good enough for me I found this video which seemed to speak well of the molasses if a little slow. I am not in any rush, so I might give this a try first.
-
Thanks for your valuable input. I did know that the baking soda neutralised the acid so it is important to clean the tank out afterwards with it but I wasn't aware the baking soda formed a protective coating against flash rust. that is very interesting. I have bought a POR tank sealer to finish the process which comes with a product called Metal Prep that is suppose to remove rust and provide a final etch for the POR to key to. I am not confident that it will remove anything but surface ( flash rust ) so my plan was to use this as the final step before applying the paint. I would just like to see as much clean metal as possible before using the MetaL Prep. Anyone else used this product?
-
Thanks for your input. I taken a look at the electrolysis process ( YouTube again) looks like it might be less risky to the paintwork.
-
The next part of my project is to get the rust out of the petrol tank. I have been using a rust eater product from Frost Auto Restorations. It seemed to be working at first but it seems to be loosing its effectiveness. I put a gallon of the stuff in the tank and turned the tank over every day. It has worked quite well but I am struggling to remove the rust from the raised central section. ( more liquid needed to keep it wet. ) rather than buy more of the product I am eyeing up a gallon can of brick cleaner that is sat doing nothing in my garage. I have run a test on some rusty old bolts in a container with a 50/50 mix of acid and water. Looks to be doing the job well. But I am a but worried about putting it in the tank and splashing it on the paintwork. Anyone got any advice? Is the a good idea or a terrible one? Is there a better way?
-
Thanks for the advice. I think you are right it is a wait and see job now. just need to clean out the rust from the petrol tank then I can see if it will fire up.
-
A mystery indeed !!
-
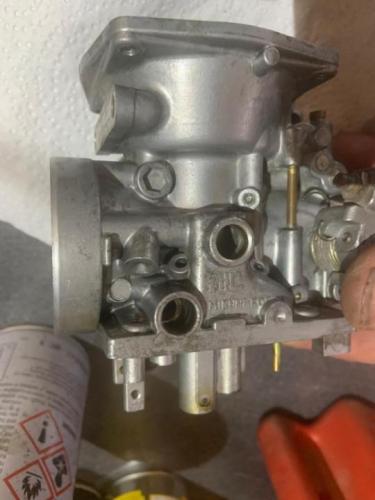
Thanks for the input say what now!?. Yes there is a brass plug in there it is just set quite deep but it is there. I am pleased you think I might be wrong about the loose plug. Any ideas what the rattle could be??? It really does sound like a ball rolling from side to side Inside the body. if you tip the carb front to back there is no rattle but if you tip it side to side the noise is clear to hear. I believe the body at this point is completely dismantled apart from the butterfly shaft which I would rather leave Undisturbed if poss. ( Worried about the butterfly screws coming loose and dropping into the engine) I am holding the shaft in place as I am rocking the carb so there is no movement there to cause the rattle. apart from rebuilding the carb and seeing if it runs I am not sure what else to do. just hoping for some inspiration.
-
It looks like I might have dropped a big boo boo !!! After cleaning out my rather gummed up Mikuni cv carb bodies in an ultrasonic cleaner two of them now rattle. It sounds to me like I might have dislodged an internal brass blanking ball and it is now rolling freely from side to side in some internal channel. That is what it sounds like, ( I am desperately hoping I am wrong ) Does that sound reasonable or is there another explanation ? Could this process be reversed to use heat from the ultrasonic to drop it back into place? or am I ( hopefully ) barking up the wrong tree ? What do you think ? I am appealing to the great and good, Please Heeeelp !!!
-
What cleaning agent would you use?
-
Brick cleaning acid sounds a bit scary. Got some for cleaning oil from driveway. Never would have thought of using it to clean passages in carbs. I am sure it will definitely do the trick.
-
Thanks Ral, I think that is good advice. not started the project just yet. think my plan it to get it running first and then go back and do the engine strip. so first job is clean tank and carbs. would you recommend a ultrasonic clean?
-
Think I will be like that anyway. That’s why the bike is in such good fettle now.
-
Not sure how far to go with the restoration. As it is, it is absolutely original and is only the engine lacquer that has suffered. The frame paint is basically intact apart from a couple of places that has small scuffs.. not really any rust. It seems a shame to have the frame powder coated and lose the original patina. Would I best keeping the original patina as much as possible ? What do you guys think ?
-
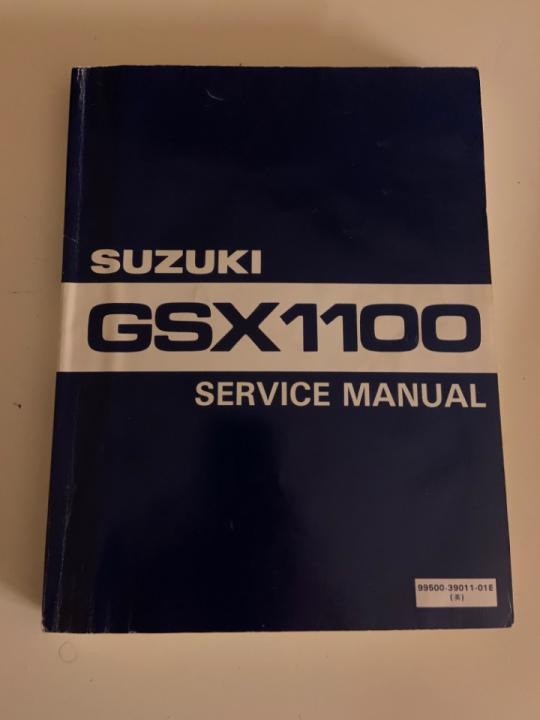
Just dug this out from the back of my bookcase. Think this just might come in handy.
-
Looks like you are going on a similar journey to my own. I also built my own house a few years ago. Just one of the projects that got in the way of getting around to sorting out my old GSX. love your workshop….. very nice. Good luck with the house project.
-
Just had a look at their Facebook page….…very impressive. just might give them a call. Thanks very much for the valuable info.
-
Bongo-H That is absolutely fantastic, that is exactly the sort of information I was hoping to get back. There is no substitute for experience. So the ultrasonic + carb cleaner is damaging to the rubber parts. That is something I did not expect to hear. We’re your diaphragms still intact?
-
The exhaust if I remember is a Motad. never really happy with it. It never gave the bottom end power and instant throttle response that the original pipes did. Wish I still had them. I only replaced them because the baffles started to rattle. And I believed to advertising waffle the the motad would be better. Don’t suppose anyone manufactures a patten copy of the original pipes do they? sorry for the silly questions but I have been out of the biking loop for many years.