yyt
-
Posts
92 -
Joined
-
Last visited
Content Type
Profiles
Forums
Events
Everything posted by yyt
-
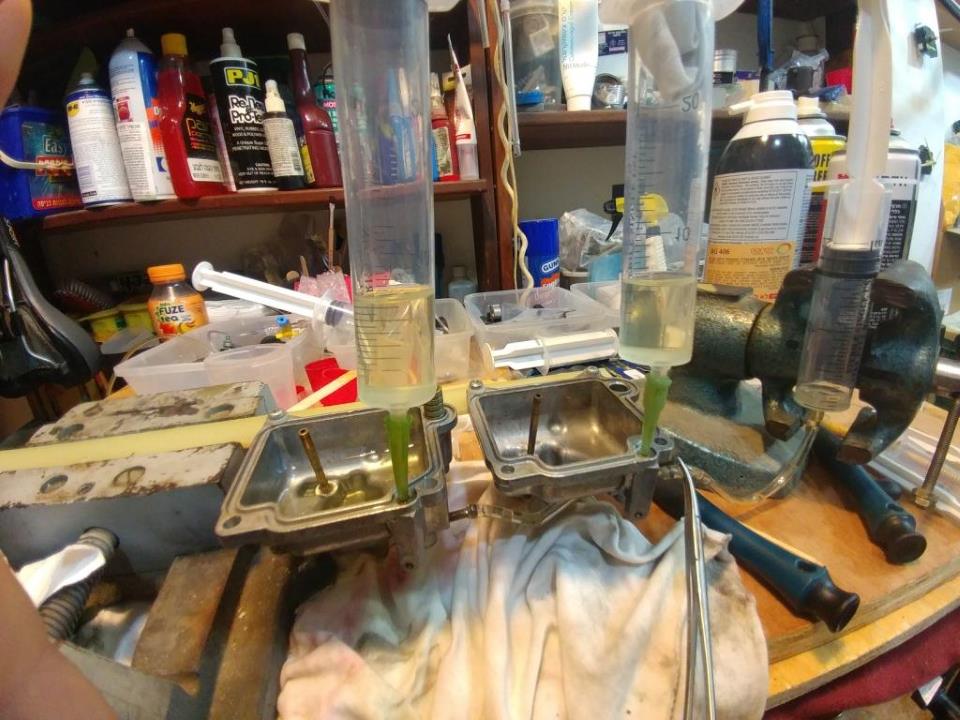
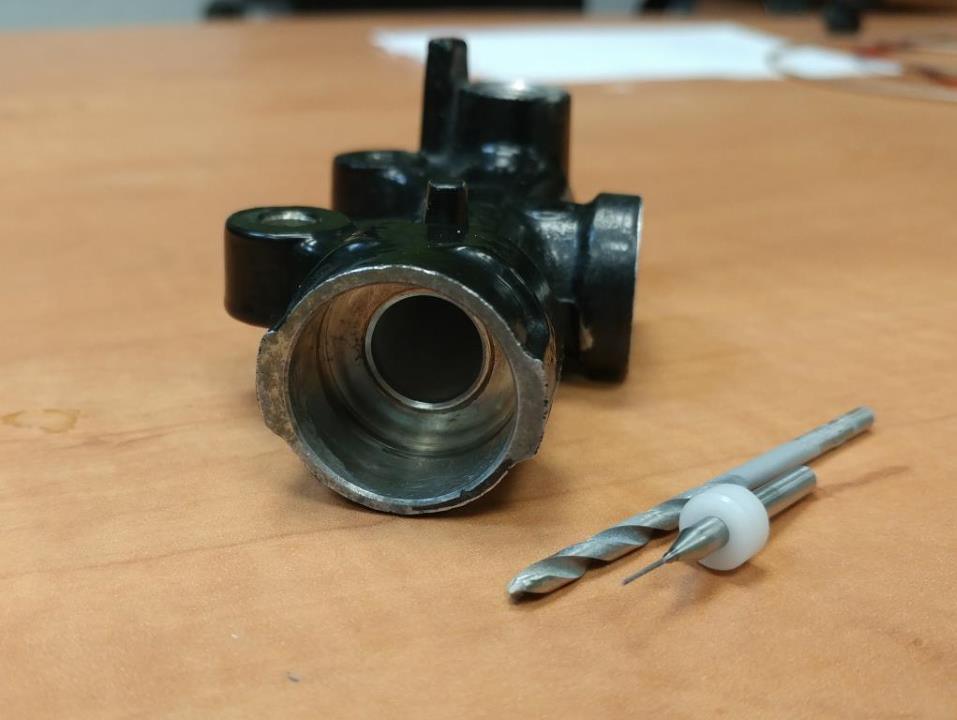
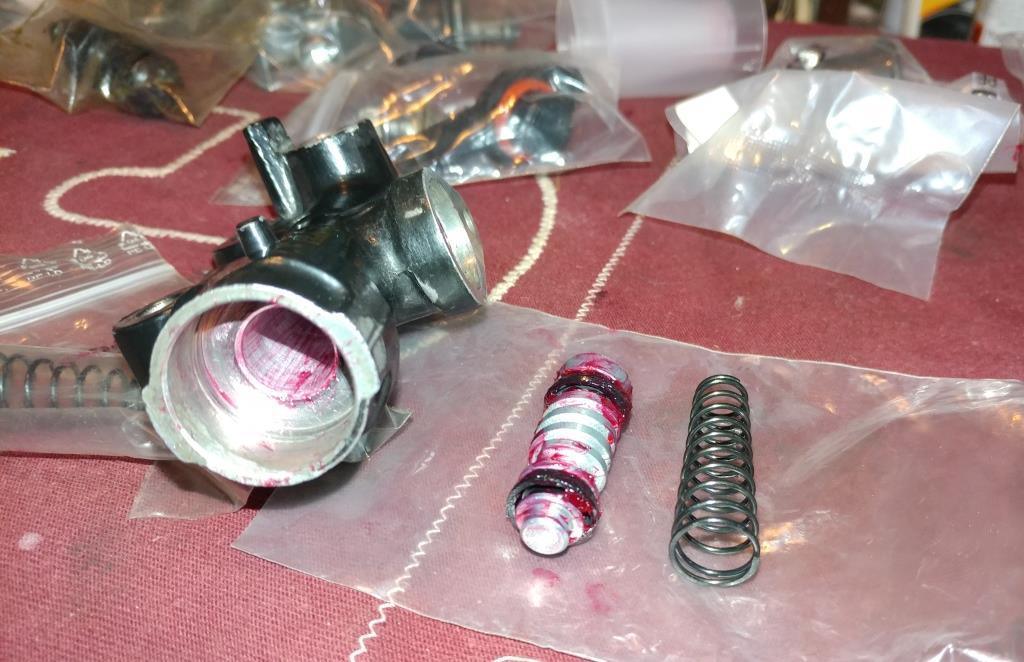
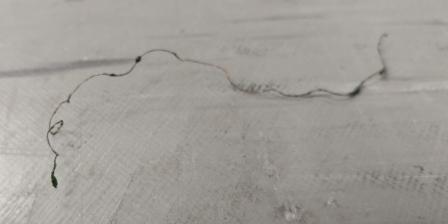
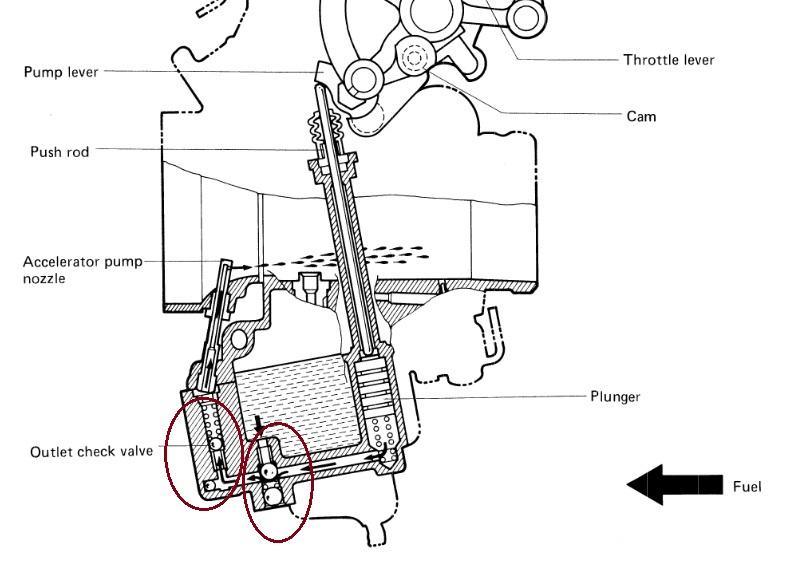
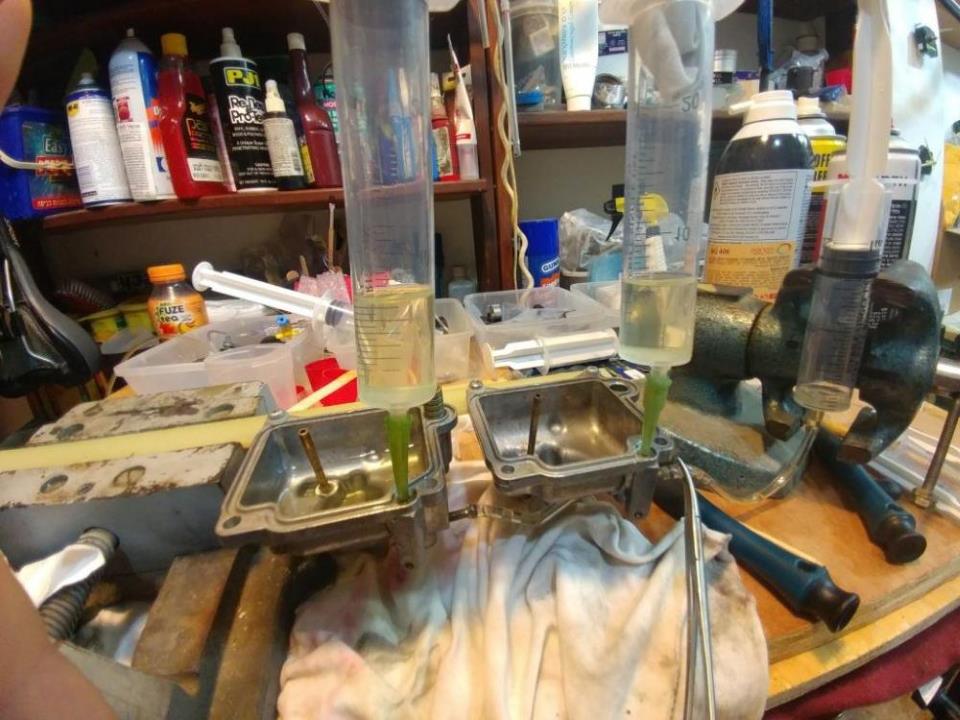
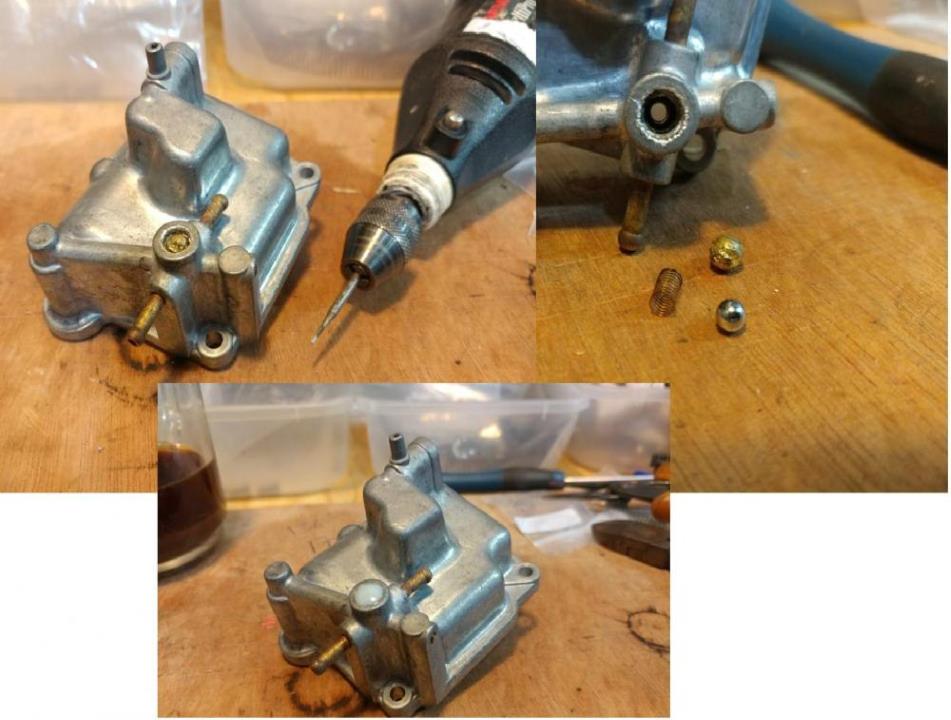
Next interesting mining on the VM29.. Does any one test the Accelerator pump? I decided to check all the valves of the float chamber after while cleaning the carbs, what seemed like a spring came out of the bottom fuel brass adapters connecting the float chambers together of the accelerator pump: Than I started to test the 2 valves and the plunger for proper work on the 2 float chambers having the system. Actually, before I realized I can't attach a video here I made a really good one showing how it works. Luckily I have a spare set of VM29. I found 1 bad Outlet check valve and at another bad plunger filling valve. To fix the plunger filling valve seemed easier ... Released the brass ball with Dremel, got the spring from the float chamber with the outlet check valve problem and sealed it with the Scotch-Weld Epoxy. Hope I helped some-one here. Any Questions?
-
Will appreciate recommended carb. synchronizer? There are: 4 analogue vacuum gauges, hoses adapters mounting plate. Glycerine filled Vacuum Gauges. Motion Pro SyncPRO carburator Tuner. Carbtune - 4 column Sync manometer. A Penny for your toughs..
-
Welcome, neat looking bike. I replaced some years ago the exhaust cover to a kevlar/carbon piece I made. As far as I remember the rivets just fell out from the 4 tubes and I had no rattling sounds. I recommend using SS closed end rivets when fitting the new cover.
-
I wish I could have put here a video clip showing me turning the shaft with 2 fingers. I don't have a new set to compare with, I recon there is a bit of friction but if the bearings are set right it's almost not noticeable.
-
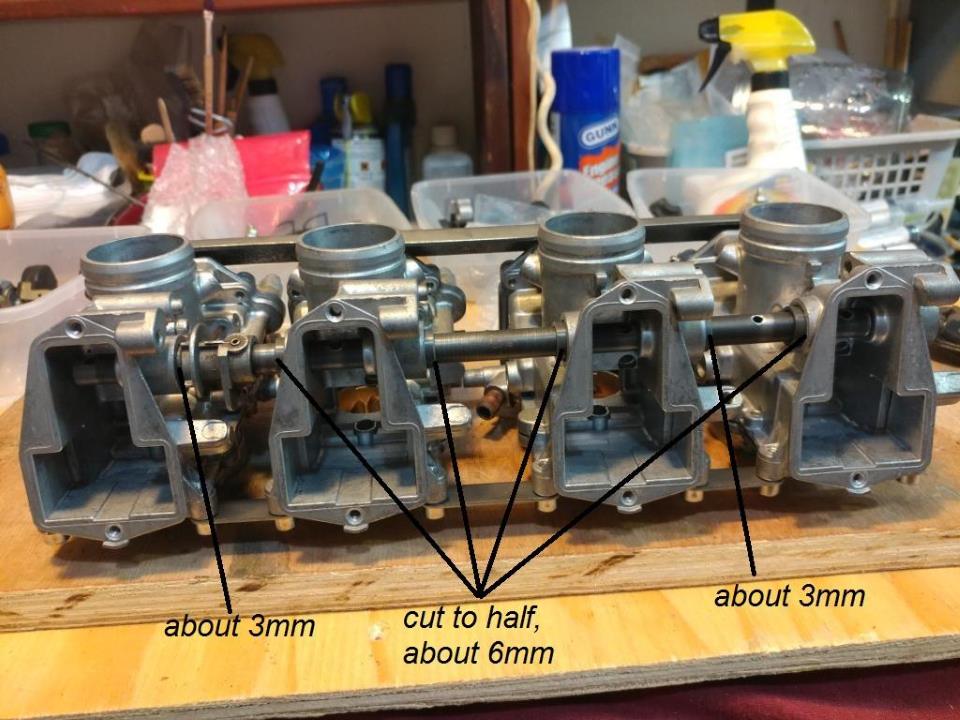
I bought 25 bearings as is was better priced, 3 bearings are enough, cut to 2 per set of carbs. Later on i will be needing to synchronize the carbs. I saw there's some options : the Chinese 4 analogue gauges, Carbtune or Motion-Pro. Any recommendation?

-
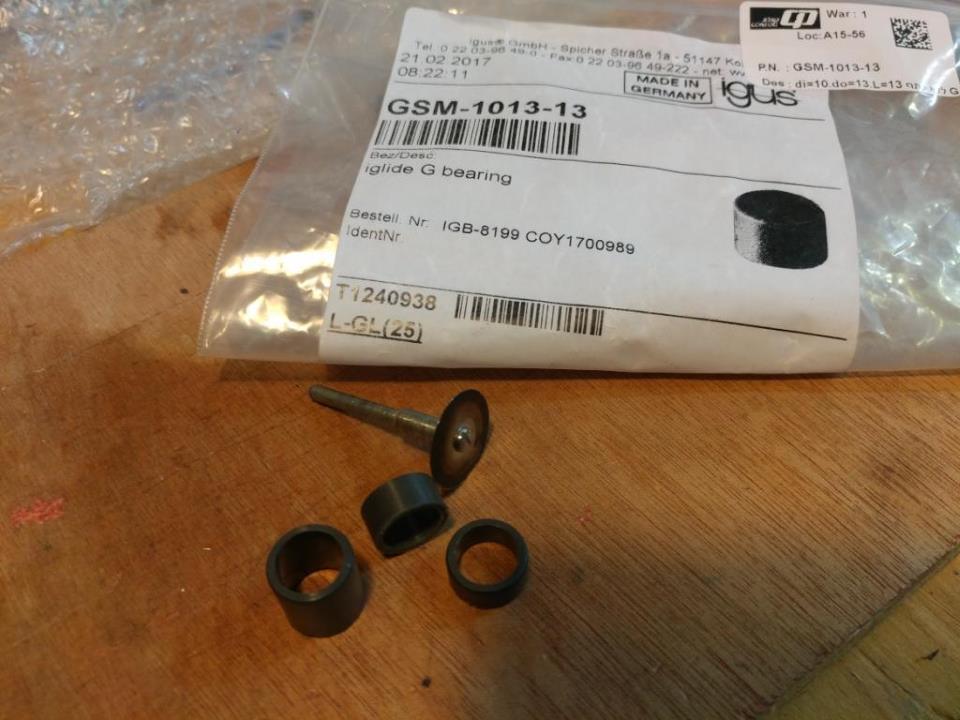
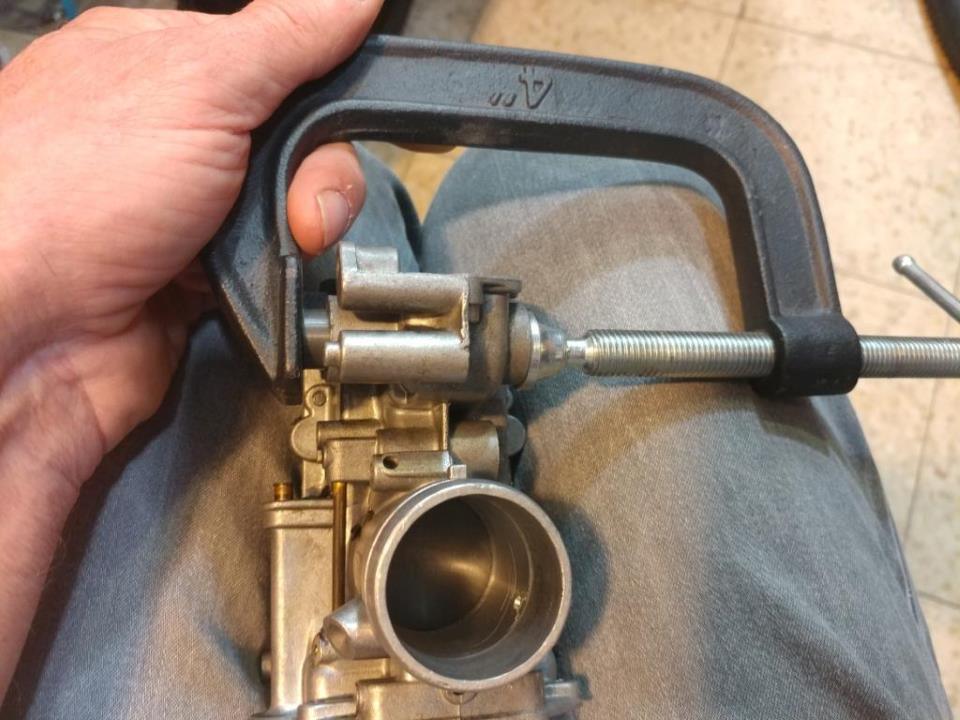
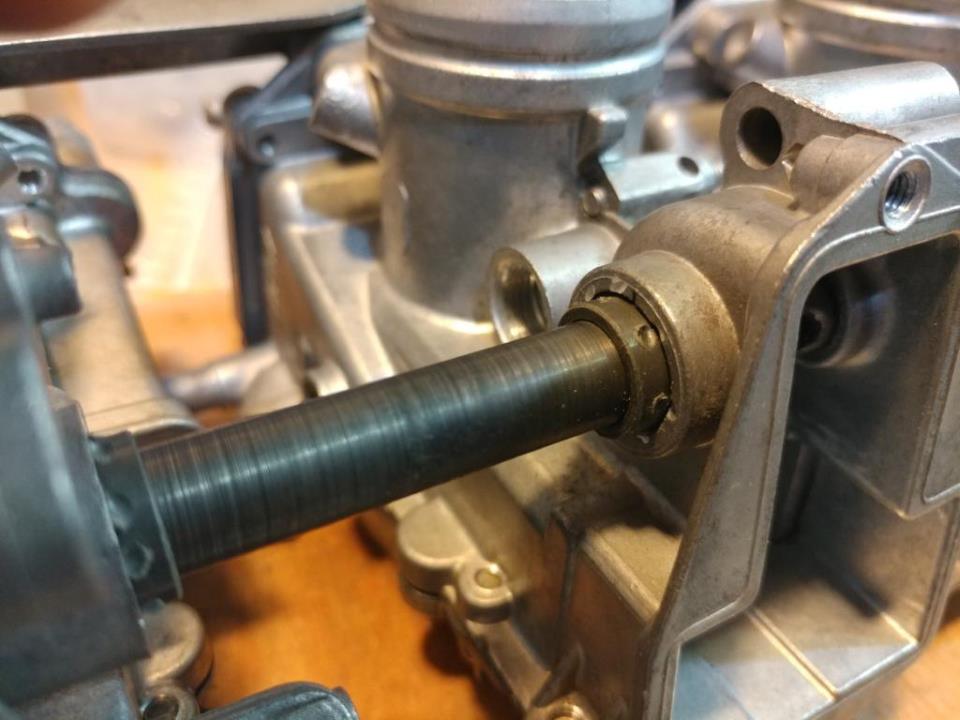
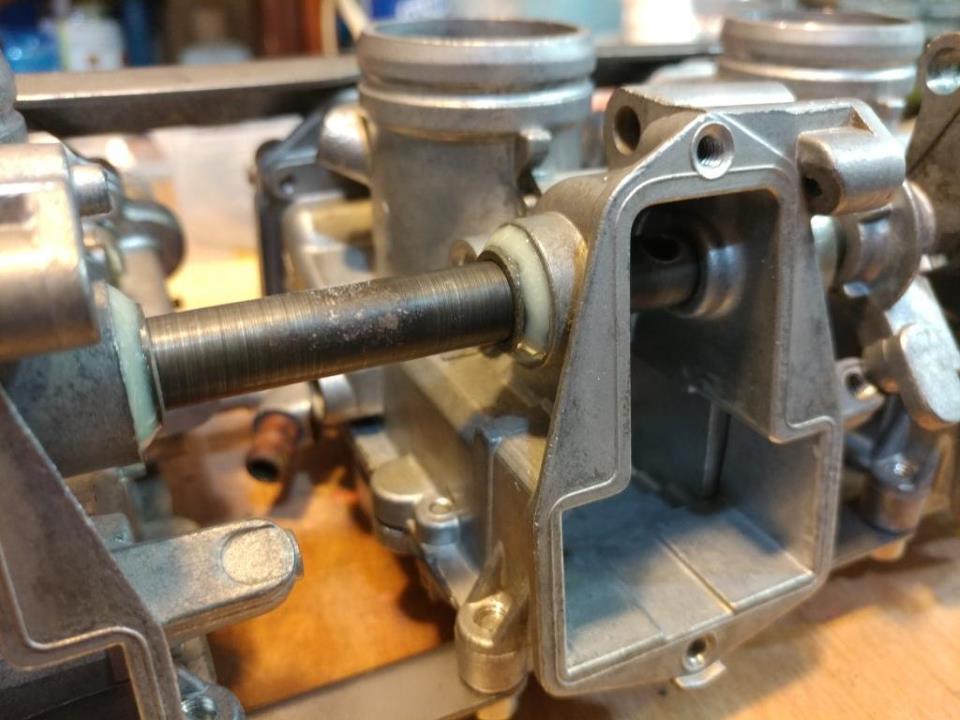
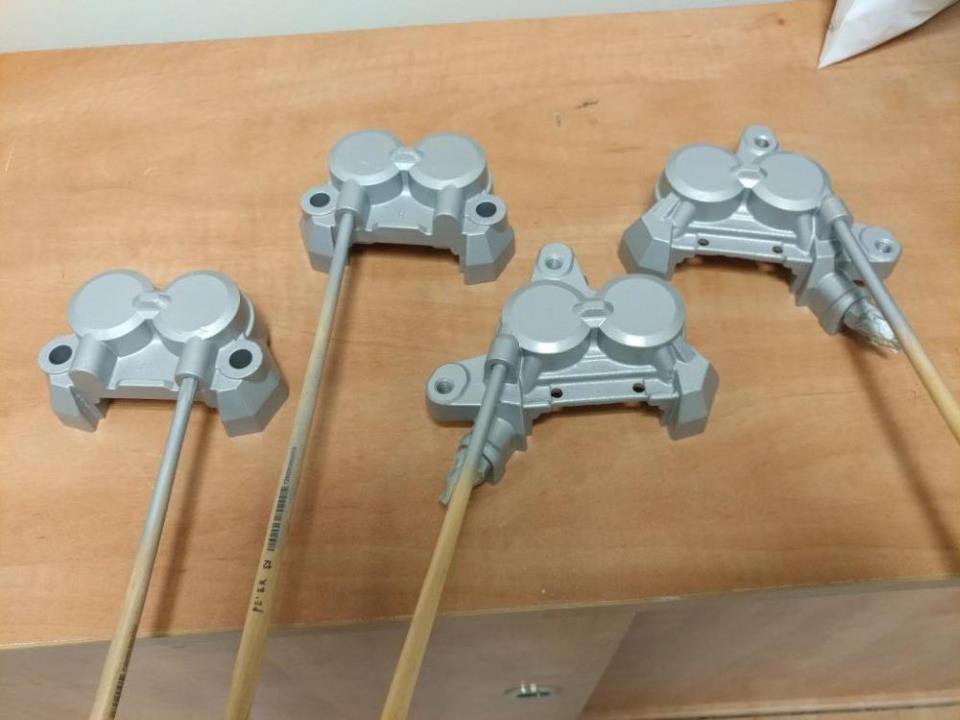
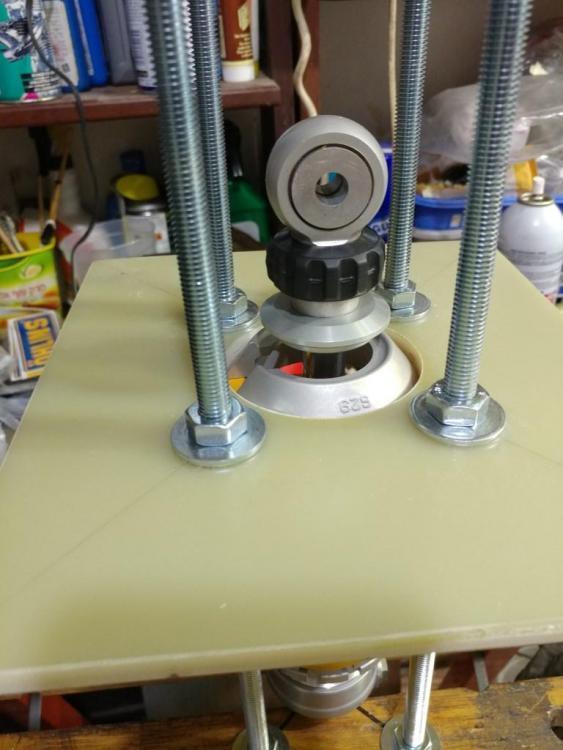
I don't have any experience with other carbs shaft diameter, for the VM's I chose the IGUS Bearing: The important diameter is the shaft, the length can be relatively easily cut to what you like with a dremel bit or small saw and trimmed/ chamfered with scalpel/model knife. I had to cut 2 bearings extra short for the Throttle/return spring bits on the shaft. On the carbs where the shaft is, there is a felt ring (after 30 years is useless) held in by a brass cap. The bearing goes in the cup, a bit of a tight fit. The bearing is press in with a clamp, don't press too much, the bearing just has to be sited in the cup. After inserted, you can move the bearing slightly for proper alignment for the 4 carbs (can use a 10mm drill to align). I started with one of the center carbs, connected the upper and lower plates to the chosen carb. Than 1 by 1 I aligned each carb, bolting to the plates and making sure the shaft turns freely. After all 4 carbs are connected to the plates and the shaft moves freely, small notches are made with a dremel bit (3rd pic. of first topic). Than the Epoxy Adhesive is applied so it attaches to the bearing and the aluminum carb body. That about it.. think writing is harder than doing it


-
OK. I'll get some more pictures of the stages n get back to you.
-
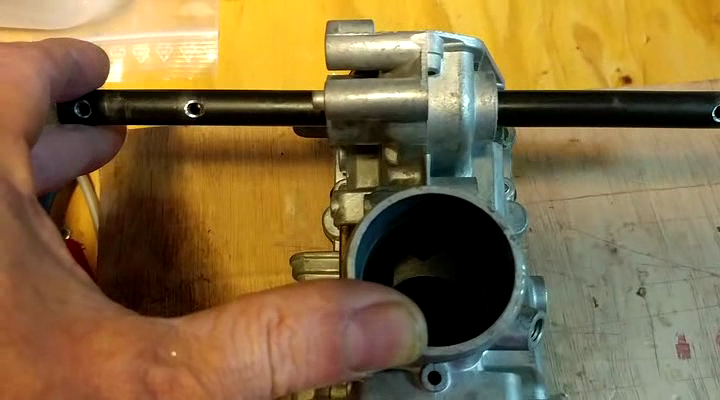
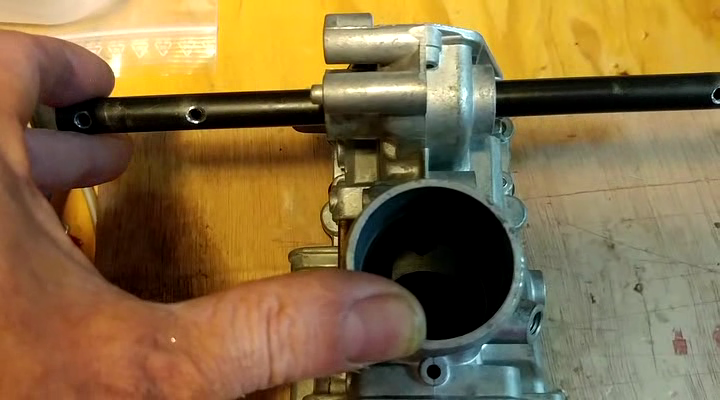
Slowly but Surely I got to the carbs. I will not bore you with the ultrasonic cleaning and rebuilding, carbs are in good condition and I got most parts n seals that needs to be replaced after 30 years. Got my own theory why these carbs rattle, at first a long time ago I thought the problem was from the gap between the body of the carb to the slider (throttle valve in the book). Playing with the set-up I noticed there is a large free play between the Shaft and the carbs shaft bore. Got a nice video clip, but pics. only here: So I my opinion the rattling comes from the sliders (throttle valves moving up n down. It also affects the Idle … Measured things, thought a bit.. Used IGUS Plastic Bearing, had to cut in half. Assembled the 4 carbs for proper smooth movement and glued the bearings with 3M Scotch-Weld Epoxy Adhesive DP460.


-
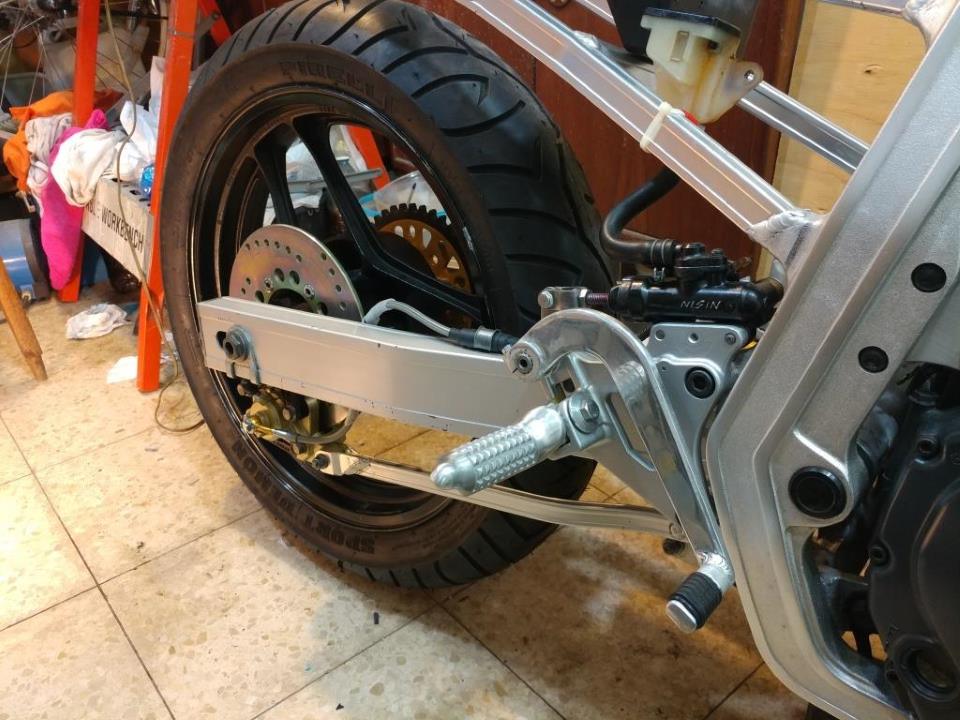
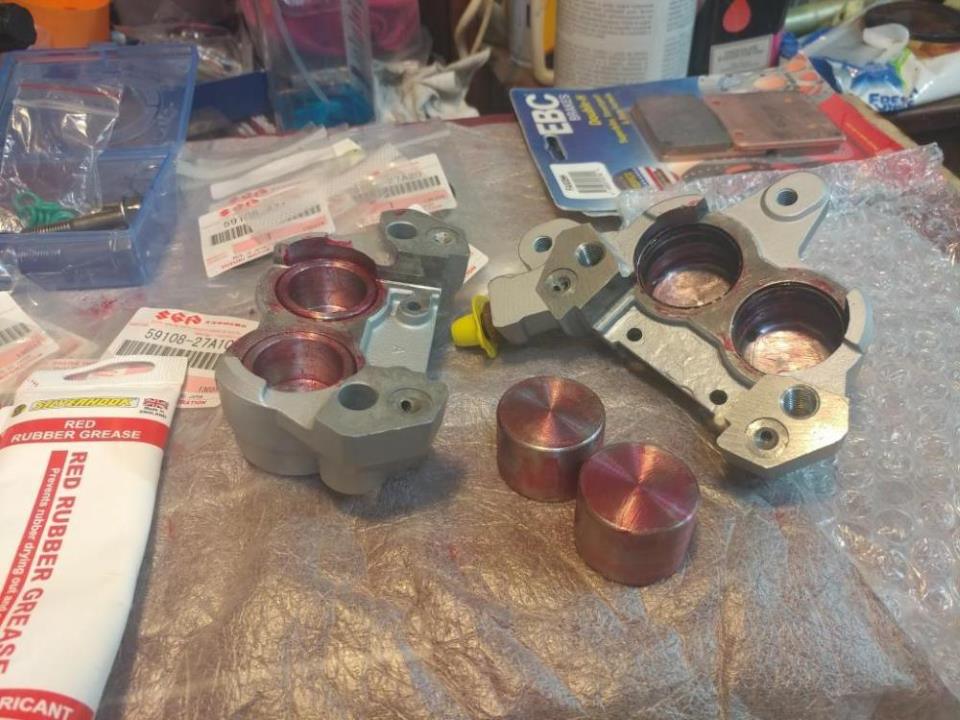
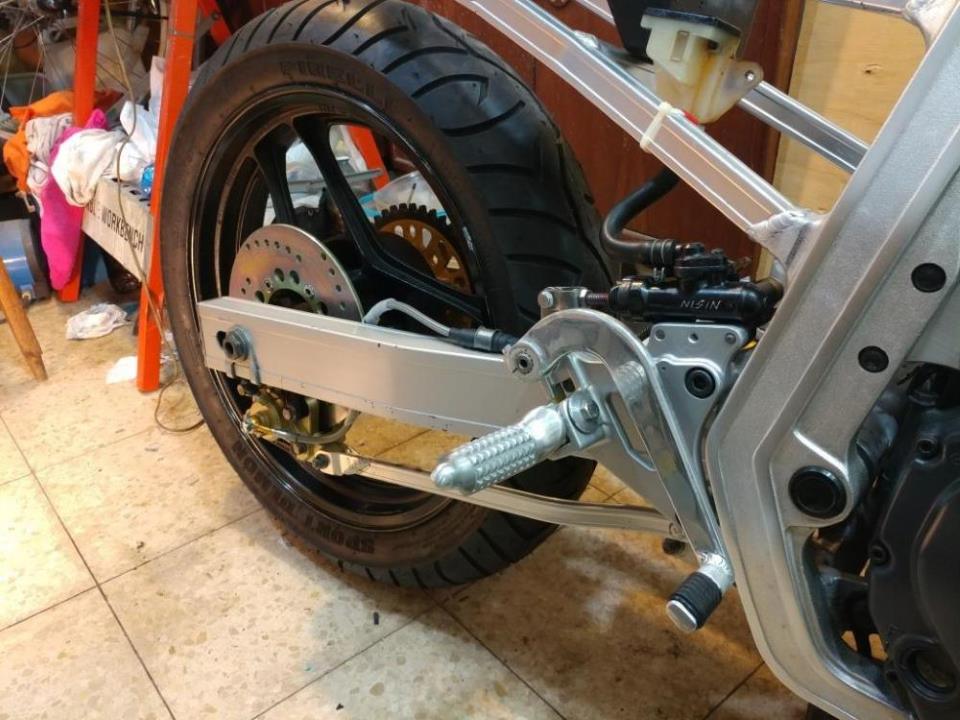
Can anyone please change the "clipers" to Calipers?.. Almost finished with the front Calipers, just need to add the tubes and bleeding the system. If you were wondering why the caliper are silver.. well.. don't know what was on my mind! But because the clear lack of the original silver paint of the front forks turned yellowish. It got stuck in my mind that the forks were originally anodized. Got the anodized like paint, matt clear lack. well.. I almost stripped everything and paint it silver/aluminum color like i was supposed to. But i thought it looked so good, so i'll left it. That's why the calipers had to be different, otherwise it would have looked like a lump of gold stuck at the front.. Anyway. I'm happy with the result.

-
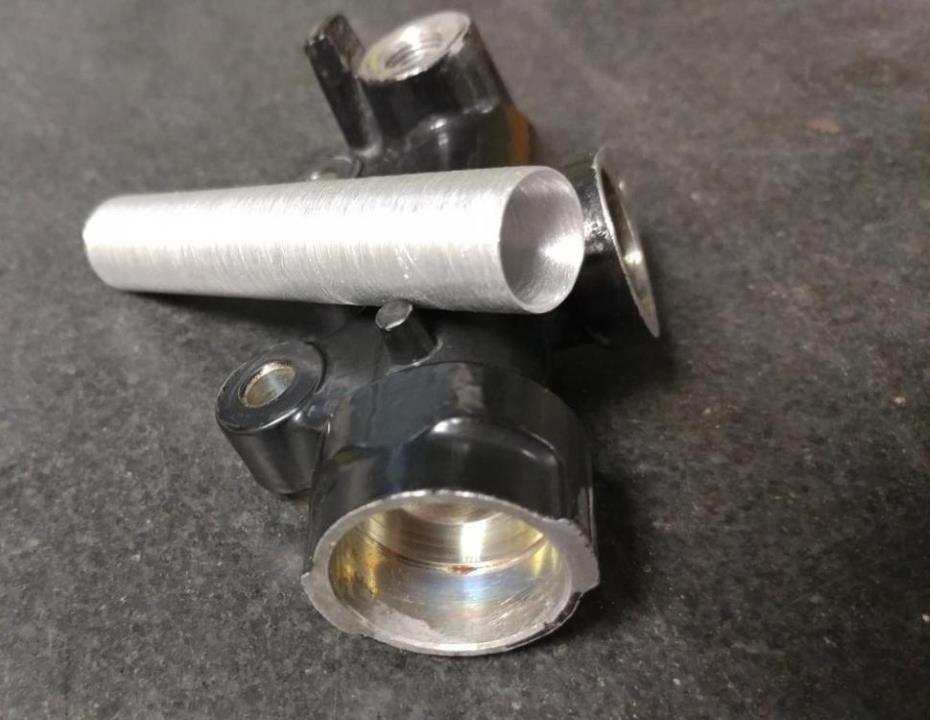
Thanks to Swiss Toni I made a sleeve : OD-14mm, ID-12.7mm Glued the sleeve with 3M Scotch-Weld structural adhesive. I also just in case, tested the strength and resistance to brake dot3 fluid by gluing 2 bolts together and let it stay submerged in brake fluid ( after 2 months up to now, its perfect). Got all assembled and was really pleased with the result..


-
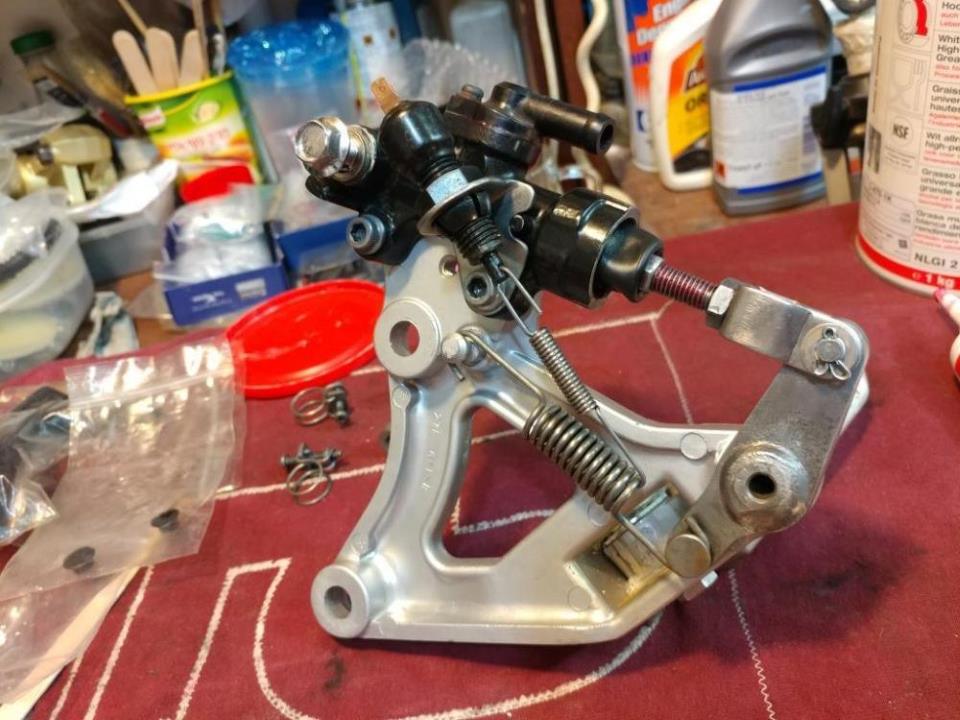
Sorry.. I was in the middle of continuing the epic when I was distracted and had no time through the weekend. I didn't want to put the 14mm internal piston (which looked just as good as the Suzuki original replacement part) as to not to change the relationship between the piston/leverage/force of the original Suzuki engineers. Anyway.. I ordered from USA a used 1995 Suzuki GSX750F for about 9$ with shipping 25$, and still less than half the price I could (not) find locally. Had to make slight upgrades to make it fit and the rear bracket to connect, painted it and it was perfect. Drowned it with red rubber grease n put i away..
-
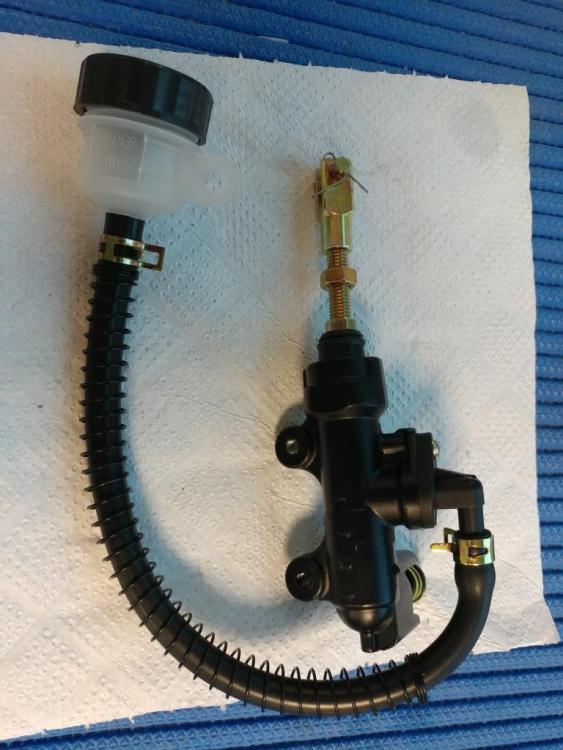
Its about time I update.. Well, I got a rear master cylinder from China. didn't have any specs, bot I saw in the picture: the "1/2" and the overall size looked like it will fit, so I bought it for some 10$. Its amazing that all these parts are 10$. It looked great and needed only minor changes to fit. I opened it up and found its 14mm!! (although on the body casting there is a "1/2") So, trashed it aside..
-
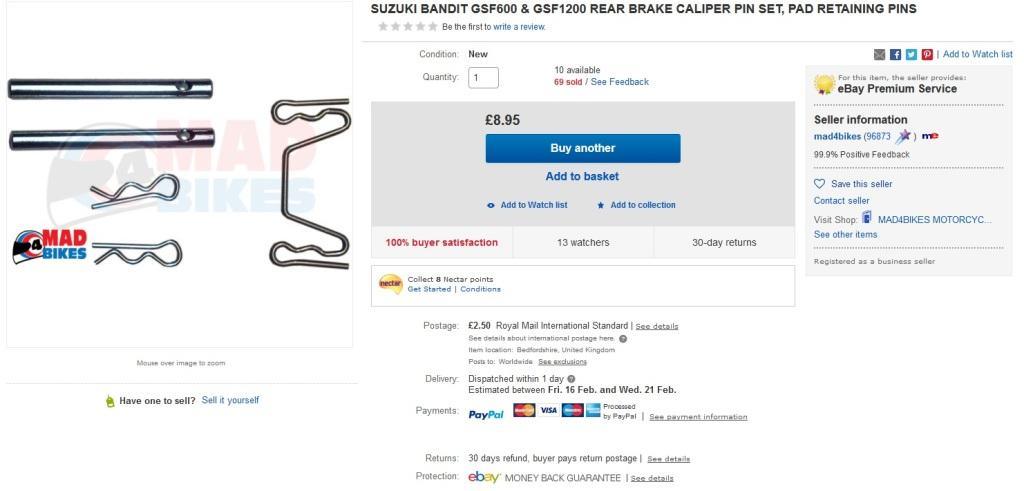
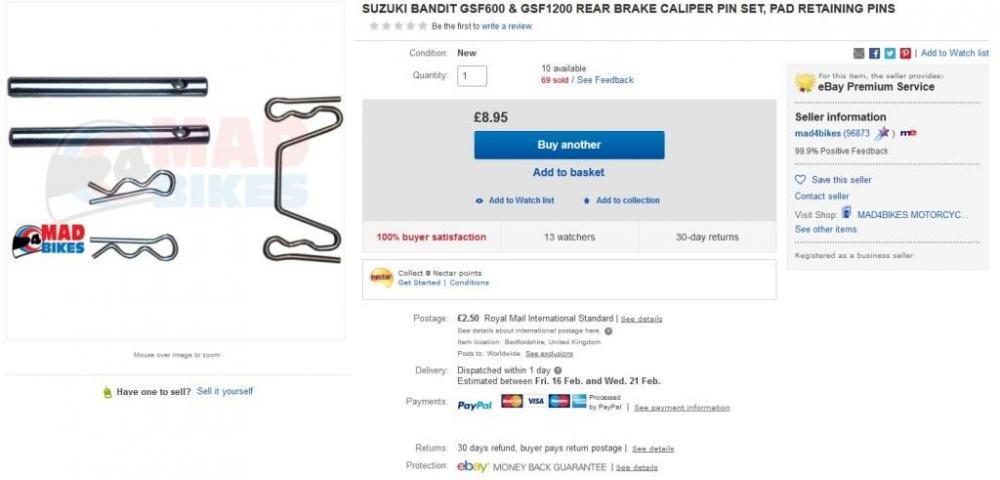
Thanx Guys, I knew there was a good solution.. I have and can lockwire the pins as I work on aircraft engines but I like the simple and smart idea of connecting the pins together. Got It..
-
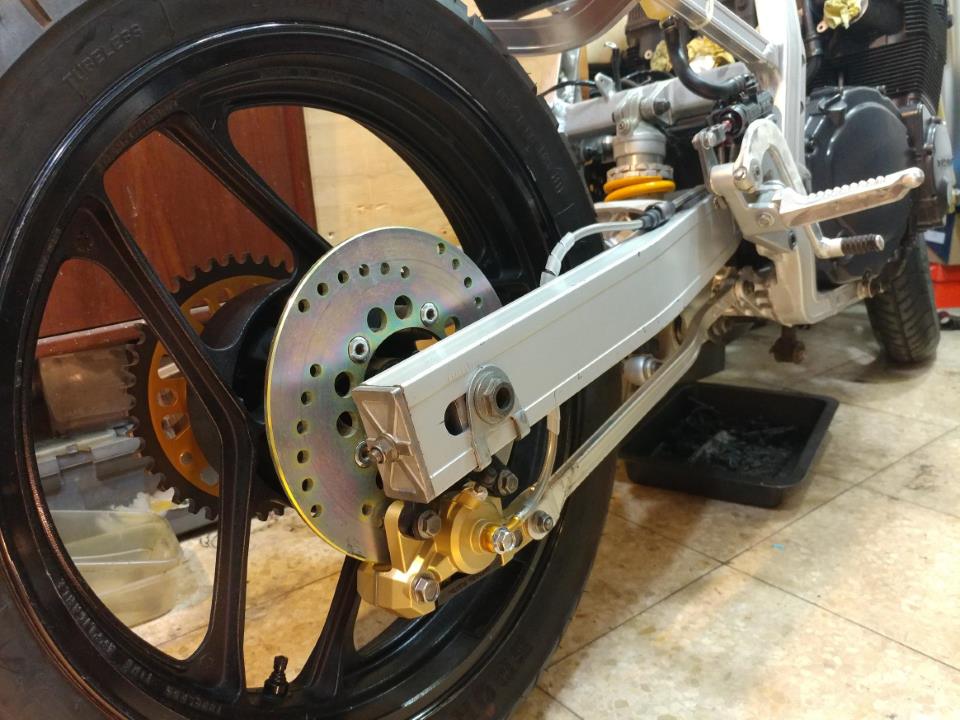
Finished that part.. Now, while I'm deep digging.. I was wondering if anyone made an improvement on the Rear Caliper? The clips holding the Pads Pin are prone to damage the Piston Dust Seal! Is there a better option?? Sometimes even the Japanese engineers ...
-
Thanx, best advise i got for a long time.. Just didn't want to miss any thing before i put the oil seals.
-
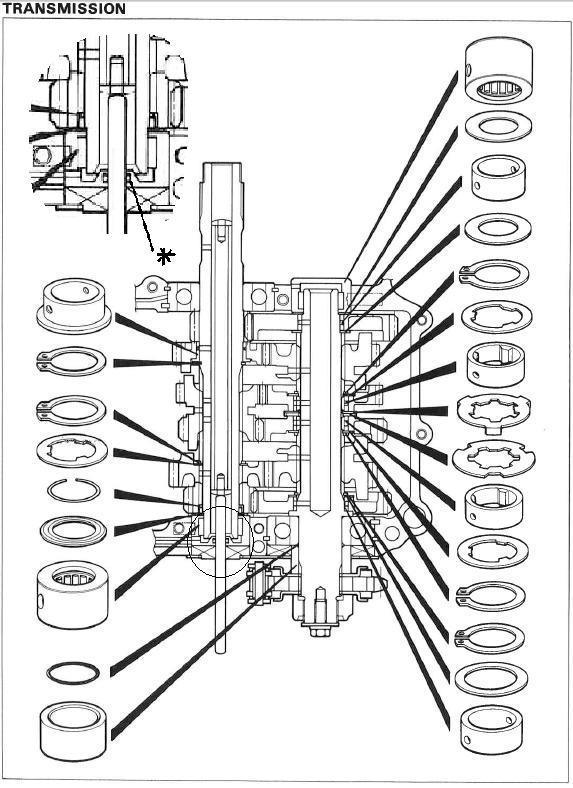
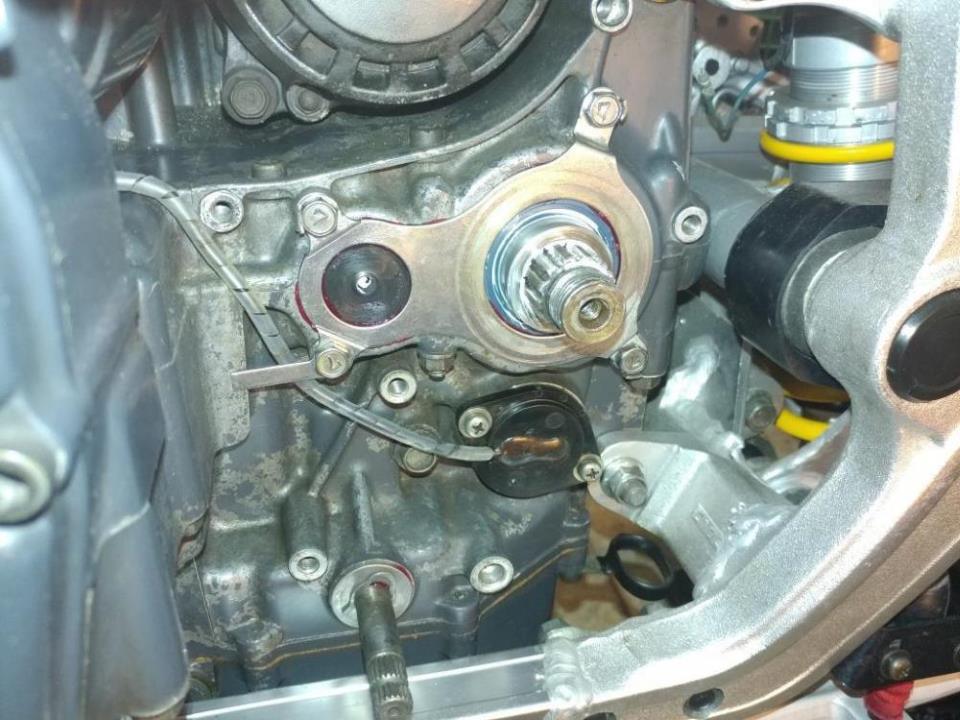
Thanks for trying but its not 15, much to large, its the size of the clutch push rod which is about 6mm. I think i found it..its in the gear bearing housing and i don't think its serviceable. A penny for your thoughts..

-
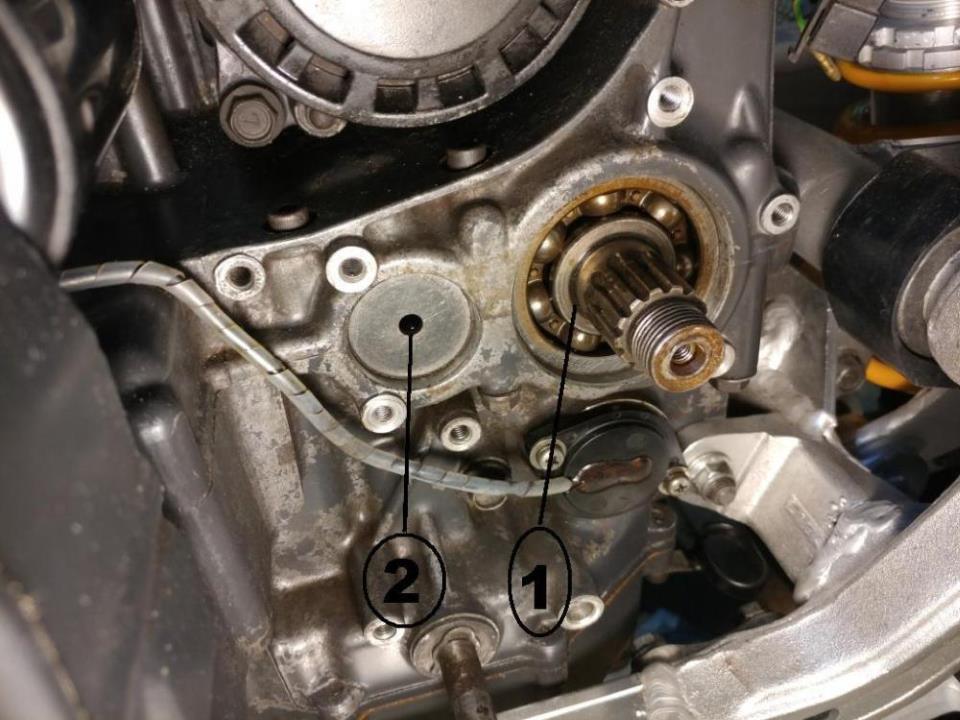
As for no.1, i know its to be found as no.46 from Suzuki. But i always order from O-ring dealers, so i was hoping for dimensions. No.2 in pic. is just behind the oil seal, is seems there is another o-ring inside.
-
Before putting the oil seals I thought I'll ask if there is more to replace. 1 on pic. I almost missed and ordered a 1mm, 25mmOD O-ring. anyone knows the exact size? 2 0n pic. It seems there is an O-ring inside/behind the (silver)disc. Anyone knows if I should/can replace? And if so, what size/kind is it? There is no documentation in any book, parts cat. or manual I have.
-
Not from experience, but I would consider Nitron Shoks.

-
Grateful for your advice. Now I will order the 8 pistons from powerhouse. Was waiting to see if to start looking for a new set or get it fixed.
-
I got this - Ohlins spring code: 01091-24 (with rate 80 N/mm) which is what I wanted.. The 80 N/mm but 10mm longer, sorted out with the Preload Adjuster and fine tuned according to Ohlins instructions with original shock lengths/loads. Was great fun changing the spring (first time) and looking good. Now the test is on the road.. to be continued..

-
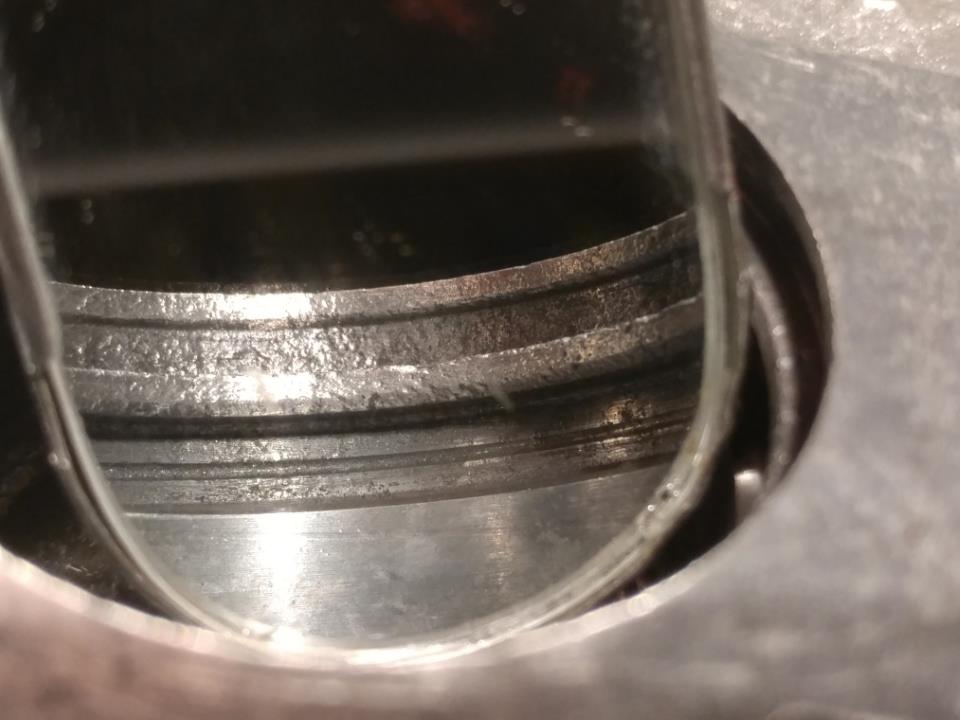
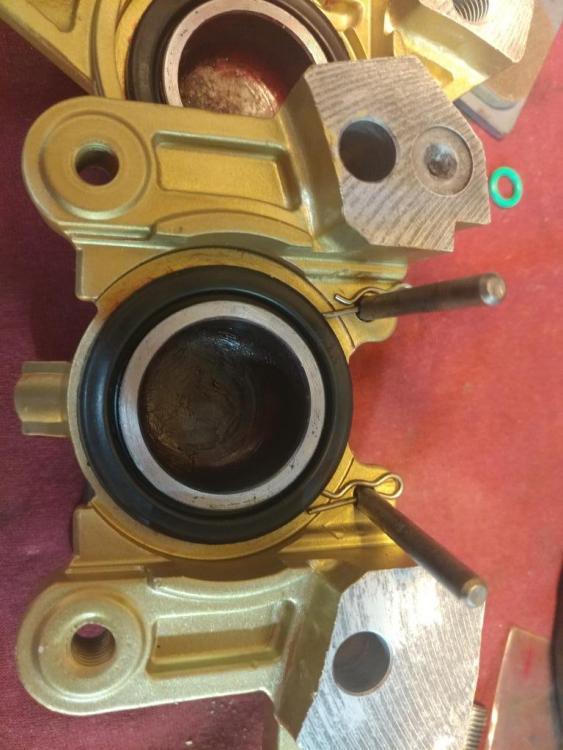
I'm in the calipers restoration stage of my slabby 750 86. My question is whether the caliper's condition is not as bad as it looks.. The Piston seal grove is reasonably OK. The Wiper seal grove is??? The pictures show the worst.. What do you say? Should I give it a try to see if it will hold the pressure or I'm wasting my time with this set and start looking for a new one.

-
Guess most just buy new or just don't look down that hole/ bore .. Anyone knows what kind of oil/grease is best for the internal rubbers of the braking parts? It will take a while (some months) before I will connect all the braking components and fill the system with DOT4 fluid.
-
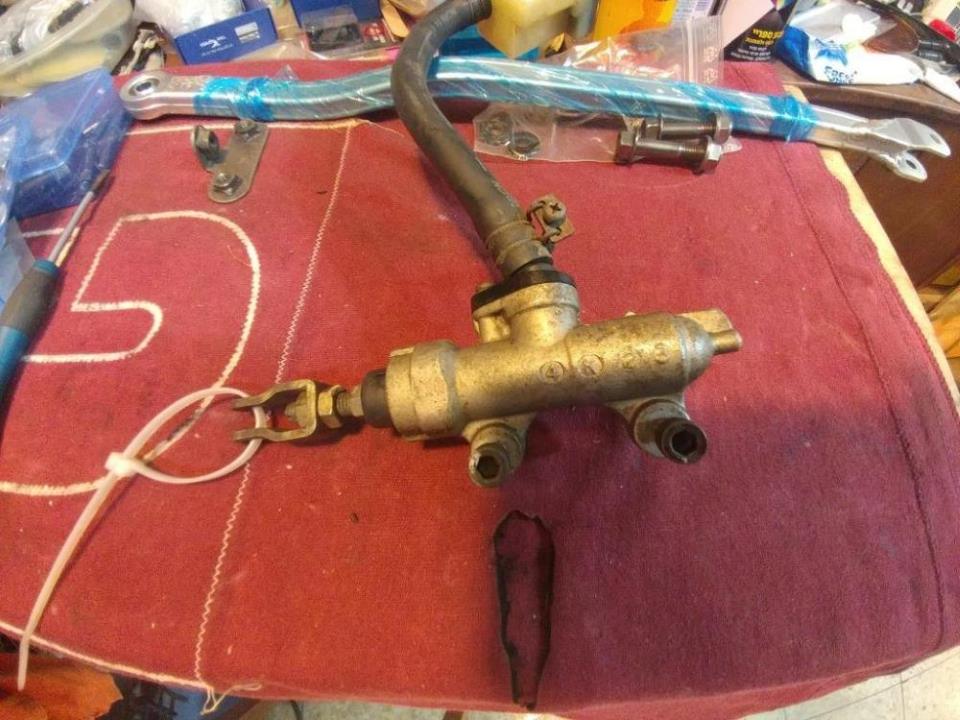
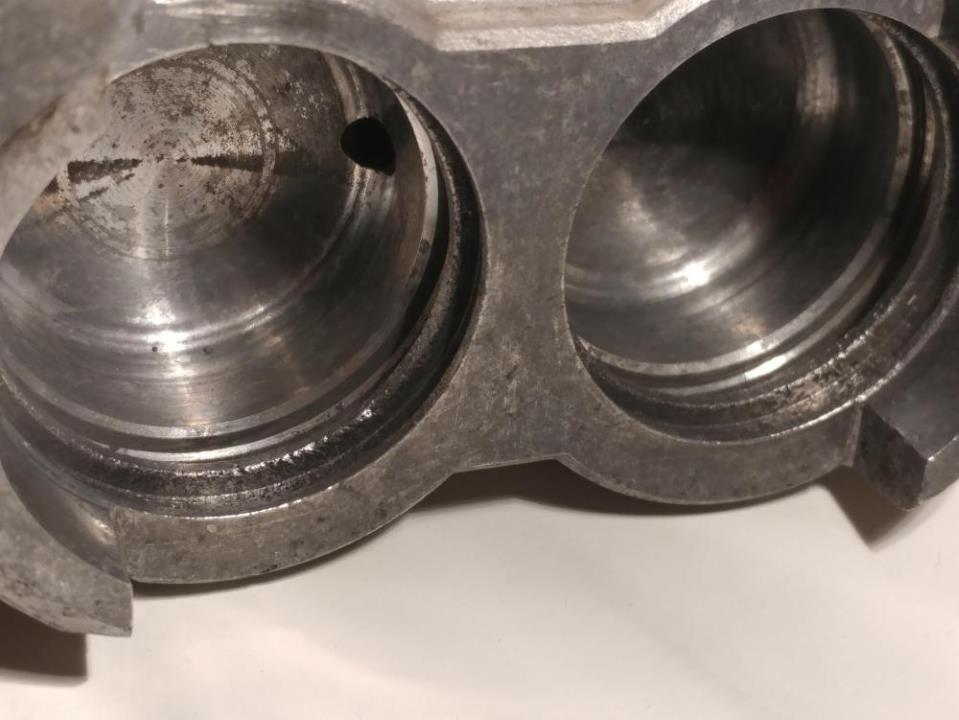
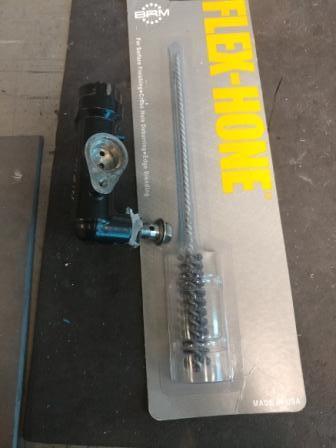
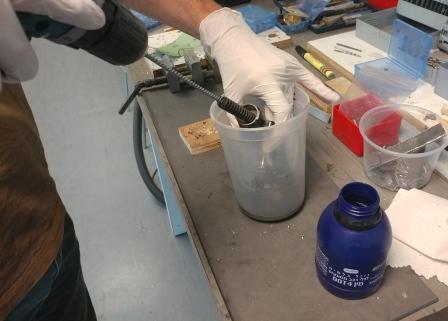
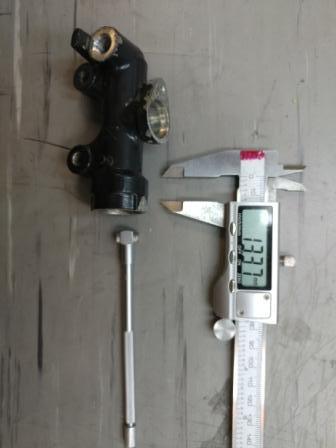
As usual I'm always trying to fix everything without thinking its easier and cheaper to buy a new part. I'm fixing my 30 years old original Rear Master Cylinder and because at the rear the oil has never been changed it damaged the cylinder bore with pits at the center. I got a honing bit in order to smooth the pits. The 1/2" diameter - 12.7mm got to 13.3mm to eliminate completely the pits at the bore. Any one here knows if its OK? Should i hone to 14mm and find a 14mm (same length) replacement piston? Is the original hopeless to fix and i must replace it? I want to keep the original set-up, is there a newer bike equivalent to this master cylinder? I saw a Chinese set-up which looks very close which i can fit for 10$.. are the Chinese stuff any good? Any Recommendations? I'm stuck at this point..
-
Hope the 1.5 dia. will do. The gap is 1.6mm, I wrote it should be 1.9 to 2.0mm dia.