Breadman
-
Posts
67 -
Joined
-
Last visited
Content Type
Profiles
Forums
Events
Everything posted by Breadman
-
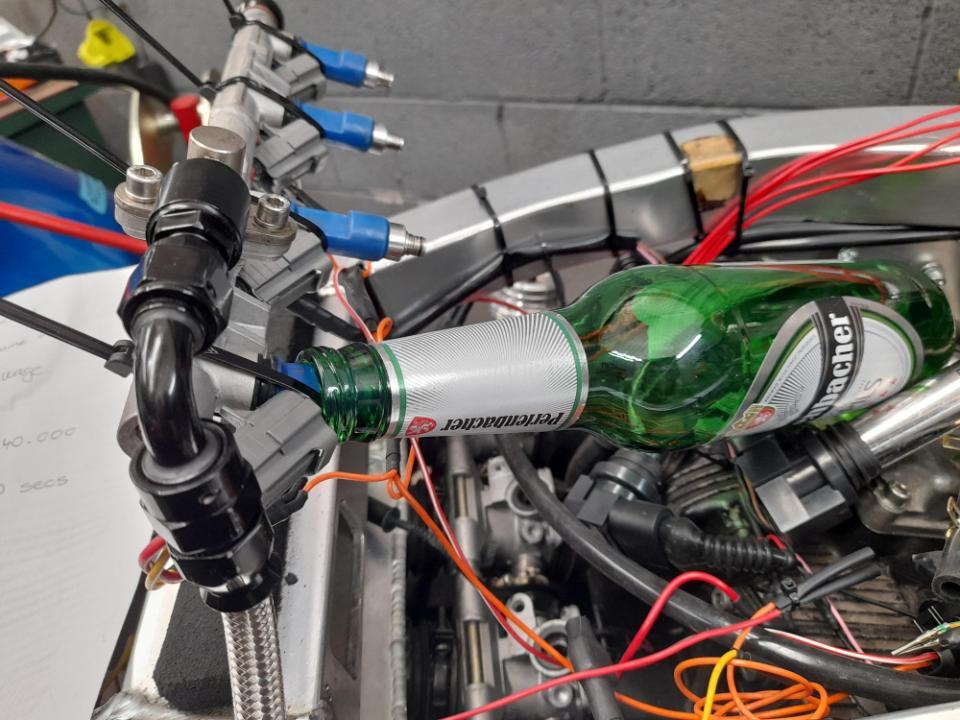
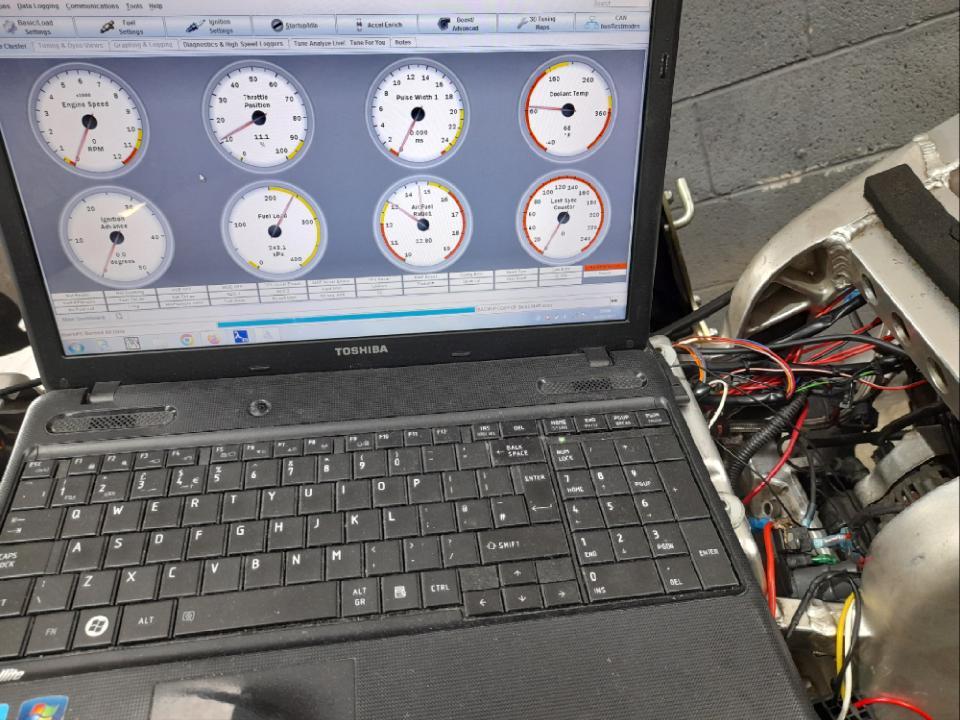
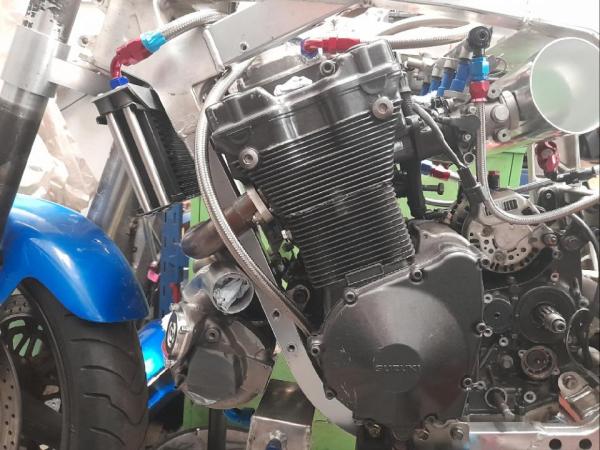
It,s alive and I am over the moon. Tested the injectors again . All injectors are putting out the same amount of fuel. Megasquirt has a test mode so you can fire each one individually or all at the same time. Next to test was the coils. These all gave nice fat sparks . So I went to fire it up and all it did was cough and splutter. Removed the spark plugs and the plugs were wet so I had fuel. Checked each coil again as I cranked the motor and 1 and 2 cylinders were good but no spark on 3 and 4. Time to dig into Megasquirts many ecu menus and settings. Finally found something that wasn't right, corrected it and it and it fired up. Very happy and relieved. The bike idles nicely about 1000rpm but definitely needs a better fuel map at part throttle and above. As its a freshly built engine, I'm being careful. The facet oil pump needed a bit of persuasion to prime but is now taking the oil from the turbo back to the engine. Now I can take off the wiring loom and get that tidied up. Big thanks to Arttu for his help. Top man.
-
All wiring completed. Everything works as it should. Time to hook the laptop to the ecu. Got fuel. Got sparks. But the motor refused to start. It did try though. On the plus side, I have plenty of oil pumping around the motor. This was a concern after my crankcase modification to allow the crank bolts to clear. I obviously can't check oil pressure properly until its running. So I have several batteries charged ready for next Monday when it is time to start altering some settings in the ecu and hopefully get it running. This is new territory for me. I've read the manual (several times). Had some good advice given but its me that has to change the settings. Its going to be interesting. I need to access the plugs to check them so I will have to leave the petrol tank off and extend the 2 fuel lines. Despite having quick releases, it's still time consuming and a bit of a pain.
-
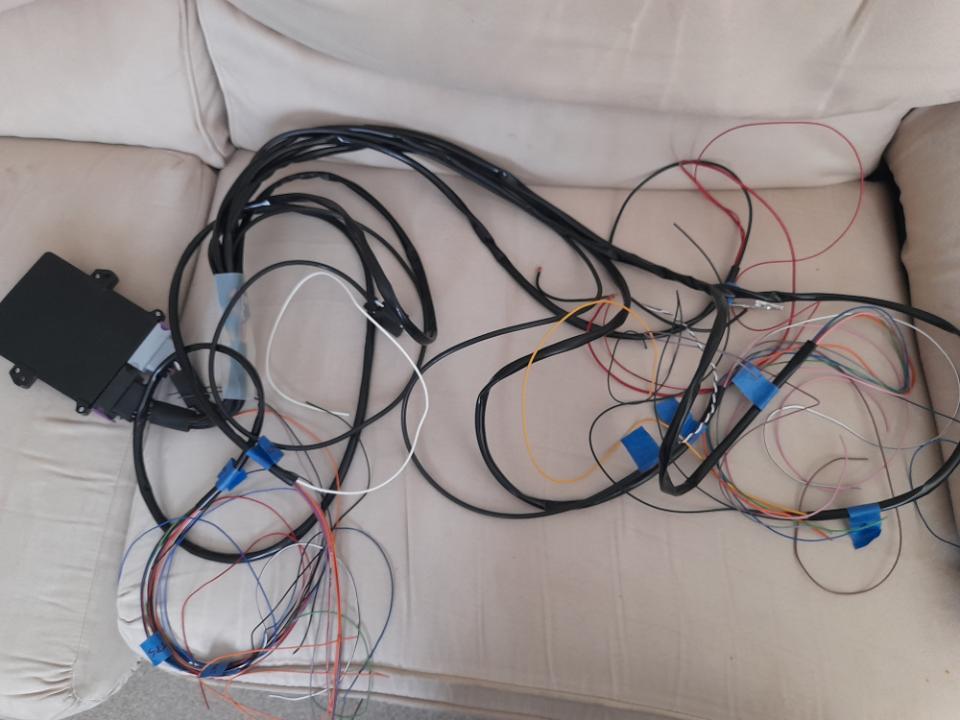
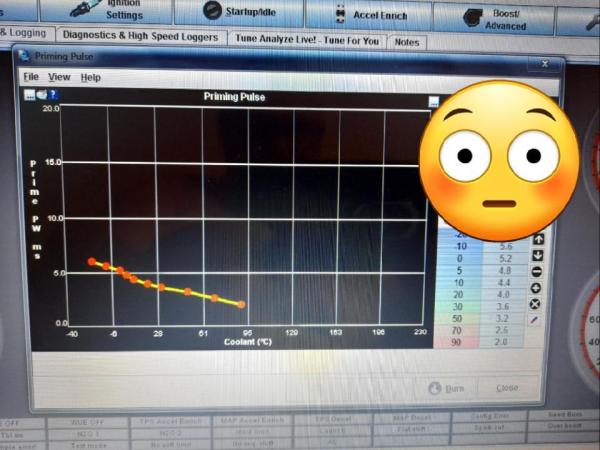
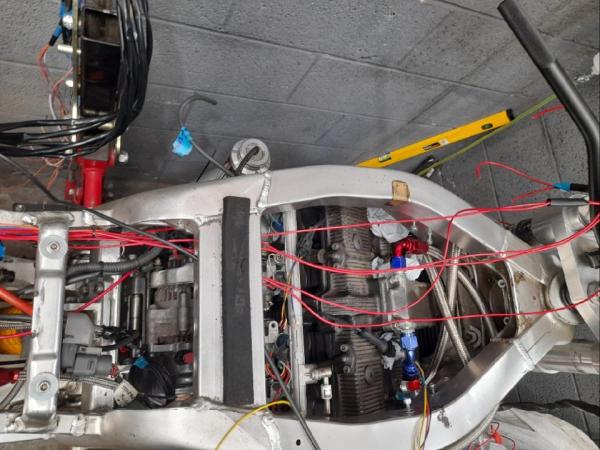
As suggested by a few people, I will reduce the quantity of oil lines. Rewelded the top engine breather outlet. Wiring is almost complete. Just the a/f meter to wire in. Arttu has helped me with a wiring solution for this. I hooked the laptop up to check that all the ecu, fuel pump and sensors were all functioning. Next week, I will do a final check of all connections and nuts and bolts. Recheck all the laptop parameters are correct again and then I can check the oil pressure before giving it some sparks and fuel.

-
Yes, I have the white wire from the ECU connected to the fuel pump relay.
-
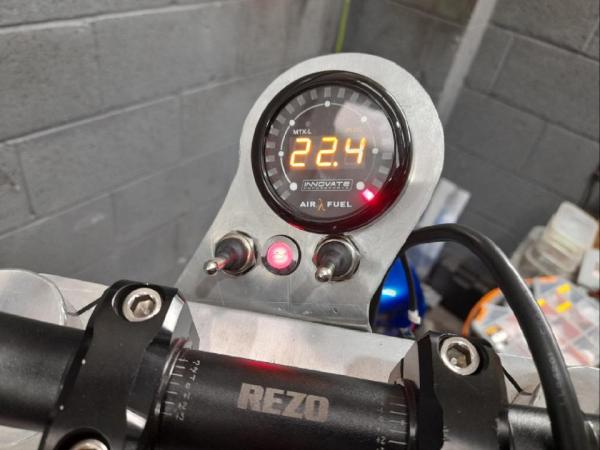
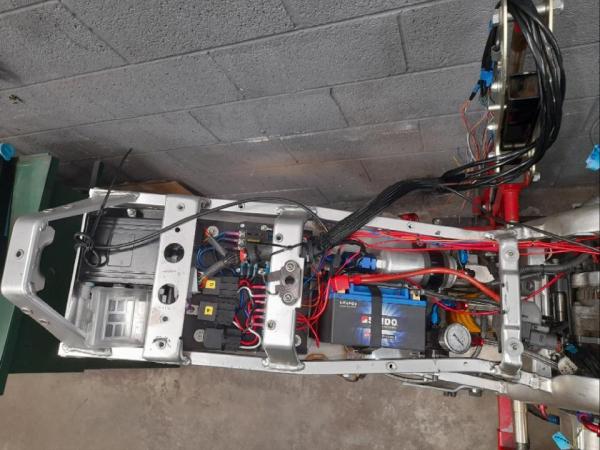
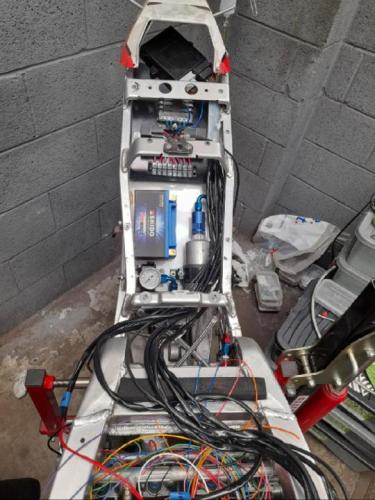
Bit more progress. Power connected to the distribution board. All relays functioning as they should. Oil and fuel pump, A/F gauge operating. Engine turns over and kill switch functions. Oil pressure warning light connected. So just the ECU sensor wiring to finish off and I can connect the laptop and set up the parameters to get it running. I will keep the ECU wiring seperate from the switches and relay stuff. Wrapping the looms will happen later.
-
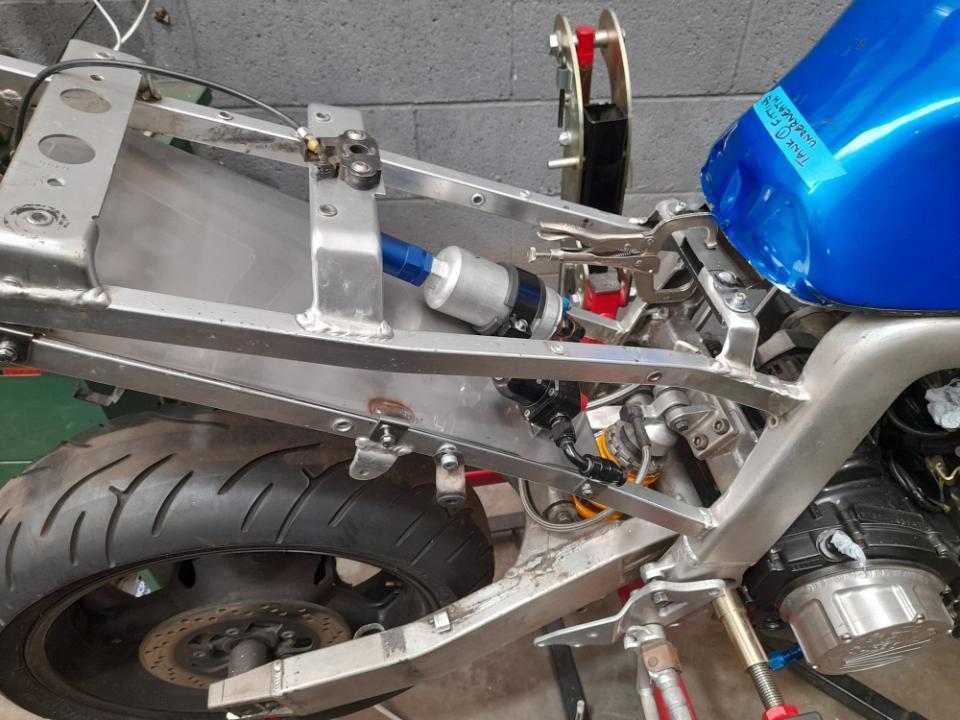
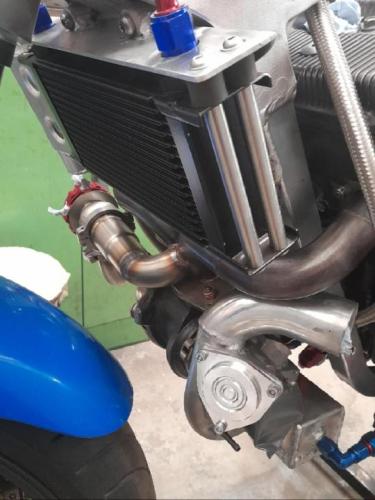
Fitted the oil cooler and oil lines today. The steering lockstop will have to be altered now as the forks contact the oil cooler bracket......but thats a small problem to be dealt with at a later date. Also, I cut the tube for the plenum chamber and this needs to be finished so I can then start fitting the various sensors and at least make a start on connecting all the ecu wiring together. The electrics for fuel pump, ignition, oil pump, etc will be on a seperate loom. This bike is going to be ugly and very rough around the edges. The goal is to get it running.

-
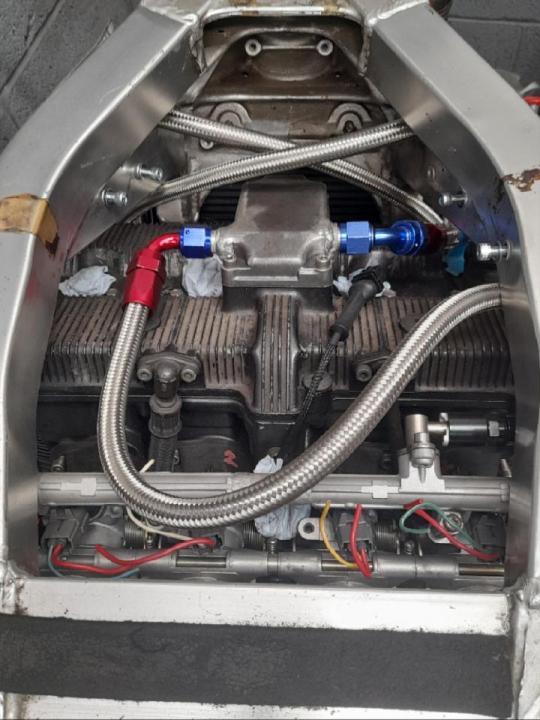
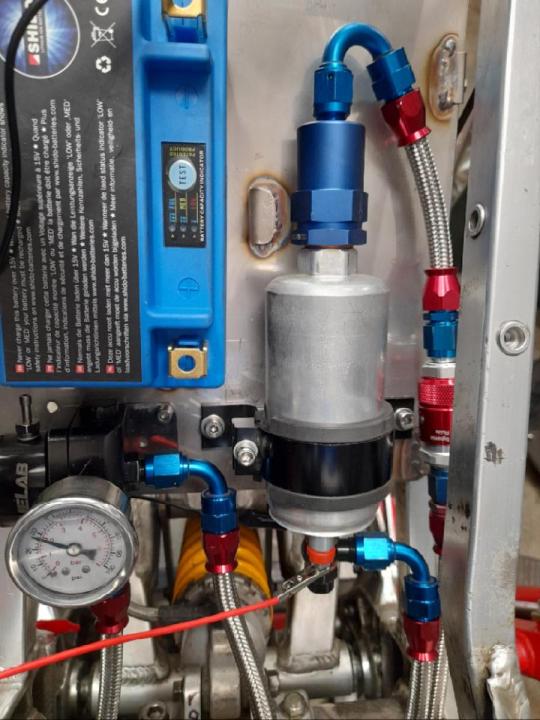
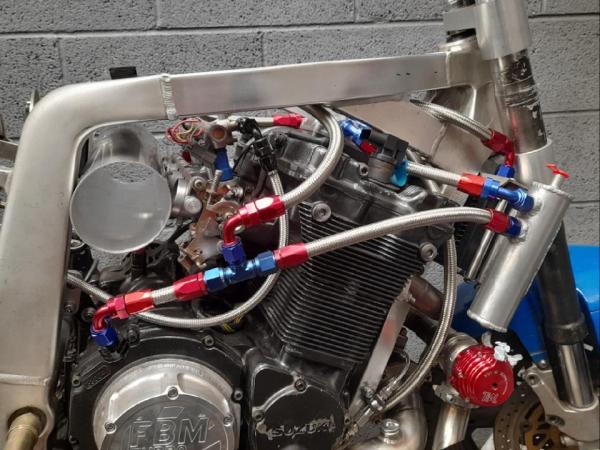
Finished all the pipework and fittings for the fuel system. Put some fuel in and gradually pressurised the system. Got up to 2 bar and no leaks. I was very happy that the modified fuel rail and injectors had no leaks. I fully tested the system up to 4 bar and still no leaks. Very, very happy.

-
New Bosch stick coils fitted into original Suzuki spark plug rubbers and they seem to be held quite tightly despite the weight and extra height of the coils.
-
All of the space I thought I had is rapidly disappearing. ☹️
-
More to follow. soon.
-
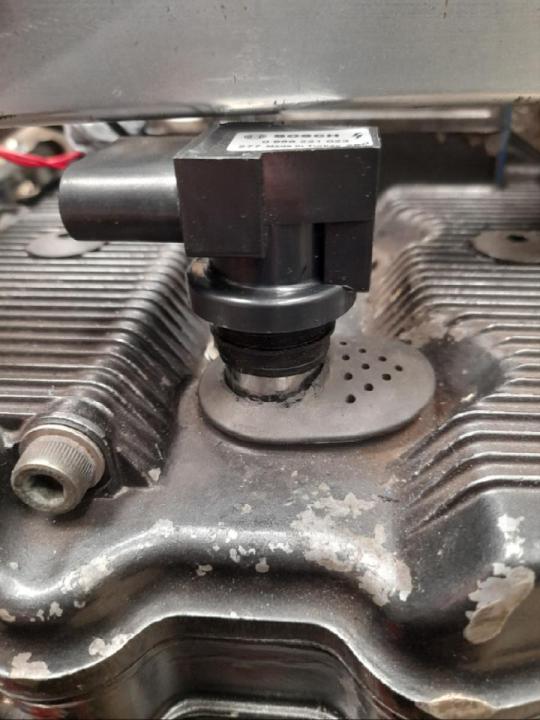
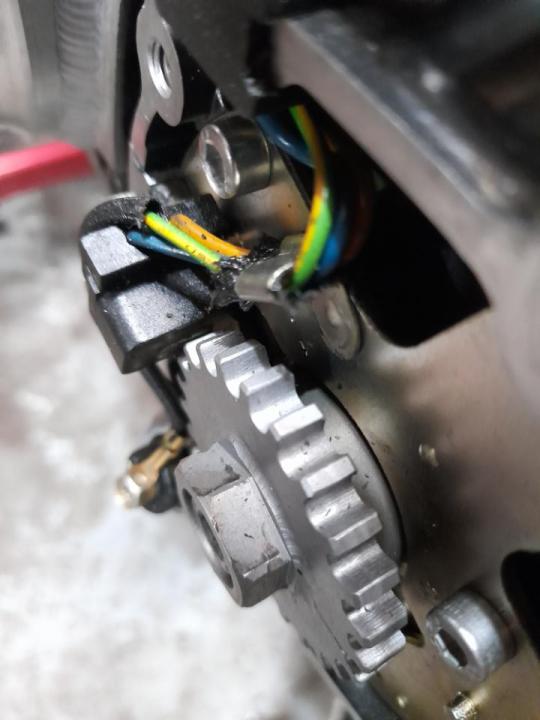
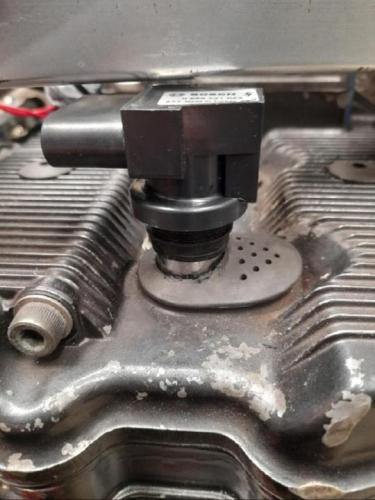
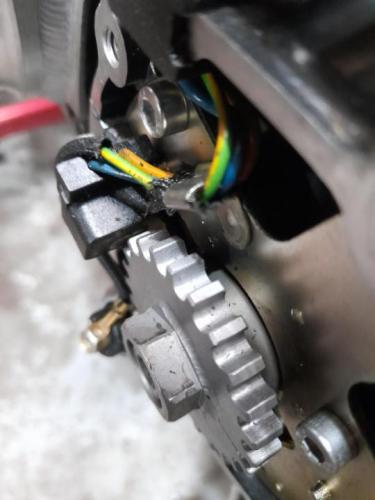
Crank trigger wheel supplied with the ECU
-
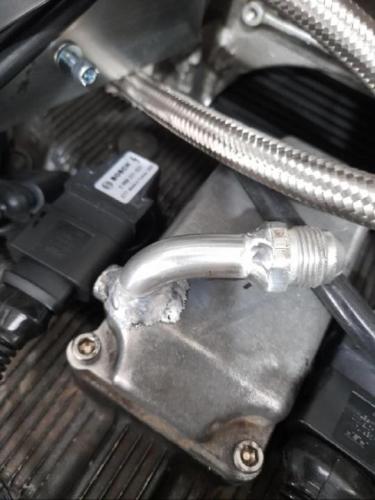
Facet pump has been crudely bolted in place and a small catch tank from the turbo oil drain has been fitted. The tank will have to be redone as I'm not too happy with it.


-
I was lucky enough to get a Megasquirt ECU wen I took on this project and it came with various sensors and a wiring diagram supplied by Arttu who is on this site. Once again, I am in unknown territory as I hate wiring but I have come this far and I am trying to get my head around what I have to do.

-
Have now fitted an FBM clutch access cover. Stuck the fuel pump and fuel reg on a plate, ready for the fuel lines to be plumbed in.

-
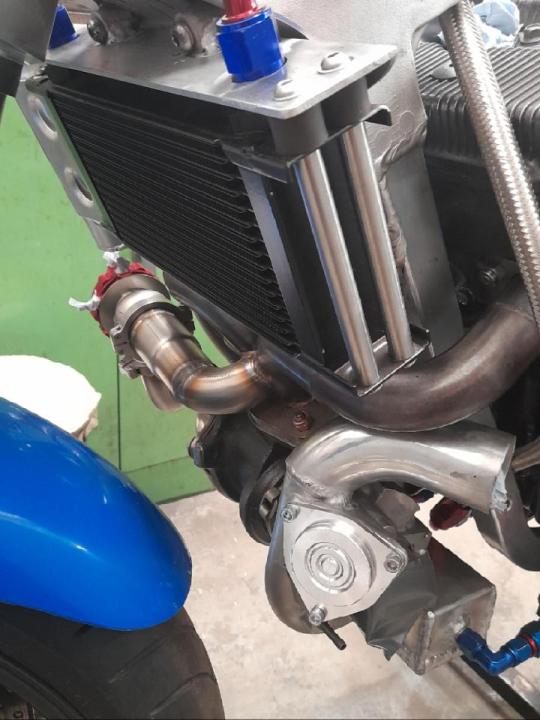
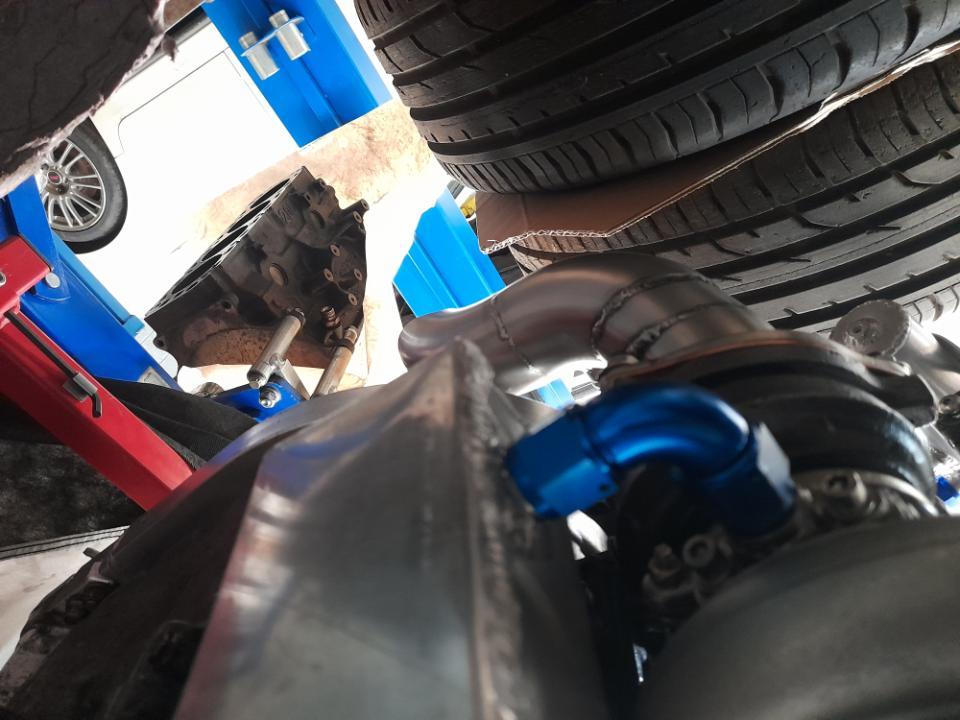
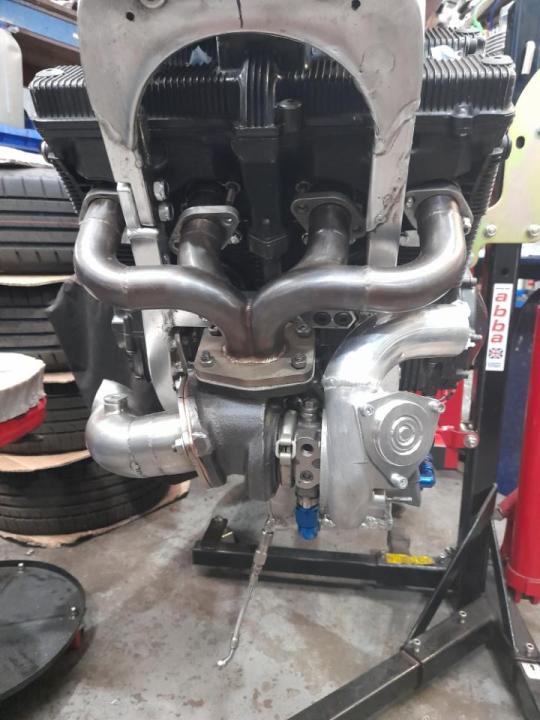
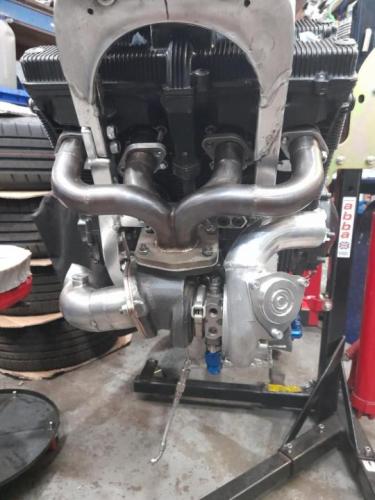
Moving onto the turbo which came from a Volvo. The header pipes were made already. I have welded the wastegate flapper up, thrown away the actuator and am in the process of fitting a Tial wastegate.
-
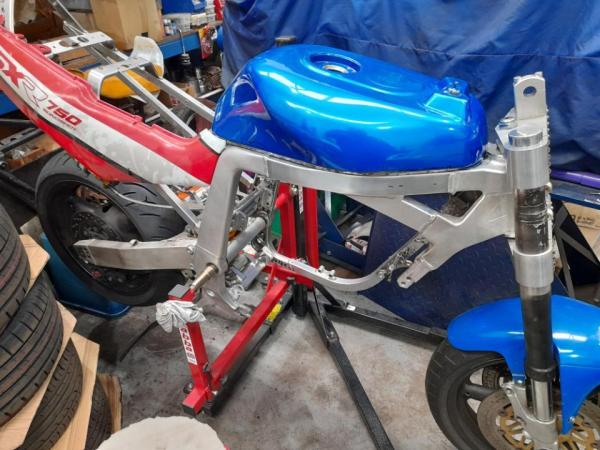
I had to find some better plastics which a friend got me at an Autojumble and at all the lugs are in place. The tank was originally modified to fit a Bandit frame but after some welding, I have managed to get all the fuel line fittings welded. The tank brackets still need to be modified.
-
So to get from this stage to the engine in has taken me 5 months.
-

-
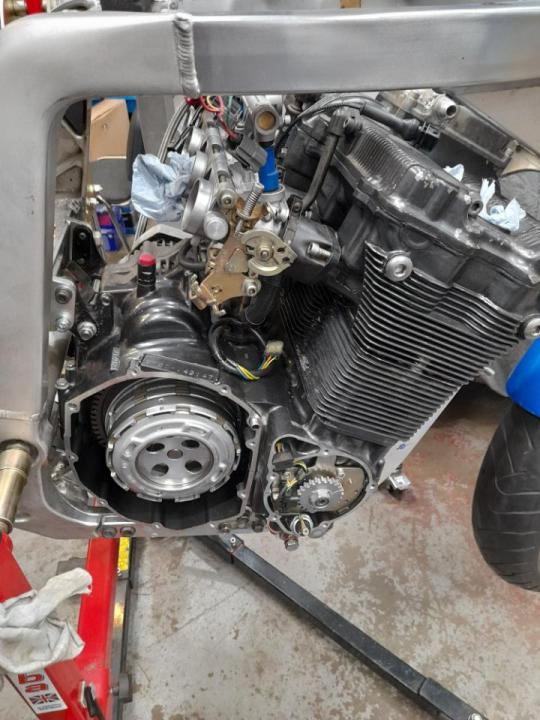
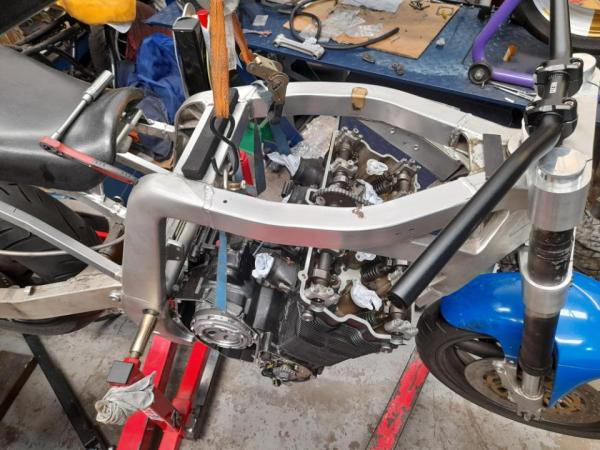
Standard cams fitted and valve clearances done, it was time to get the engine crane out and fit it in the frame. Attempt number 1 was made without the cam cover fitted but then I couldn't fit the cam cover on. Attempt number 2 was more successful. But I did have to grind a small section of the frame...about 5mm... and then the cam cover slid into place. Threebond sealant everywhere and much poking and prodding to fit the rubber gasket and finally secure the cam cover.
-
-
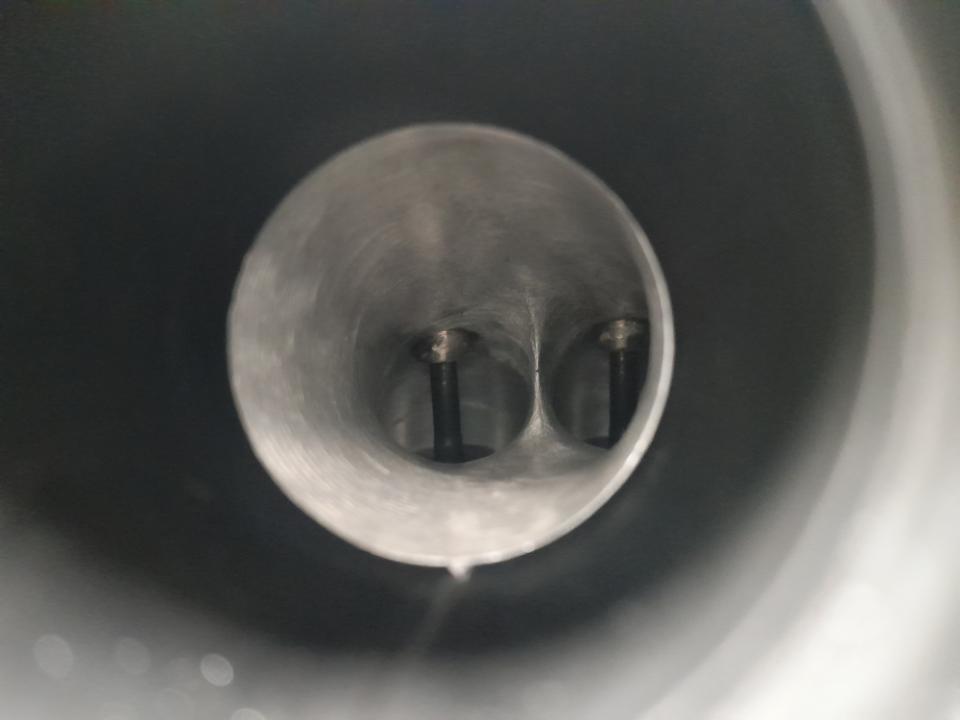
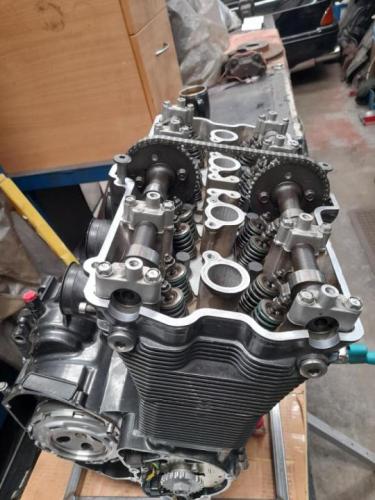
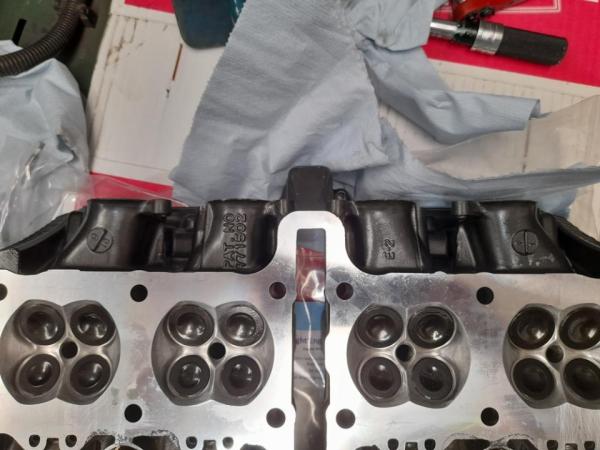
I skimmed the head and got the valve seats re-cut and was very happy to get this bolted down and in place using APE studs and nuts and genuine gasket.
-

-

-
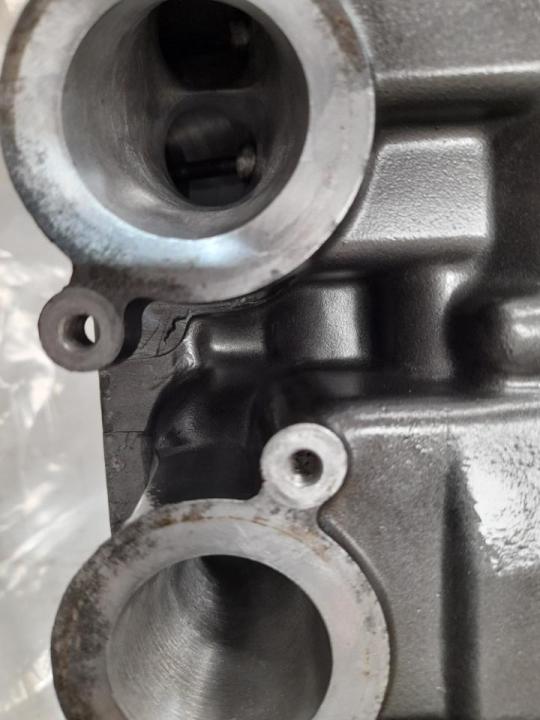
The cylinder head had been worked on by a local engine builder when I got it. The work looks fantastic.