


ral
-
Posts
160 -
Joined
-
Last visited
Content Type
Profiles
Forums
Events
Posts posted by ral
-
-
On 12/31/2022 at 7:17 PM, johnr said:
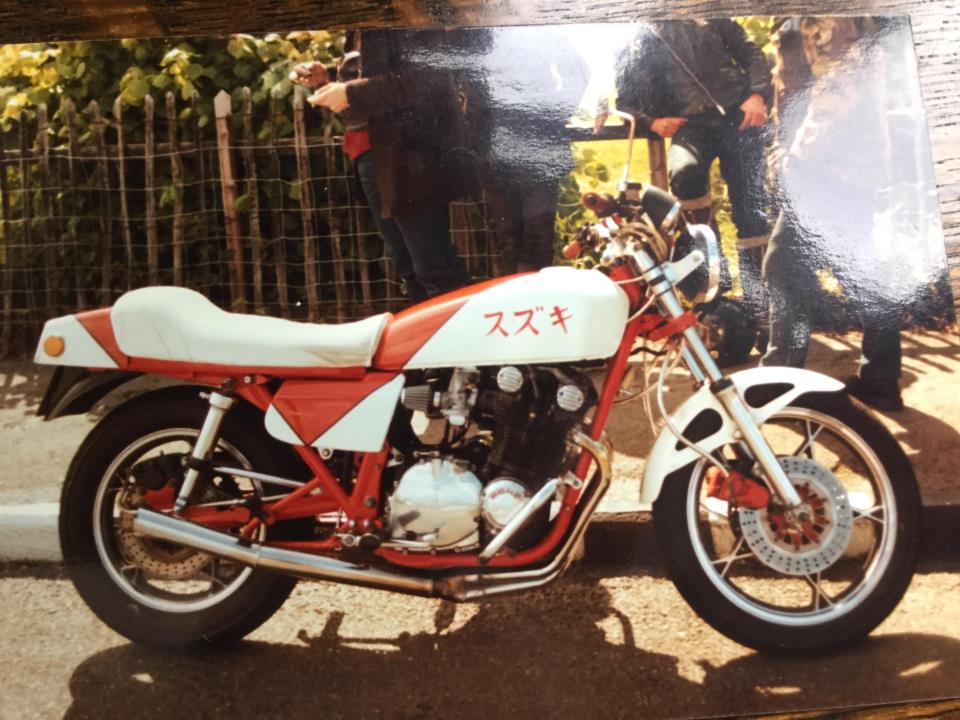
gs1000 spoked wheel. theyre uber rare and very sought after. when suzuki made the kat szx for use in some race series in the southern hemisphere, they raided the spare parts bin for stuff and used spoked rins from the early gs1000, theyre rare cos most spoked suzuki rears of the era had a drum brake and most disk braked rears were on cast ally rims, so this is the rare spoked rim with a disk brake. when people buy sets of spoked wheels from a gs to build bikes, 90+% of the value of when they pay is in the rear wheel hub. theyre just super rare, tons of spoked front hubs are out there, but this particular combination of spoked rim and disk hub is probably the most desirable of all the vintage suzuki wheels. ive seen just the hub, no rim or bearings, but just the hub, fetch over 250 quid. thats a great find. (a very few gt750 kettles had this hub and an even smaller number of re5's, but that does nothing to make them less sought after). the fact that someone in the past has fitted it with an ally rim just saves you having to do it!!
My 1st early GS750 also had wire wheels with rear disk, I assume the front and rears wire wheels would be the same as fitted to early GS1000s, I paid £20 for a rear at Stafford last year

-
Agree with imago’s answer, the expose ends of the wires at the connection over time will oxidise as will the pins/bullet and spade connectors, this oxidising will also creep up the wire, you might need to replace some connectors cutting back into clean wire.
The horn can partially seize internally as well and this will reduce the volume it operates at.
-
Not sure if it’s any help but When I researched the ET colours if memory serves me well there was a total of four colour options, Black, Red, Blue and Silver,think they were all a metallic/ pearl, I’ve not come across any White/ Off white/ Cream options.
-
3 hours ago, bluedog59 said:
I have an ultrasonic cleaner and have run dozens of carbs through it without any problems. The basket the items sit in should have rubber feet so the components themselves are not actually shaken, just the cleaning fluid. The only other way to damage things is by using an unsuitable cleaning agent.
Nice if you’ve got the ultrasonic cleaner bluedog but when you ain’t and needs must then the acid works fine, like I said just don’t leave your float bowl or anything else for that matter soaking in the stuff, at £6 a gallon it’s a cheap option and is suitable for the job if used with caution, cleared my passages straight away

-
On 9/3/2021 at 1:19 PM, no class said:
looking for options on a fuel petcock swap…..what works/ fits the hole spacing on the tank ….. thnxs
A point to bear in mind is that if running a std airbox you’ve only got about 35mm clearance from the bottom of the tank to the top of the airbox ( measured from my ET running std airbox )
-
I cant advise on the ultrasonic clean as I’ve never had it done, I completely stripped mine and used carb cleaner and high pressure air line to blast through every passage main issue I had was the float bowl passageways as somebody already mentioned, they are a pig to clean out, small amount of brick cleaning acid cleared them but be warned don’t leave the float bowl soaking in it or you’ll find it dissolving away, I used a small syringe to feed the acid into the passageway and it worked a treat, just remember to flush in hot soapy water after, also applies to pilot jets, take them out soak in said brick acid for 5 mins again wash with hot soapy water and blow dry with airline, just confirm small hole right at the tip is clear otherwise it won’t tick over very well.
-
 1
1
-
-
I would be checking wiring loom, especially the connectors they tend to tarnish and go mouldy when stood for that long,
Personally I would drop the motor out for full strip, vapour blast and rebuild with all new seals, again after so long they will have hardened off IMO.
Deep clean carbs again new seals,gaskets, same treatment to brakes.
Only think I wouldn’t be touching is paintwork.
Great bikes, BUT YOU KNOW THAT ANYWAY
-
 lots of Harley taps/ internal external threaded, the three HD taps I have are not the same thread as the Pringle, having said that though find a fuel tap you want to fit that gives you the clearance you need and knock up a mounting to fit both the tank and the tap.
-
1
-
-
Fuel tap hole centres on ET fuel tank are 50mm
-
21 hours ago, no class said:
thanks….. I know the Pingel products and have used them with success. I seem to recall there was a non-vac type valve on the Yams or kwaks that was mentioned on here to work on the gs …..
Most are gravity fed taps so you won’t need the vac pipe, there are single and twin outlets with reserve and no reserve
They do do a vac operated one if that’s your thing,
As far as I’m aware they are all high flow taps but you will need the adapter plate to fit them onto a standard gsx tank.
-
Pingel taps will fit but you will need there mounting plate as well, makes it an expensive job I’m afraid.
All available on the Eblag.
Just put a repro one on mine at around £45 and it works fine.
-
1
-
-
OLD CARBS ARE A COMPLETE PHOOKERS
SO MANY BITS TO PHOOK UP ON
 If in doubt disconnect cable set tickover adjuster until happy reconnect cable.
And don’t think your pilot jets are clean just cause you can see daylight through them
-
23 hours ago, Mouse said:
About 20 years give or take, but hopefully about to get a new lease of life
.
yes it looks like a few hours sat there with a tin of servisol super 10, do i just spray it on the connectors and wait or do i have to abrade the connector as well, and if so what is the best way to clean inside the female connectors ??.
thank you.
I use a soft wire brush to clean the male connectors, hold the connector in a pair of long nose pliers and scrub away any crud, scotch bright works as well, small round file to clean up female connector, or splash out on new connectors and replace all the old ones, you can reuse the small multi connector blocks and just replace all the male and female spades with new, strip the wires back to clean copper, you will be surprised how black and corroded it is at the old connectors.
Bit laborious but worth doing to freshen everything up, don’t forget to clean all the earths, check continuity with a meter once done.
Good Luck
-
Looking at that lot I would be surprised if you have any current running through it, try removing and cleaning up all the connection points, if you’ve got a meter test each wire to see if there is any power or continuity getting through, bad earths will also stop you getting anything, again remove connections clean and refit.
looks like it’s been stood a while.

-
2
-
-
I might be wrong on this but I don’t recall the bottom case being painted on the thou, it wasn’t on my last one owned for 25 years with no known engine changes, finish over time yellowed slightly and appeared to be more of a clear coat finish on upper cases.
-
Sometimes needs a little encouragement to show level so tilt bike slightly over to clutch side and presto appears like magic 3200 is your start point as will depend on a few factors, best checked when warm and stood for ten mins, on level ground.
-
Don’t think it would be long before them back wheels were missing if I ad one of them
-
-
On 3/4/2019 at 7:38 PM, arnout said:
Great links, thanks
-
One of those little red fibre washers will do the trick as will swell up once it gets some oil on it.
-
What exhaust system is on that.
-
Thanks for PM, I will need to measure ports and get back to you.
-
4 hours ago, YoshiJohnny said:
I have a decent set of standard GS1000 Mikuni 29mm
PM with pic & price if you would like to sell, thanks
-
5 hours ago, gs7_11 said:
Which cylinder head?
Chain drive Gs1000 E as far as I’m aware, what different heads are there??
1150 flywheel removal
in Air Cooled
Posted
Not sure if your heating first then applying the puller, I would try fitting the puller and tightening it up before applying any heat. Use a wet cold out the freezer tea towel around the rotor to reduce heat spread, the ones I’ve done pop off without twatting the puller hard, freezer spray is also a good shout as the shock from heating to fast cooling might persuade the bugger off, good luck