scott-s
-
Posts
229 -
Joined
-
Last visited
Content Type
Profiles
Forums
Events
Everything posted by scott-s
-
So...this bike is "finished" but not on the road yet. I have very few miles on it, riding it (illegally) around the back roads near my house. It definitely needs some tuning down low. I can feel it surging or hunting at part throttle. Runs like a raped ape up top. It can be a little difficult to get cranked if I let it sit for a few weeks. Not having made it to the dyno yet, or even pulled a plug, those things hint to me at being lean on the bottom end. If I remember correctly, the mixture screws are on the engine side, so they meter fuel and not air. Think there's anything I can do with them to help? Or just wait for the dyno runs and see exactly what I need to do? The DynoJet kit didn't come with any pilot jets that I remember.
-
There's a guy parting out a 2001 Bandit 1200 near me. I'd like to use the smaller, neater oil cooler on my build. I have the 750 Teapot oil cooler and it's huge and the oil lines are routed oddly because they were hidden behind plastic. Now the bike is naked. He sent some measurements and it looks like it will fit my frame/mounts. Any harm in swapping them out? I asked him for the oil lines and hardware, too. Think that will all swap over to the 750 engine and clear the exhaust, etc.?
-
This is the best place I've found for this specific genera of OSS. There's the GSResources site, though they tend to focus more on the GS and the older models. But still some great Suzuki knowledge there. (Mods, I hope it's OK to post a link. https://www.thegsresources.com/_forum/forum.php )
-
I plan to be there! Make hotel reservations now. Event tickets go on sale in June.
-
Oct. 9-11. https://www.barbermuseum.org/barber-vintage-festival/
-
Yes.... missed last year but plan on going this year. Mind blowing place/event.
-
I'm in South Carolina, about 20 miles south of Charlotte. Any of you ever make it to the Barber Vintage Festival?
-
But I dont have a matching connector for either of them.... yet. I may try removing the wires from the Teapot connector and then removing the connector from the B400 harness..... see if I can just push the pins in instead of splicing wires.
-
Edit: I have with wiring and the mount for the clutch safety switch. I found the missing switch itself, genuine Suzuki, for only $12.86 shipped, so I'll incorporate that. There's no mount on the GS550 frame for a side stand switch. I'll need to bypass it.
-
I studied the 750 harness today and the wiring colors all seem to match. I ordered a Bandit 400 wiring loom so I can use the correct male connector. I won't be using the side stand switch or clutch switch (this is all going in a GS550 frame). If I just use a jumper for those two switches, will the turn signal/side stand relay in the 750 harness still supply the correct power and ground to make the neutral light work?
-
A couple that I'm still trying to wrap my head around is why the Neutral light gets a Blue/Black (LB) from the side stand diode. Hafta figure out a source for that on the 750 harness.And what the Orange/Green is for (OG). It runs from the RH switch, turn signal relay, turn signal fuse, etc.... is it just a fused power source?
-
Ah, sir..... you are correct. I should have paid closer attention to the legend. Gr is indeed gray and not green.
-
On the B400 there is a GREEN coming from the ignition switch and the headlight switch. The only two colors going to the dash back lights are GREEN and BLACK/WHITE. The BW is battery negative (earth) , so the green is power..... keyed power, right? But the headlamp fuse goes to the ORANGE wire. And on the B400, the PASS (passing flasher for headlight) it also looks to go from a GR to an OR wire. Am.i correct in thinking I need to supply power to the GREEN on the B400 dash for power for bulbs? The 750 doesn't have an ON/OFF switch for the lights. On the 750, power is fed from a GREY wire and BW (earth).
-
That's the plan. Probably going to get a donor B400 harness just for the plug. And, yes, there will be "extras" on each end I won't need.
-
OK, that makes sense. And, on the 400 diagram, the BW (black/white) looks to be coming from the negative terminal of the battery, so it's an earth/ground? Now I need to study the GSX750 diagram and see where they were getting the tach signal. That would go to the BY, correct?
-
Once I figure out the purpose/source for the B/Y on the Bandit 400 harness, I just need to get the same from the 750 harness and then find the corresponding wires for the oil pressure, hi-beam, N, turn, etc., right? If I'm correct, what's a good source for keyed power on the Teapot harness (2000 model)?
-
Here's the Bandit 400 wiring diagram. Am I correct in thinking that the Black/Yellow is keyed power? I only see it going to one of the two coils and the ignitor. Is it only supplying keyed power to the dash?
-
Working on a project that has Teapot/GSX750F engine, suspension, etc, in a 1980 GS550 frame. I have '91 Bandit 400 gauges and idiot lights I plan on using. I am now faced with mating the B400 wiring to the 750 harness. The plugs are completely different. I have a wiring diagram for both and am studying what goes where. I will need back lights for the tach and speedo, a neutral light, oil pressure light, turn signal indicators and Hi-beam. I can forgo things like gas gauge, water temp, etc. This the the Teapot 750 plug. This is the Bandit 400 plug (notice the single Black/Yellow plug, too)
-
I guess I still need to check that #4 carb body. See how the #16 hose attaches? Need to make sure that's not open to a vacuum leak.
-
Ah, I see... I saw those before but I thought they were hard plastic. Just went out and squeezed one and I see that is indeed rubber.
-
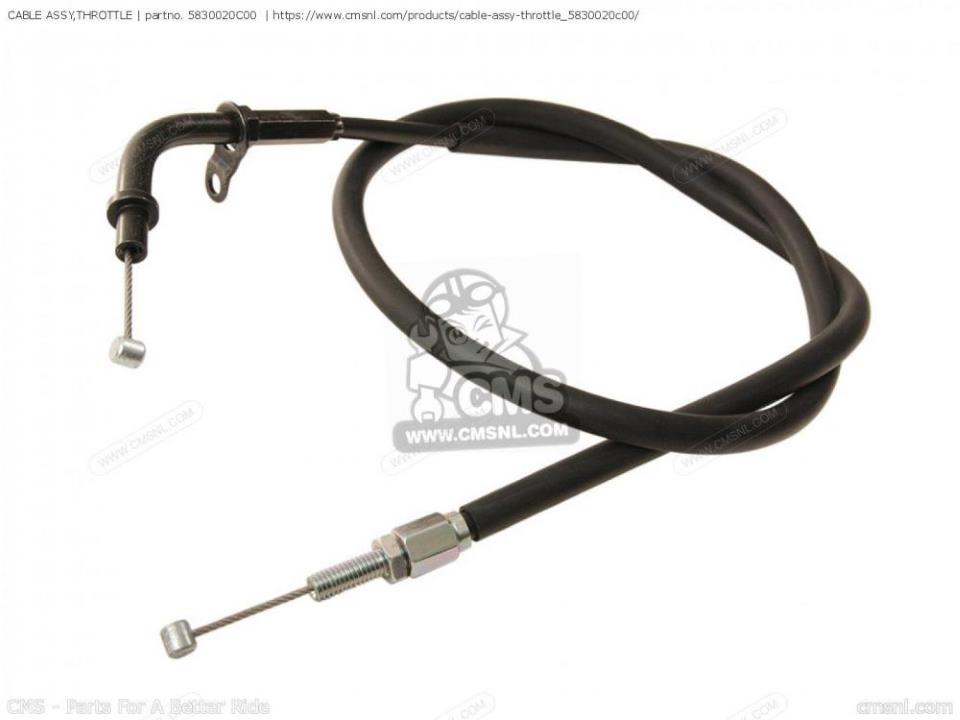
The carb cable mount is just a plain hole. There's a "cross bar" that the entire rack mounts to. On the underside of that rack is a countersunk hole in the shape of a nut. To hold the nut captive. To get the cable tight at the carbs, I had to screw the larger barrel type nut all the way in. The throttle works OK, but I can roll it forward and the end of the sheathed cable will slip out of the holder at the handle bar end. It's **almost** adjusted correctly, but not quite. Fuel tap only has one outlet, so I'll have to get a T. What are #16 and #21 in the diagram? Vacuum for the petcock? If so, I guess I need to find a nipple for the outside of #4 carb. And while we're at it, how do you vacuum sync these carbs? I don't see a place to hook up gauges.
-
I have a set of BST-36 carbs from a '96 GSX-750F. The throttle cable seems to have a little too much play in it, even when the slack is taken out. I'm used to seeing two lock nuts on the cable at the carb end. I tried slipping one over the end of the cable but it won't fit over the barrel. I also looked at the diagram and it only shows one nut. There is a place on the carb rack for the nut to be held captive. If I try to back out on the large adjuster nut at that end, then the cable is loose at the carbs. What am I missing here? Also, where does the fuel line attach? There are four T fittings. The top two are obviously vents. At first, I thought that the fuel line went on the two lower Tee's, but the diagram shows them as open vents. The diagram shows a line attaching to the RH side of the carbs. I see a barb there. That line has a TEE in it also and just seems to dead end on the diagram. How, exactly, do these carbs get fuel?
-
I should clarify. The slides ALREADY have two holes on either side of the needle. The DJ kit says to drill and tap them and install some threaded plugs that are included in the kit. The instructions say that, for tuning purposes, one of the plugs can be removed. A member here and my shop owner buddy both recommended leaving the slides stock and just using the adjustable needles and the jets.
-
I have a 2000 Teapot GSX750-F that I picked up over a year ago. The seller told me that he burned out the starter trying to start it with gummed up carbs (the carbs were leaky and I believed him). Found a used starter online, bought it, tested it, and then the project sat. I finally got around to swapping it and found out I ordered the starter for an earlier model. Doh! Ordered the correct starter. Tested and installed it today. Just for shits and giggles, I tested the starter I removed and it worked! It also looked to be an aftermarket replacement, not the original Denso (which is what I installed today). I now suspect the solenoid, maybe? Or did he simply run the battery flat and think he killed the starter? Anyway, the engine is out and on the bench. Carbs, exhaust and spark plugs out. I know it turns over fine by hand. Wiring harness is in a box. I tried just going to the POS and NEG posts on a spare battery I have and the solenoid didn't do anything. I pulled the 30A fuse and it looks good. The manual has a test procedure that I need to study a little more, but it assumes the bike is complete and there's a battery in the circuit. The power to the starter seems to run through the start button, through the clutch safety switch and then to the starter motor. Am I dead in the water as far as testing the solenoid, etc, until I get the bike back together? I tried using my battery on the starter that I installed today after I put it in the engine, but it looks like it needs to get ground to start. I can do that with the starter in my hand and the spare battery, bt not sure how to do it now that the starter is in the engine. (The new/old starter DOES test good and turn over out of the bike). I now suspect that he either fried the solenoid, starter button or simply ran the battery dead. But I don't know how to do any further testing with the engine and wiring harness out of the bike and separated from each other, at the moment.
-
FWIW, after getting some feedback from a member here and talking to my buddy who runs a shop up in North Carolina (and has generally favorable experiences with DJ), I went ahead with a "75% install" of the DynoJet kit. Meaning I adjusted the mixture screws per their recommendation (plugs were already drilled out), used the 140 DynoJet mains (middle of the "rich" jets, I can still go up and down) and used their adjustable needles. What I did NOT do is drill and tap the slides for the correctors. Both guys told me not to bother with that. Even DJ mentions that one of the two (per slide) can be removed. We'll see where this gets me.....someday.