


arnout
-
Posts
306 -
Joined
-
Last visited
Content Type
Profiles
Forums
Events
Posts posted by arnout
-
-
I once replaced the large o-ring on the starter motor to fix a leak, but as the new o-ring didn't stop your oil leak I reckon the source must be elsewhere.
2 hours ago, 1135 said:It is also interesting that the generator cover gasket when you remove the starter does obscure some of the hole . I was wondering if it was making like a pocket that retains some oil infront of the starter., still does not explain how it gets out!
This area inside the alternator cover where the wires go into from the hole, is supposed to be dry. If I understand correctly this is not the case on your engine? The wires from the stator are fed through a D-shaped rubber seal/block. But perhaps that bit is missing or damaged allowing oil to pass through?
-
4 hours ago, Spirit said:
Arnout, all good thoughts. Where did you get the proper size outlets to plumb the openings? Just a set of right-angle metrics?
The blanking plugs you mean? I picked those up from a local DIY store reckoning the threads would be some kind of industrial tapered plumbing type. So no normal metric threads from what I remember, but it's all a very long time ago.
I thought I had saved those original 90 deg fittings somewhere, but they're not in the place I expected to find them. Which doesn't bode well for the adapter plate still being in my possession. But I'm not going to look for the plate unless you are really interested as I'd have to search through heavy crates packed with engine parts that are hidden behind other difficult to get to stuff. So I'm actually kinda hoping you'll be able to locate such a plate on Eblag or similar.

-
Here's a link to a service manual.
-
 1
1
-
-
There is a chance I *may* have the Lockhart (Derale?) oil filter adapter plate in question. It was originally installed on the 1100 engine I sourced for my old Kat many years ago. Here's a (tiny) picture I once took of the inside of the plate for further reference.
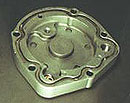
I'm not sure if I still have it or whether I sold it along with the small oil cooler in the kit some time ago. But if you absolutely want it I can try and find it in one of the piles of parts in my "workshop". I agree with Gammaboy though on the benefits of using the oil take offs on either side of the filter cover instead of using the adapter plate, and that is how I changed my oil cooler setup years ago. (I swapped the 90 deg fittings for blanking plugs.) Also I thought these fittings were rather undersized and so perhaps would limit the oil flow to the cooler.
-
On 7/1/2018 at 10:48 PM, R1guy said:
Does anyone have any detailed drawings/diagrams of the bracket that the faring bracket fixes to the frame at its lowest point?
Perhaps someone has, but not me. I can however provide some insight on using an ET/EX frame for Katana use.
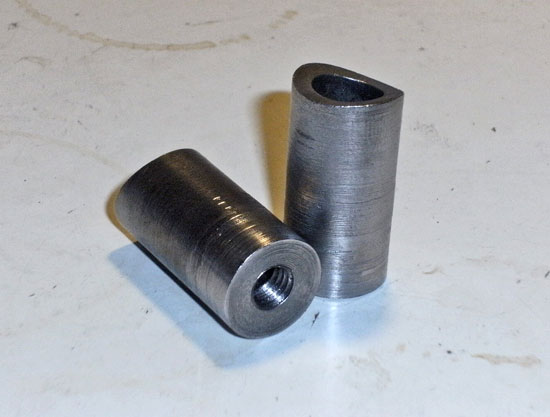
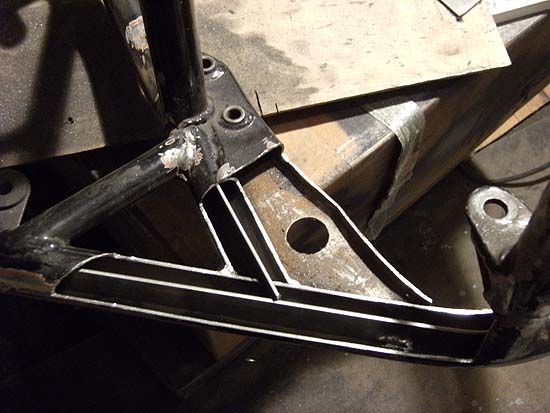
To accept the Katana bodywork (fairing, tank, seat, tail, side panels) all mounting points need to be modified as as they're all different and in different locations. For the lower fairing subframe mounting point I made these instead of trying to copy the original katana ones:
On the headstock you'll also need to add mounting points to attach the upper part of the fairing frame onto.
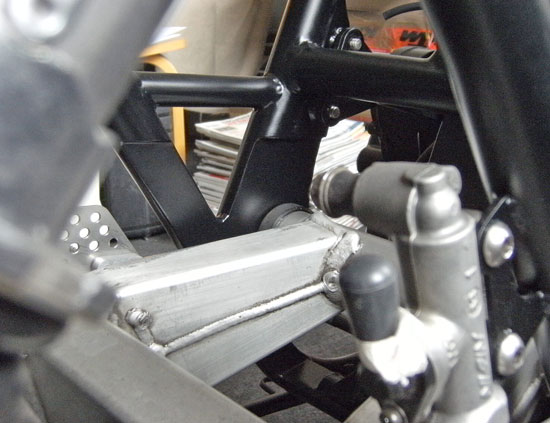
Here's a picture of my GSX750EX frame with the added bodywork mounting points beside various other mods:
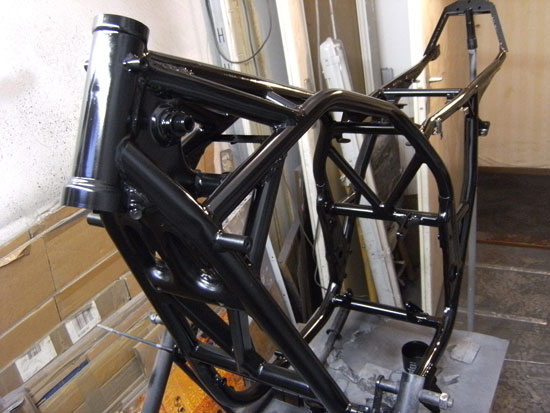
Because of the intrusive bracing around the headstock I decided to keep the stock front tank mounting points and alter the points on tke Katana tank itself instead.
What further sets the Katana frame apart from ET/EX frames beside the obvious passenger peg supports welded to the frame, is the angle of the subframe. On a Katana this section is swept up slightly compared to a regular GSX frame. The subframe tubes will just peek out from under the Katana tail if not modified.
Both the seat lock and bracket it is fitted to also differ. I managed to reuse the old EX/ET lock, but only because of adding a cable operation to it and omitting the key hole in the tail panel.
-
Nice EFE. Not keen on the clocks though..
-
Rarity
in Air Cooled
You can browse the RDW database. I found 200 1135cc GSX1100's (including 1 SB5) and 100 Katana 750's and 1100's.
Somewhat strange to find such round numbers though..

-
5 hours ago, RUSSP said:
When the motor starts to warm up I get a lot of smoke coming from the engine breather on top of the rocker cover.
Venting off just water vapour from condensation in the cases seems probable. Also if you've recently changed the oil that might contain water as well.. That is, the first couple of rides on my EFE using mineral oil to help bed in the rings of the new pistons/bore quite a bit off steam escaped from the breather hose. (Thought the loom was shorting out!)
So.. If the compression is OK I'd say let the engine run and get to decent temperature a few times and for longer periods. This should get rid of the water inside the engine.
5 hours ago, RUSSP said:..and it seem to be pressurising the crankcase pushing some oil out via the cylinder base gasket
If the engine breather isn't blocked (make sure it isn't) this oil weeping is a completely unrelated issue. Slightly leaky base gaskets are not uncommon. More a cosmetic nuisance than mechanical problem (unless the gasket is breaking up and blocking the oilways to the exhaust camshaft
 ).
).
-
1
-
-
Yep.. AFAIK all ET/EX seats are the same or are at least interchangeable.. 750 or 1100, big or small tank.
-
4 hours ago, no class said:
Anyone know the "max" safe bore size for a 83 katana 1100 engine case ?
Not sure on actual max. bore size, but the limiting factor is the space between sleeves and acceptable min. wall thickness of these sleeves. As far as boring and so weakening of the crankcases goes, the use of a solid "big block" is intended to provide additional support for the crankshaft where the bored crankcases are less able to do so.
-
1
-
-
Much better.

-
1
-
-
3 hours ago, Kraptanaman said:
Is this the right one? for bottom of the engine.
AN -6 AN6 BLACK JIC Flare to M14x1.5 METRIC STRAIGHT MALE Hose Fitting Adapter
Yup, I'd say so.
Most like to use AN8 oil hoses/fittings though, but I think AN6 is large enough for the oil flow required on aircooled Suzuki's. Also hoses/fittings etc will be cheaper and less bulky.
-
On 17/02/2018 at 6:47 PM, Youngkidoldbike said:
Took the carbs out and found out the problem.
Cool. Thanks for reporting back.
-
On 15/02/2018 at 1:54 PM, SATANSAM said:
QUESTION:
IS IT THAT IMPORTANT TO PUT SILENTBLOCK IN THE BOTTOM MOUNT WHERE IT SCREWES TO THE SWINGARM?
Uhmm.. Pictures would help, but I guess perhaps the newer GSX-R shock might have a spherical mount in the bottom eyelet rather than a silent block to compensate for slight misalignments? Investigate?
-
Black smoke = over rich mixture. Perhaps the choke is stuck on?
High revs and slow return to idle would point to a lean mixture though..
Bench synchronizing should be close enough for an OK running engine and should not result in said symptoms if indeed done correctly.
As far as leaky rubber manifolds go I'd say check manually (remove parts for closer inspection) but for now the carb cleaner/WD40 spray trick should suffice. Especially as you plugged "the one vacuum line" which raises some questions. What line exactly? The hose to the vacuum controlled fuel tap? The vent hose connected to float bowls is supposed to be left dangling open!
-
Always the same story.. Just save yourself the troubles and throw the stock tensioner in the bin. (Also a good place to store those stock vacuum controlled fuel taps btw!).
Instead fit a manual cam chain tensioner and never look back or be faced with an oil bath on top of the cases again.
-
On 10/01/2018 at 8:32 PM, Dixie said:
Any takers on my side stand issue, it has two springs one covering the other and it flicks up when i stand the bike up, i want it to stay down until kick it up, any ideas?
Oww... Only just read this question.. Simple solution: move the spring mounting point on the frame forward. On my old GSX750 this mounting point was a steel strip I just bent to the left to avoid any welding. But I see on a GS750 the stand is held by a separate piece that is bolted to the frame, and so could be easily removed for modification on the workbench.
-
GS750, from a year slide carbs were fitted. I believe other Suzukis (GS1000C, GT550) had the same twin cable throttle.
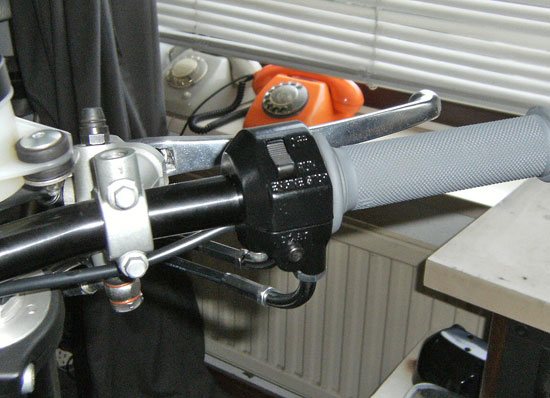
Nice and simple as far as the switch block goes, just a start button and (black) kill switch. Made from aluminium, not plastic.
-
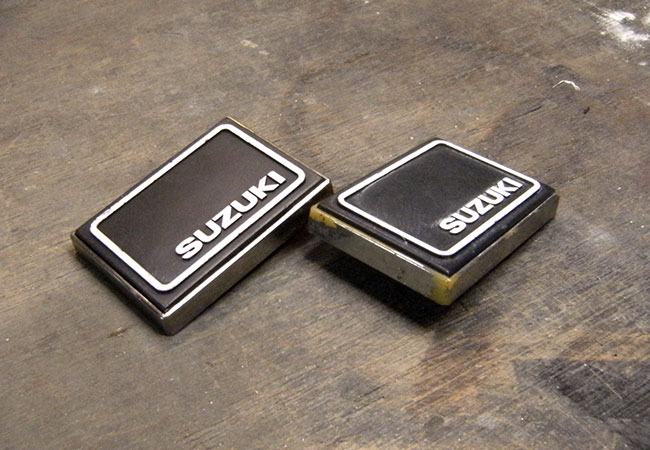
@WimBaas If you're still looking for ET badges I've got a spare set. The chrome on the bevel has peeled off in places though.
-
2
-
-
-
15 hours ago, Arttu said:
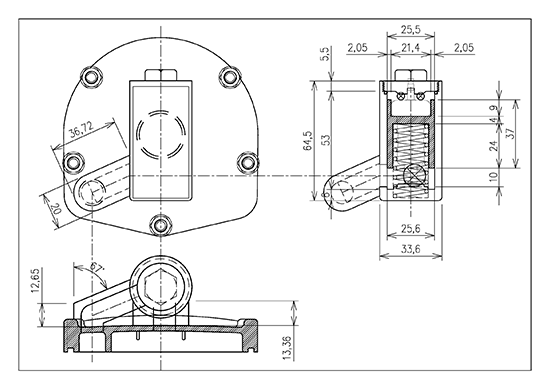
Thanks for the drawing! What waxstat unit you are using?
I have been also wondering if there would be still too much flow through cooler when the bypass is open but apparently not. Thanks for confirming.
Getting aluminium welds completely sealed can be a bitch sometimes. I had similar incident with a swingarm that was supposed to work as air tank. So even without any oil involved. Perfectly looking seam had some invisible void leaking air slowly. Ground it back properly and laid new good looking seam over it. Still leaks. Repeated half dozen times until I gave up and used some epoxy glue to seal it

Ouch..
What waxstat? Uhmm.. lemme get the box. "JP Group - Thermex 1114601210 bladibla Thermostat with seal 87 C". Probably for some random middle range car. Dunno, I just wanted a cheap thermostat to harvest the waxstat from. It was cheap, and even got a further reduction when I explained my plans..
")
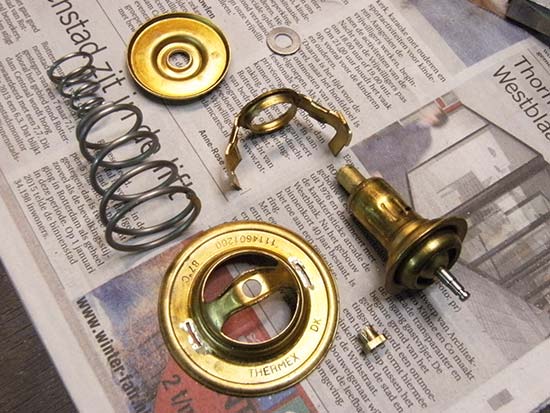
You CAN get just the separate waxstats, but only in bulk quantities. At least, that's what I found at the time.
As for the welding.. The first time around welding actually went fine (apart form the pinholes obviuosly). Only the heat made it difficult to hold on to the torch even with thick gloves. Aluminium needs a lot of it and you really need a watercooled torch for tight spaces and continuous welding.
12 hours ago, Gixer1460 said:Got to say that is an incredibly neat solution. Welding cast alloy is always hit or miss - inclusions or porosity - PITA. Maybe with a little adaptation and addition of some lugs & o-rings it could be made 'bolt-on' ?
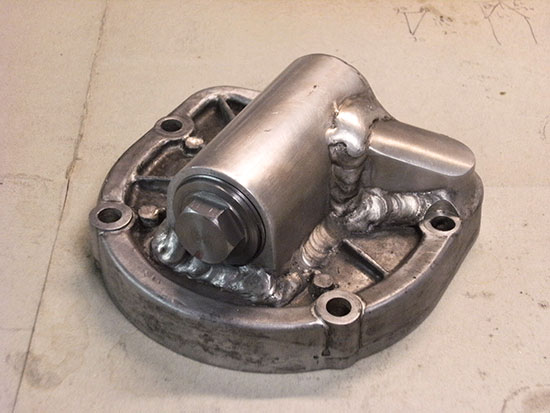
During the work and especially lateron during the fixes I concluded that it would have saved me a lot of time and swearing if I'd started off with solid stock/fresh material. So next time (if there is one) it will either be made from 1 solid piece or at least a solid plate as a starting point. Difficult bit with that will be machining the rubber seal seat though.
A bolt on design could work too in theory I guess, but you'd still need to drill some oil passages in the exact right positions, AND weld in the "blocking" bit if you cannot find an EFE oil filter cover.
Oh.. @ Karst34, Sorry for hijacking your thread!
-
16 hours ago, Arttu said:
.. I assume it just opens bypass channel when oil is cold?
Well.. it is normally open, so when the waxstat heats up and extends it pushes the piston down to close off the bypass. Very simple design.
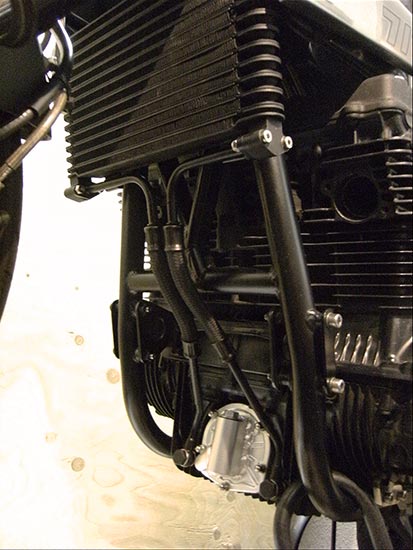
I wasn't sure though if the always open connection with the oil cooler would work as in theory it still allows a large part of the oil to flow through the cooler when the bypass is open. But it seems the extra resistance of the cooler and lines (and perhaps gravity) has most of the oil indeed flow through the bypass. The oil cooler does stay cold until the engine temp reaches about 85 deg. C. proving the concept.
I anodised the aluminium piston (purple) to harden the surface and hopefully prevent wear on the housing also in aluminum (part cut from GSX-R swingarm).
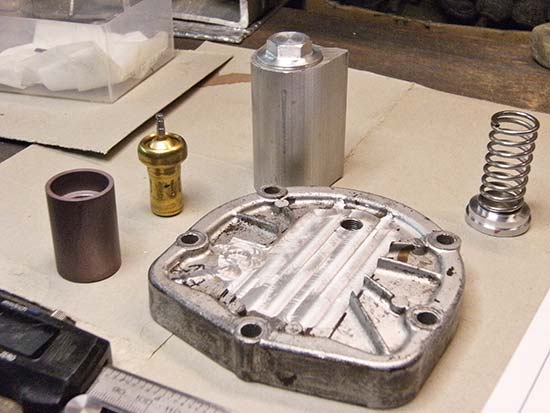
Had a pinhole leak in the first attempt and so tried to weld it shut. That was a big mistake as the aluminium was obviously contaminated with oil by now. Lots of grinding, rewelding and cleaning later I sealed the remaining pin holes with Loctite 290.
Also planned to install a fan on top of the B12 oil cooler, but took that off again when I found out I had miscalculated the available distance to the mudguard..
Will look for 1 or 2 suitable flat (computer) fans instead, but there is little need for those with the current stock EFE engine really.
-
1
-
-
On 04/12/2017 at 10:17 PM, Karst34 said:
What are the dimensions of the stock oil cooler? Then I can look for alternatives, Thanks in front for the info Guys
About 220x90 mm so quite small, but it seems you're now looking at larger (Chinese?) coolers? The oil lines + fittings are actually usually more expensive than the cooler, but copied Chinese fittings are cheaper too.
Anyway.. The larger the oil cooler the greater the need for an oil thermostat, BUT not many people actually install these on their modified engines.. (Too cumbersome? Cannot be bothered? No space?)
There is in fact limited space to fit such an oilstat (I mostly used Mocal OT/1 stats), so for my Kat I thought I'd better look for a tidier solution this time around. It took some trial&error with oil leaks due to welding porosity but I'm now using an oil filter plate with an incorporated oilstat.
-
4
-
-
17 hours ago, Gammaboy said:
It's a good modern sportsbike number? Modern stuff is all 120-125mm travel at both ends.
Yup, what Gamma said
I tried an even larger travel (135mm or so) in my sketch but reckoned the shock angle would get too extreme as it would make the mentioned regressive character of the suspension setup even worse. So the 125mm I decided to stick with is a compromise (like all things in life )
2 hours ago, nlovien said:not necessarily a downside -- I can "visualise" a good reason for it - up right things yea ok, but picture loading up the rear whilst leaning over on a corner exit - i'd be looking for the softer touch in this condition to help reduce the likelihood of the rear stepping out
Ah.. not sure whether this scenario would actually happen, but I do like your argumentation.
")
Oh.. Nearly forgot.. Mind placing the LH top shock mount further outward than the RH one to provide clearence for the chain (if indeed you're planning to use wide modern rubber). Of course it would need to correspond with the mounts on the swingarm you'll be using. (Some swingarmes are asymmetric, some are not) but plan ahead and look at the whole suspension setup before cutting and welding.
(I positioned the symmetric XJR swingarm I used asymmetrically in the frame so the LH shock would have more room. I kept the stock mounts on the swingarm unmodified, but of course you could just move the LH mount instead of the whole swingarm.)
Lockhart Oil Cooler Adapter Plate
in Air Cooled
Posted
The original 90 deg fittings on my Lockhart?/Derale (it said on the cooler) adapter plate were the push-on type. Connections on the oil cooler were push-on too.