Mike990
-
Posts
37 -
Joined
-
Last visited
-
Yeah thanks for that.. I had a detached retina which based on their last assessment after the operation all looks good now. The procedure is a bit grim especially when the big syringe comes out and they start injecting your eyeball but it's fixed now and that's the main thing. If you ever see a shadow in the corner of your vision go straight to a&e as if the retina detaches completely you'll go blind in that eye. This needs to go in the list of things you don't want to know but really should.
-
I'll do a ride update ASAP - I had an eye operation recently and I'm not allowed to drive or ride for another 4 weeks so I'm going to have to be patient
-
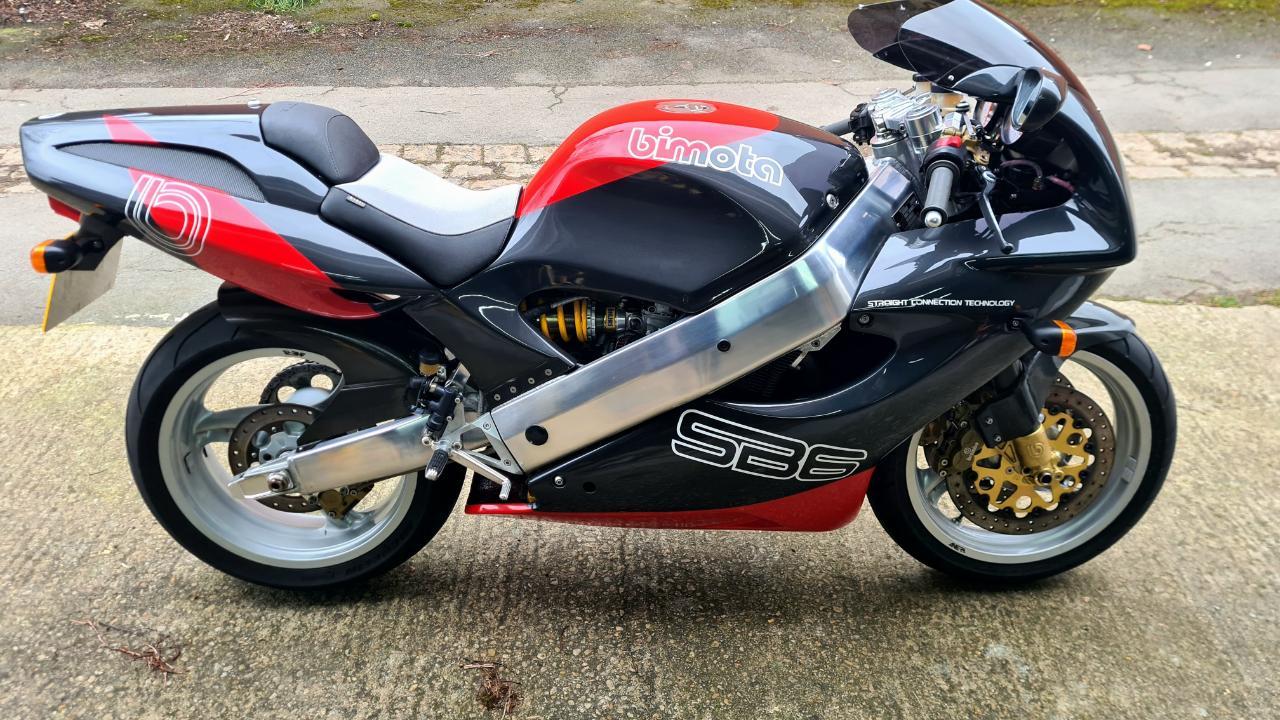
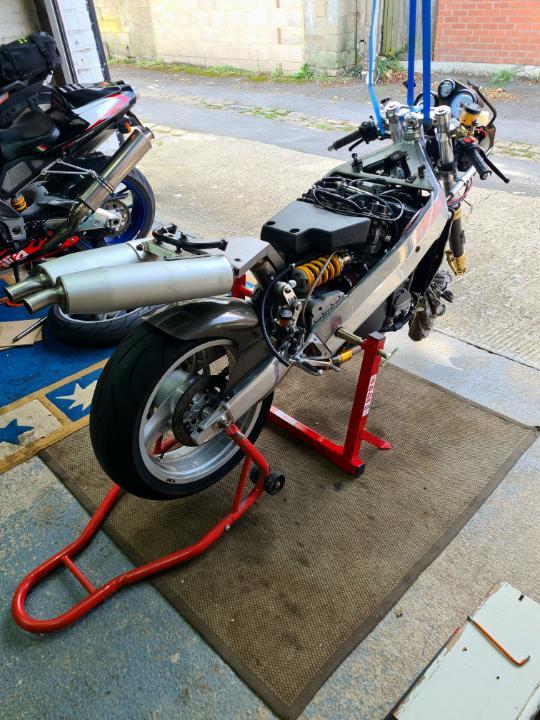
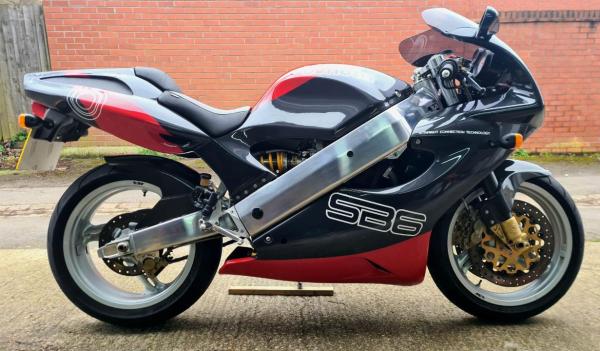
After many more hours in the garage the Bimota is finally finished!! I found a few previous owner bodges in the wiring loom which took a ridiculous amount of time to sort but (I really don’t want to jinx it) all now seems good. The tank seat unit has to be taken off and reinstalled at exactly the right angle and I have finally mastered that fine art after several ‘practice’ sessions. But by far the biggest pain in the arse was the one piece fairing - it really is a tight fit and I can understand why many owners cut it into sections to make the job easier.. But I finally managed it after a few deep breathing de-stress sessions and it’s all back together. I must admit that I’m pleased with the end result as I think it looks great..

-
Well best of luck getting it sorted.. I only have a few jobs left on mine but it's sitting at -6c in the garage this morning so it will have to wait a while. The plan is to get it on the road in April and also to do a couple of classic track days- let's see. I think the key to keeping these older bikes running well is to use them regularly so that is my main objective this summer. But I also have an Aprilia Mille, a Buell X1 and a KTM 1290 that also need looking after so finding enough time is a challenge.
-
Thanks for the info- I'll register it to me on the Bimota forum. BTW who is Oily?
-
Hi it was first registered in 2000 - I'd assumed it was made in 99 and sat in the dealer's showroom for a year or so.. The chassis number is 01227 so its fairly close to the end of the production run. I read your posts with interest - thanks! I think my journey to getting mine roadworthy has been a bit more straightforward than yours. Where are you at with it now? Cheers Mike
-
On an Ohlins shock they use a self repairing rubber bung instead of a valve to hold the air in the air reservoir. Its behind the screw at the end of the air reservoir. You use the needle to puncture the bung to release the air pressure (do this slowly)and then needle in again to pressurise at the end of the job... And remember not to mix up the shims and spacers and you've got 12bar of pressure in there - so what could possibly go wrong:) Interestingly a few of the shock rebuild companies I phoned for the seal kits wouldn't sell just the seals because of the danger factor. The world's going crazy:)
-
Just a shock needle and a small nitrogen bottle and gauge - less than £100 on Eblag. I used the 'car jack' method to compress the spring to remove and refit the collet. I know this sounds a bit dodgy but in actual fact there's hardly any tension on the spring once you slacken off the adjuster and this part of the job was very easy Other than that standard workshop tools and a vice...
-
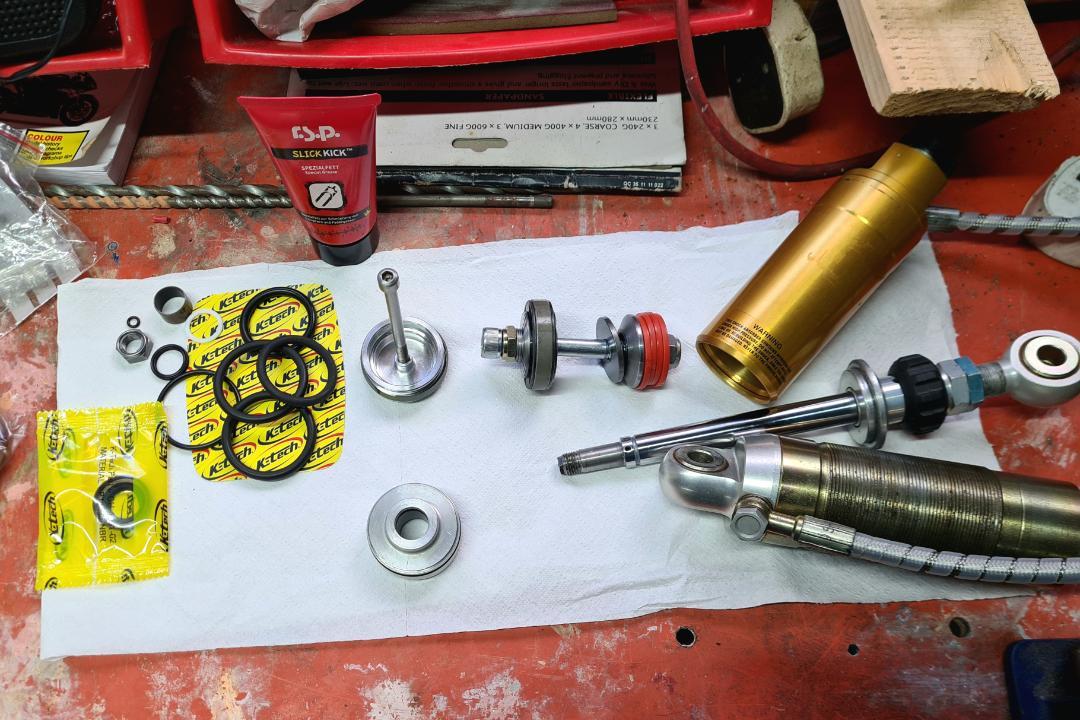
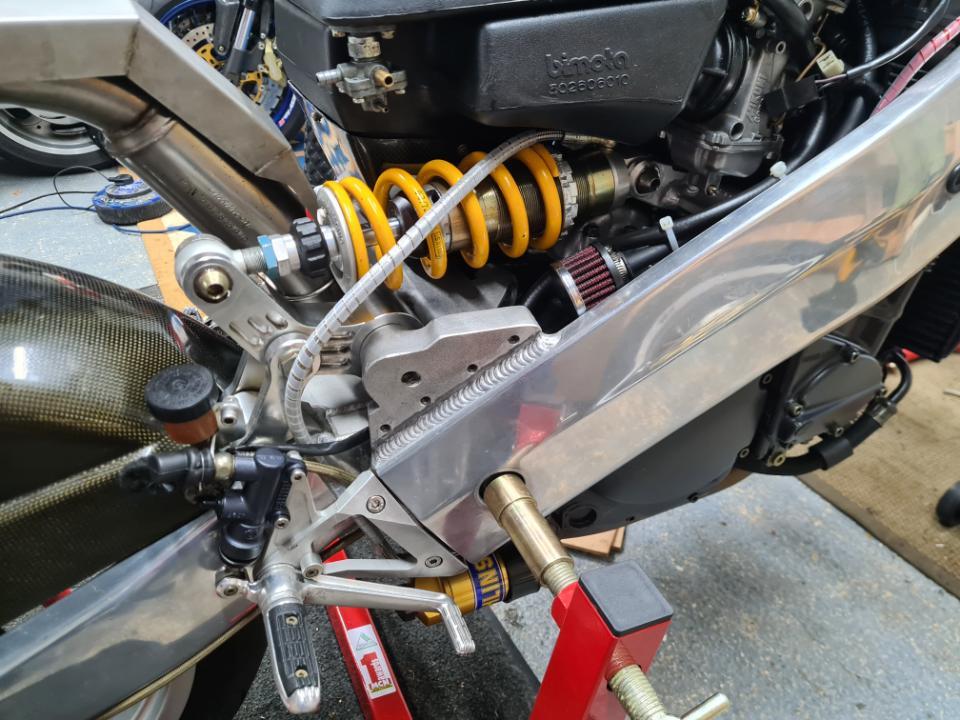
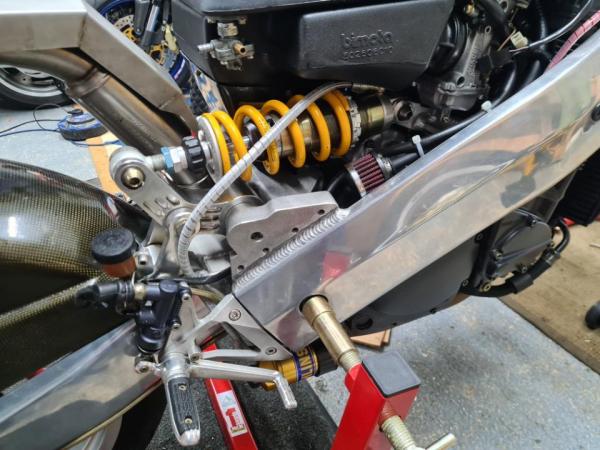
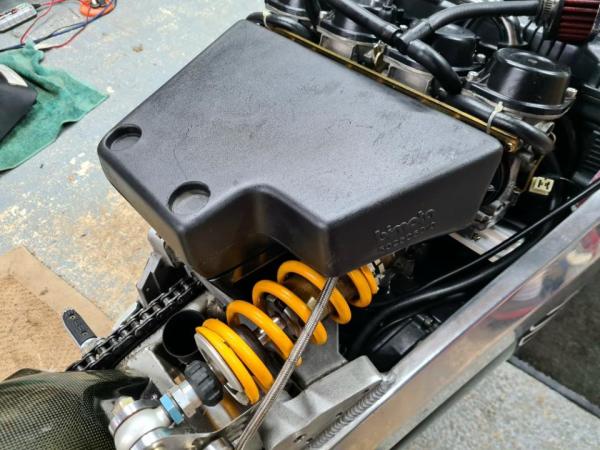
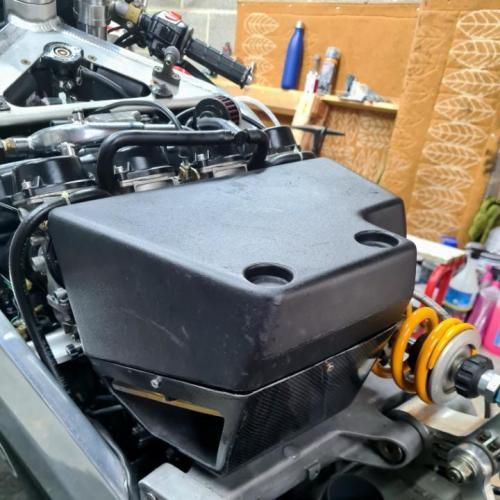
Finally finished rebuilding the rear shock. It’s the first time I’ve rebuilt an Ohlins shock but I was determined to do it myself, however much pain and angst it caused me I watched ‘the Ohlins Guy’ YouTube video a couple of times and ordered a K-Tech service kit and clamped it up in the vice and set about dismantling it. To be fair as long as you let the air pressure out first (if you don’t it will hurt you!!) it’s a pretty easy job. The oil was actually fairly clean for 23 year old oil and the seals all looked fine. I replaced them all anyway as the seal kit is quite cheap and used plenty of oil seal grease during reassembly and apart from the nearly impossible to remove and reinstall piston head circlip it was all home mechanic doable. I spent a fair bit of time bleeding air bubbles and rewatching the Youtube video so it took me much longer than I expected but I reckon the next time I do it it will be much quicker/easier. I must admit that noticing the rebound adjuster had stopped working during reassembly threw me and meant that I fully disassembled the shock again to check on what I’d screwed up but it transpires that the air pressure pushes the rebound needle onto the adjuster clicker so without air pressure no clicks! I wish the Ohlins guy had said that! But after a lot of swearing I figured it out and once pressurised all was sweet in the Ohlins universe in my garage!

-
Thanks for your kind words Daz! I feel as though I owe the forum a few words as I've really enjoyed reading the other build threads on here - there are some really talented and helpful people on here so it's nice to make my own small contribution.. I did an engineering apprenticeship when I left school and I've away's had a secret ambition to build my own steel framed bike - so the special frame section on here has rekindled that ambition somewhat... We managed to retire early and we've spent the last 4 years mostly traveling in our campervan but we have just had our first grandchild and I can see our travelling days coming to an end as my wife wants to help with childcare. So I can see the van getting sold and the garage getting kitted out with more expensive toys
-
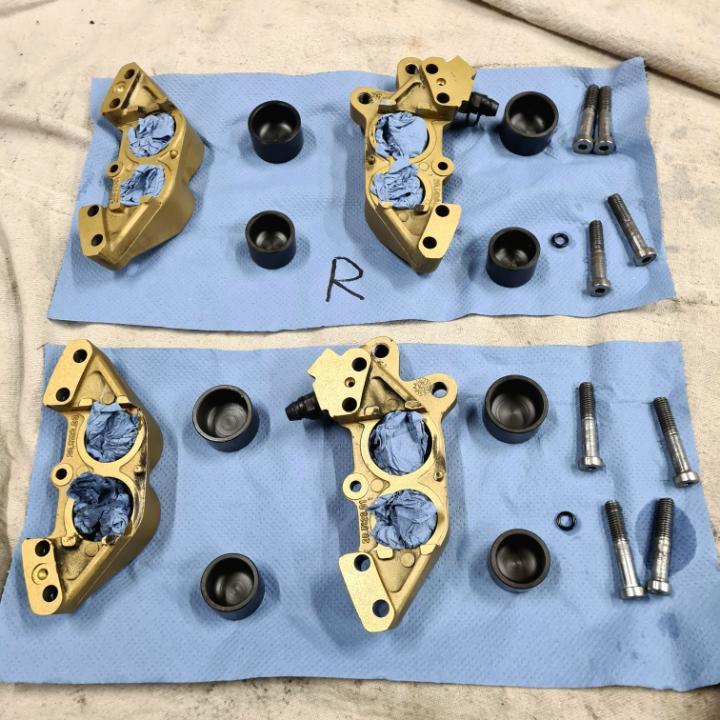
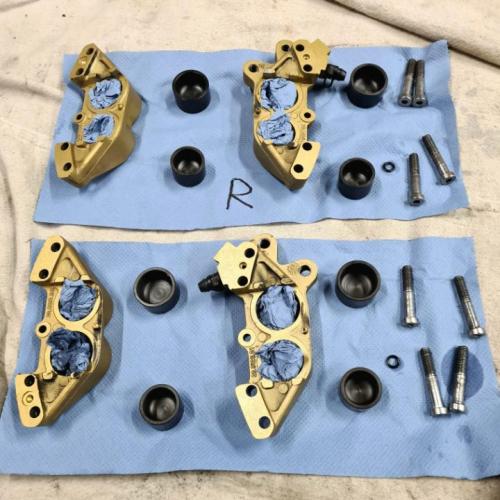
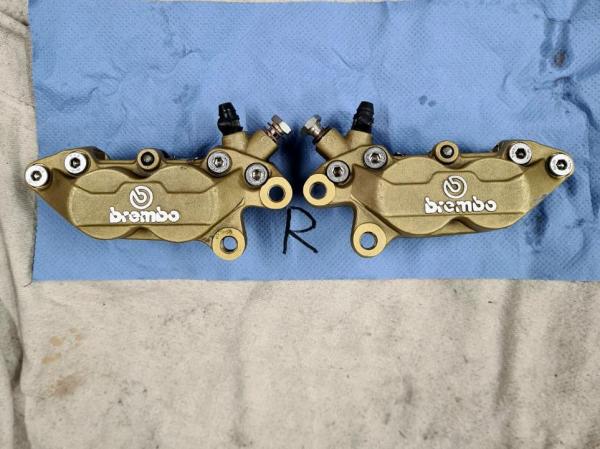
A few more jobs completed - fork seals changed, air gap set at 180mm and reinstalled on bike. Settings left standard: rebound 5 clicks out and compression 7 clicks out. Front brake calipers stripped and thoroughly cleaned - seals lightly greased with oil seal grease and reassembled. Pistons and bores look like new.. The threads had been stripped in the throttle switch assembly (standard Suzuki) so I drilled out, tapped and inserted m6 helicoils - now nice and tight.. Checked engine compression - all at ~ 175 psi so all good there. Not many jobs left on my list just rear shock rebuild, and potentially change the fuel tap (but I haven’t decided 100% to change it - why change something that is working fine I keep thinking?). I think I have spent approx 100 hours working on it so far but I have been working at a leisurely pace so no worries. I reckon another 20 hours and it will be ready for the road, so not long now! Imagine how much it would cost if I’d sent it to a professional restorer at a conservative £50/hour that would be £6k please !!!
-
Well you can usually split the bottom of the fairing and stretch it around the front wheel but on mine someone has strengthened the bottom of the fairing with a coat of fibreglass. I don't know why as there is no sign of any external damage. It's still a juggle to get is simultaneously off the lights whilst getting the forks through. I think I'll drop the forks when I put it back on as it would then be very easy (and no scratched paint) and the forks only take 5 minutes to drop. I don't know the answer to this - but why is there a preference for the oil cooled engine's over the water boiler's??
-
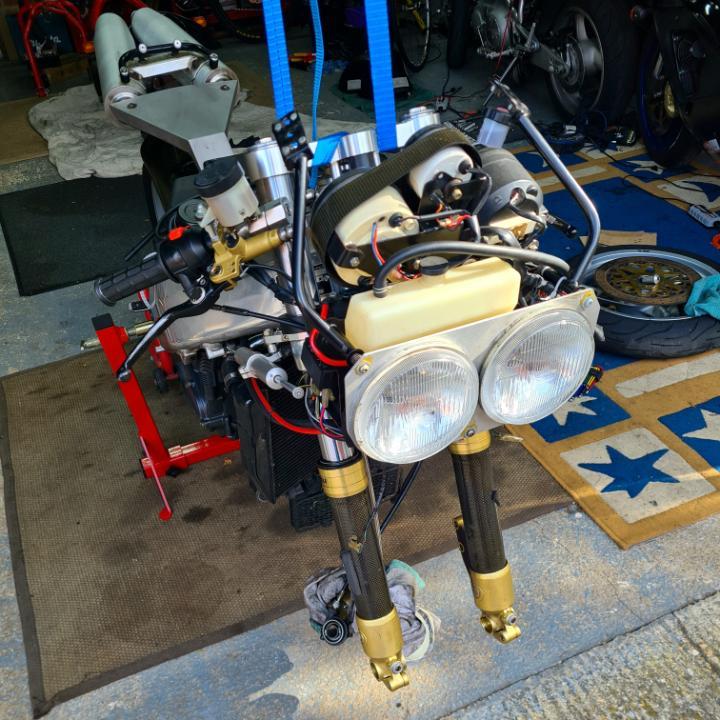
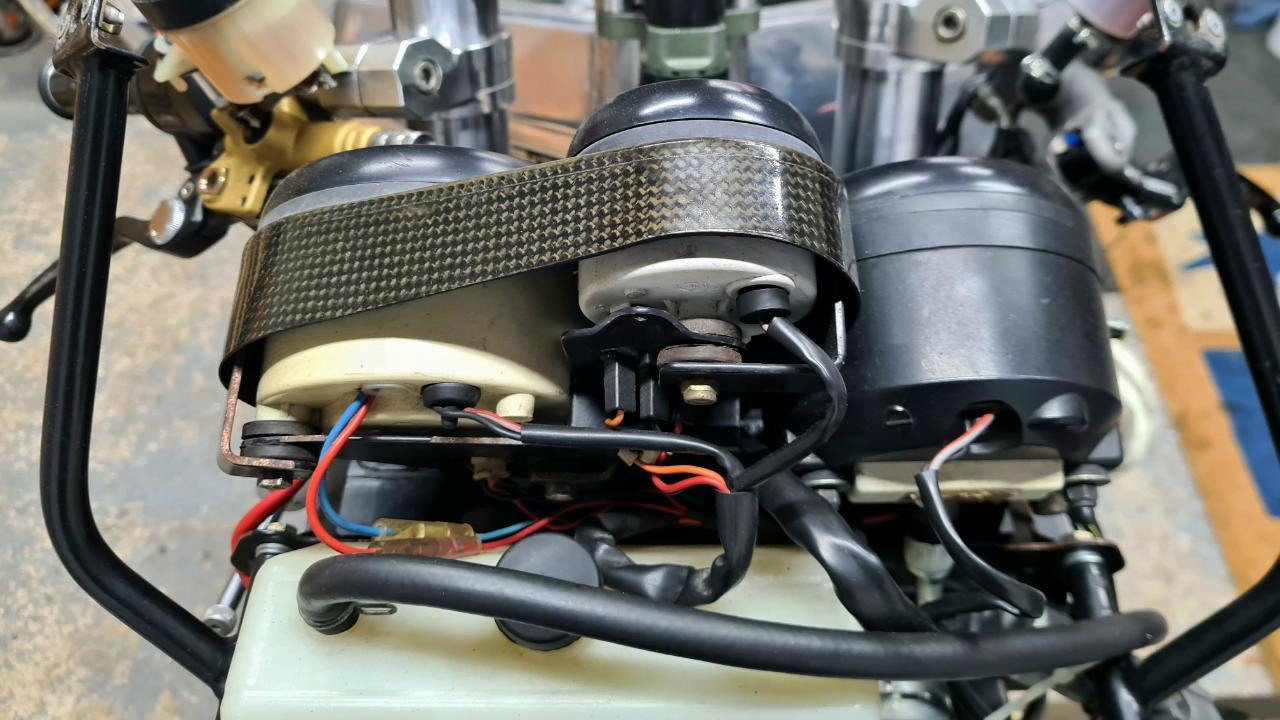
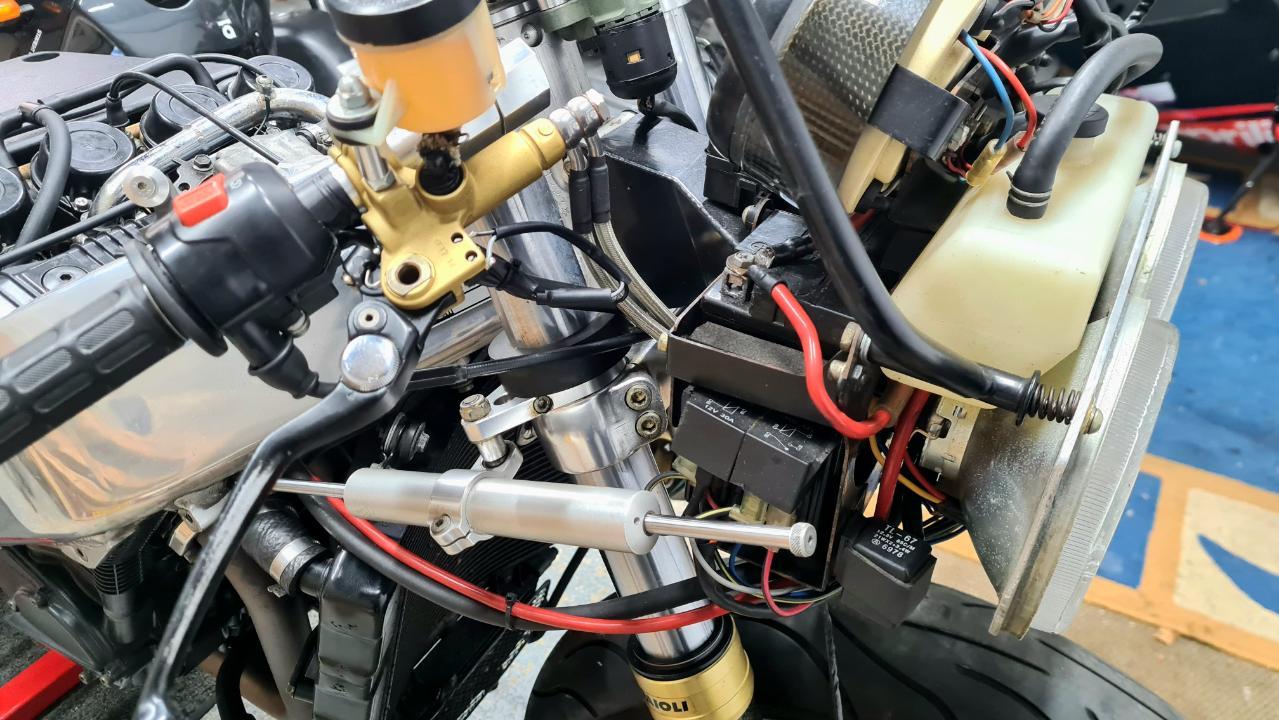
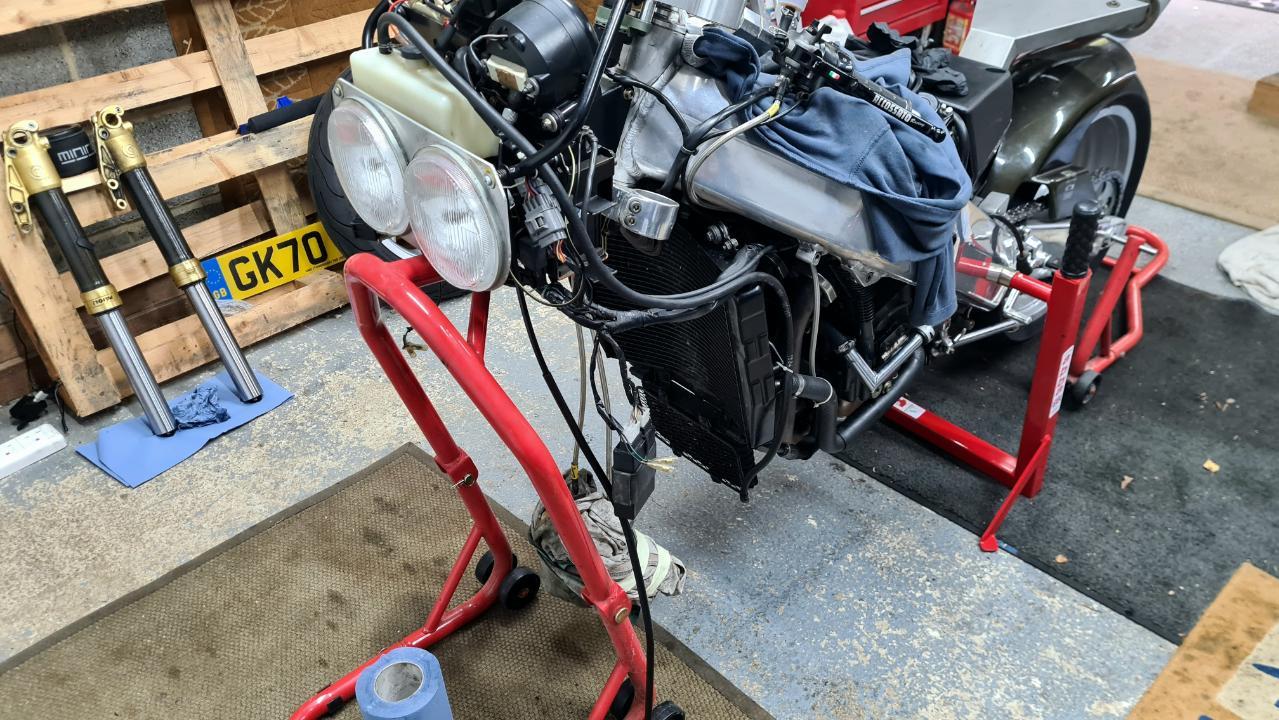
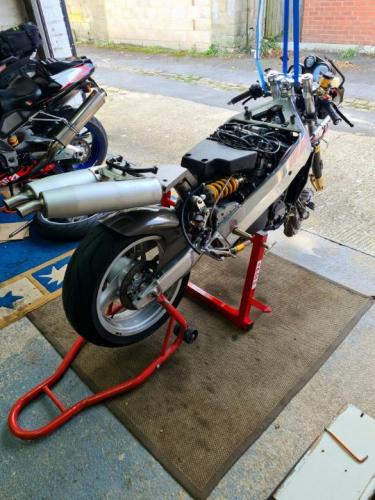
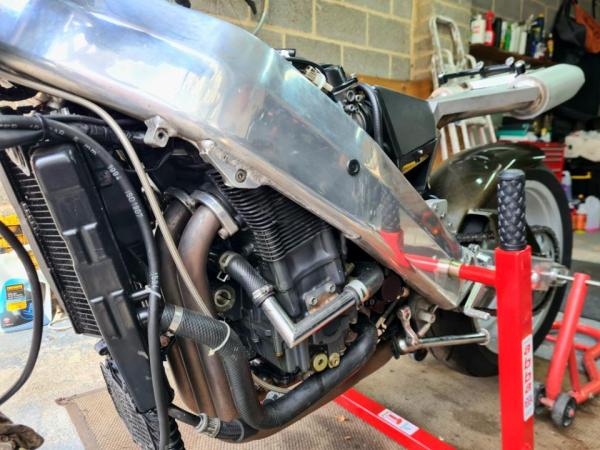
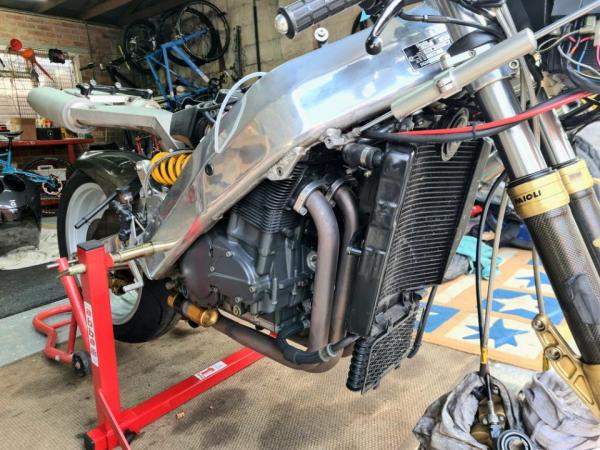
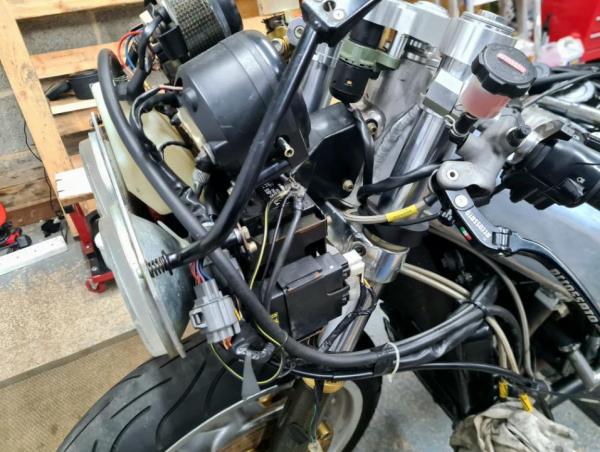
A bit more progress this weekend - bike front end hoisted via garage rafters in-order to remove the fairing. It’s a 1 piece fairing and this was the only way I could figure out how to easily remove it. A bit of a faff really and I had to call my wife down to the garage to help - she’s used to getting these calls now and is getting quite good and is quite stoical about it even when I dripped hot solder on her one time There’s a couple of pictures of the engine below and I’m amazed at how clean everything is - I don't think it has ever seen rain in its 23 years. Also a couple of pics of the Italian spaghetti wiring - to be fair it’s not too bad and just needs a bit of tidy. I don’t like the long high current cables running right up to the front of the bike but to be honest I think they’re going to have to stay as every last mm of space is used behind the engine so the battery won’t fit there.. I also stripped and flushed the forks (again with my wife helping - pushing down on the spring compressor :)) Lots of grey silvery oil but overall they are fine. New seals on-order. Next job is to rebuild the Ohlins shock - can anyone recommend a Nitrogen charging kit? Everything seems to be easily available on Eblag including Ohlins needle ends but a recommendation would be very helpful. Thanks!


-
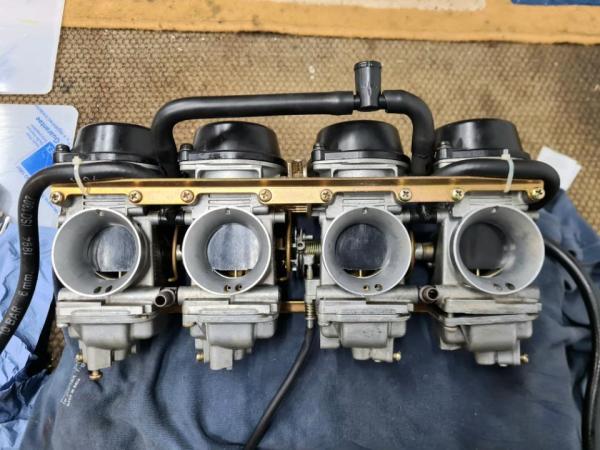
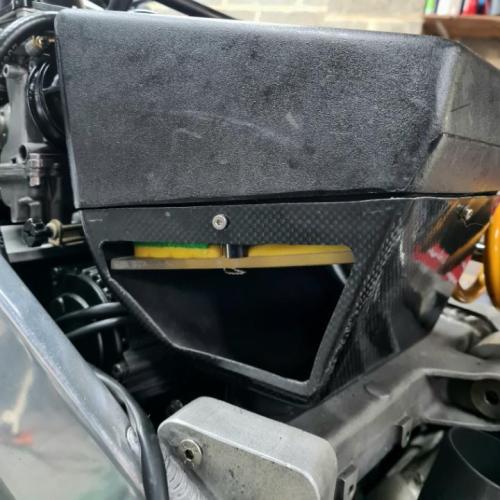
I’ve made a bit more progress over the last couple of days - the airbox and filter have been sorted. I made a frame from perspex and sandwiched a Uni filter foam filter between the existing Bimota mount and my new frame. It wouldn’t win any custom fabrication awards but it is secure, there won’t be any leaks and it will filter properly - so all good from my perspective. The airbox as a unit is actually very well designed as it uses up all of the available space between the carbs and the exhaust system quite nicely. I’m pretty sure that you don’t have to remove the airbox to take the carbs off as it looks as though there is enough space to swing the whole lot up and away. I haven’t tried that yet but it’s worth knowing. The carbs are loosely fitted at the moment because they need to come off to remove the rear shock - my next job…
-
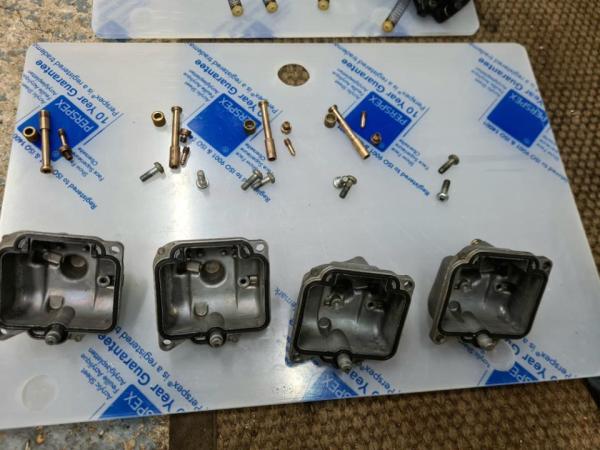
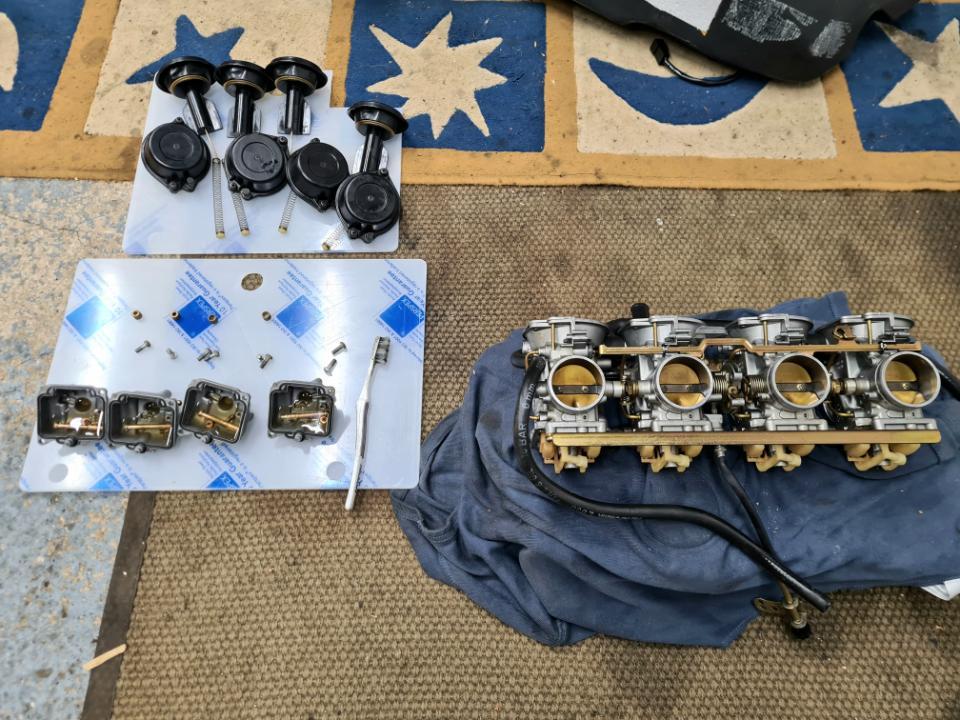
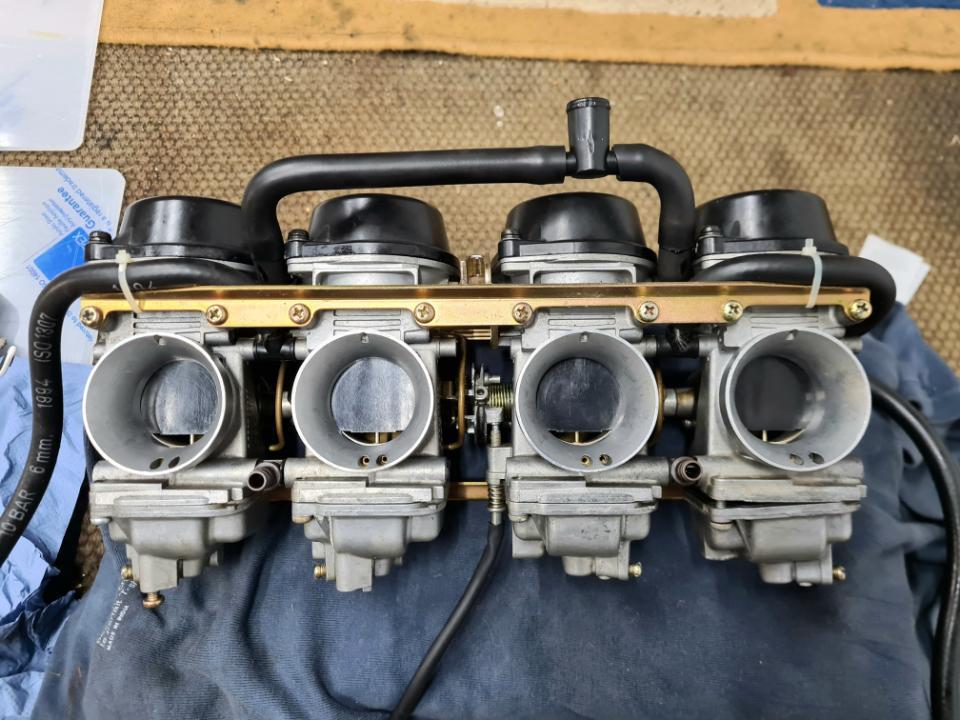
Carbs stripped and cleaned today. They were not too bad at first look but on closer inspection they needed a bit of work - The air jets and slow running jets were all slightly blocked with remains of the disintegrating airfilter element - spray solvent and an airline cleaned them out nicely 3 of the 4 slide diaphragms were distorted - whoever fitted them was heavy handed I reckon. A gentle stretch and some lanolin and they were as good as new The jets all had signs of a very fine white fur and the float bowls were stained green (from ethanol) - a 10 min soak in acid (white wine vinegar from the kitchen) then a blow through with the airline and all looked like new again. New NRP gaskets and they’re ready to roll. I also stripped the fuel tap and cleaned with solvent and it seemed to be functioning fine but I must admit that I don’t particularly like the idea of vacuum taps so I might remove the innards and add a couple of in-line taps at a later date. Although finding space for them might be a challenge. The float bowls are only fitted loosely in the picture below - as I’m waiting for stainless fasteners..