


#26Racing
-
Posts
10 -
Joined
-
Last visited
Content Type
Profiles
Forums
Events
Posts posted by #26Racing
-
-
Hello again,
They say a pictures tells a million words. Well, not quiet...
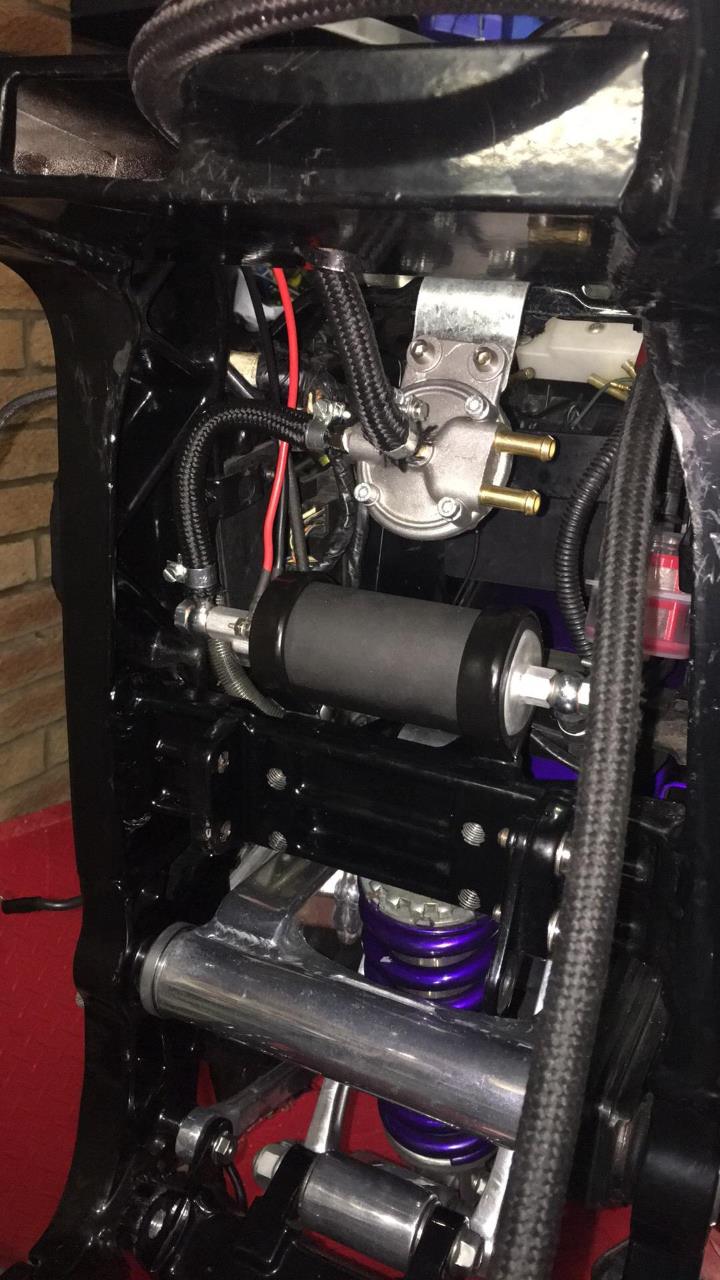
But, I've remounted the Walbro 300lp/h pump to a better place, drilled and tapped the fittings on the boost controlled fuel regulator so now I have a 4mm barb for the sensor tube, a 10mm I/D return (and a smoothed-off casting inside, the fuel in is also a true 8mm I/D pipe so hopefully I shouldn't have any probs with fuel flow
.

I've also sourced a racing wiring loom diagram that I will slightly modify as I'll be still running the alternator and charging system, although I'm struggling to find the improved charging mod from the old site...
Think this time I'll look towards a Ignatec CDI as I'll have greater control over retarding the spark and rev-limit than I have now as I'm still using the 750L's 13,000 rpm CDI and it's always on the back of mind missing a gear...
Simon
-
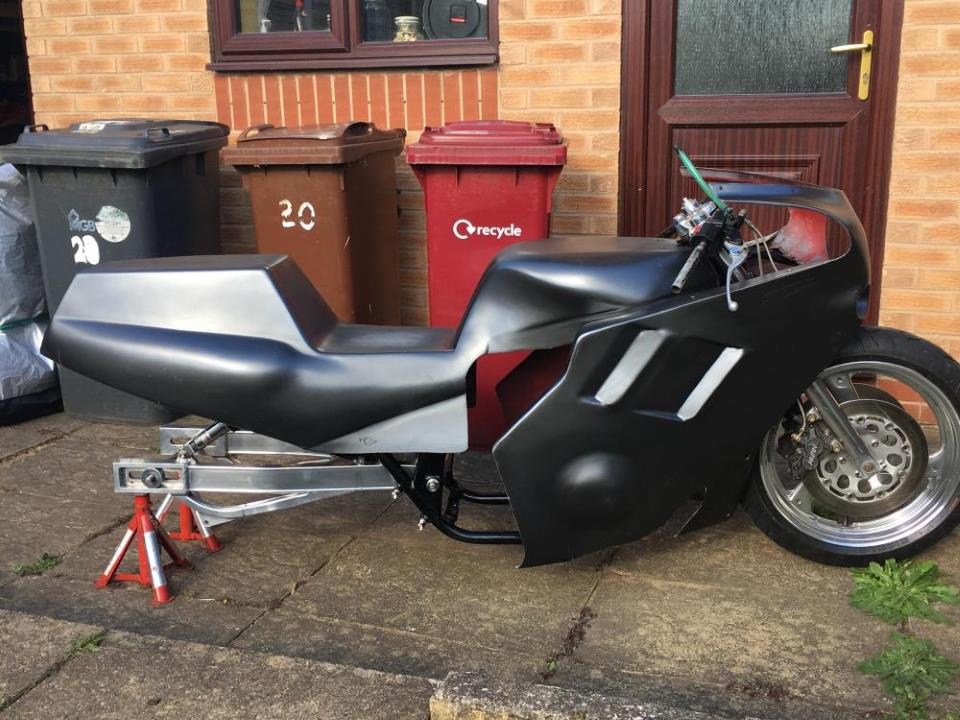
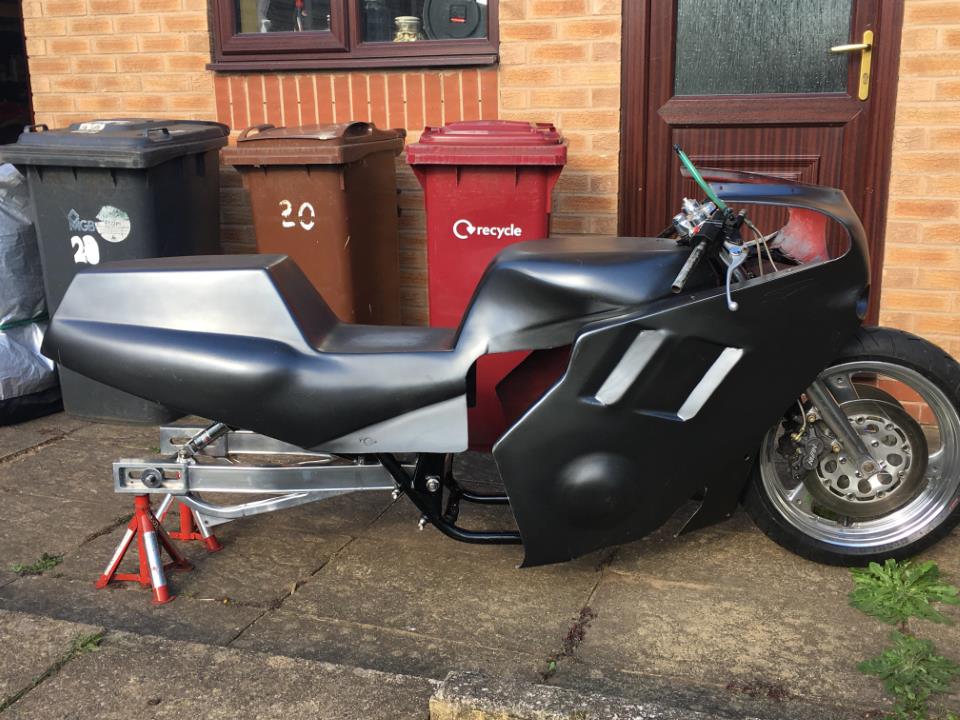
So, things have changed a bit. I looked at the costs of putting the superstreet chassis back into service and decided that it's not worth it on this occasion. I'm going to build the new turbo motor back into the 750 chassis while I look around for an 1100K/L chassis and make another less dedicated dragbike. As I haven't got enough posts to see the "For Sale" bit I'm looking on Eblag but holding off in case any OSS'r has a frame, mounts and 1100K yokes for sale.
Also, I'm struggling to find info as to whether the GSXR400 tank fits on the slingy frame, or the difficulty of making a later bandit tank fit. I want to chop the sup frame off anyway.
Any ideas/info will be much appreciated...
Simon
-
Hmmm, 2nd attempt as I dropped a photo in the "upload images" box and it missed, opened up a new page and lost 20 mins worth of typing and pics...
This is far shorter....
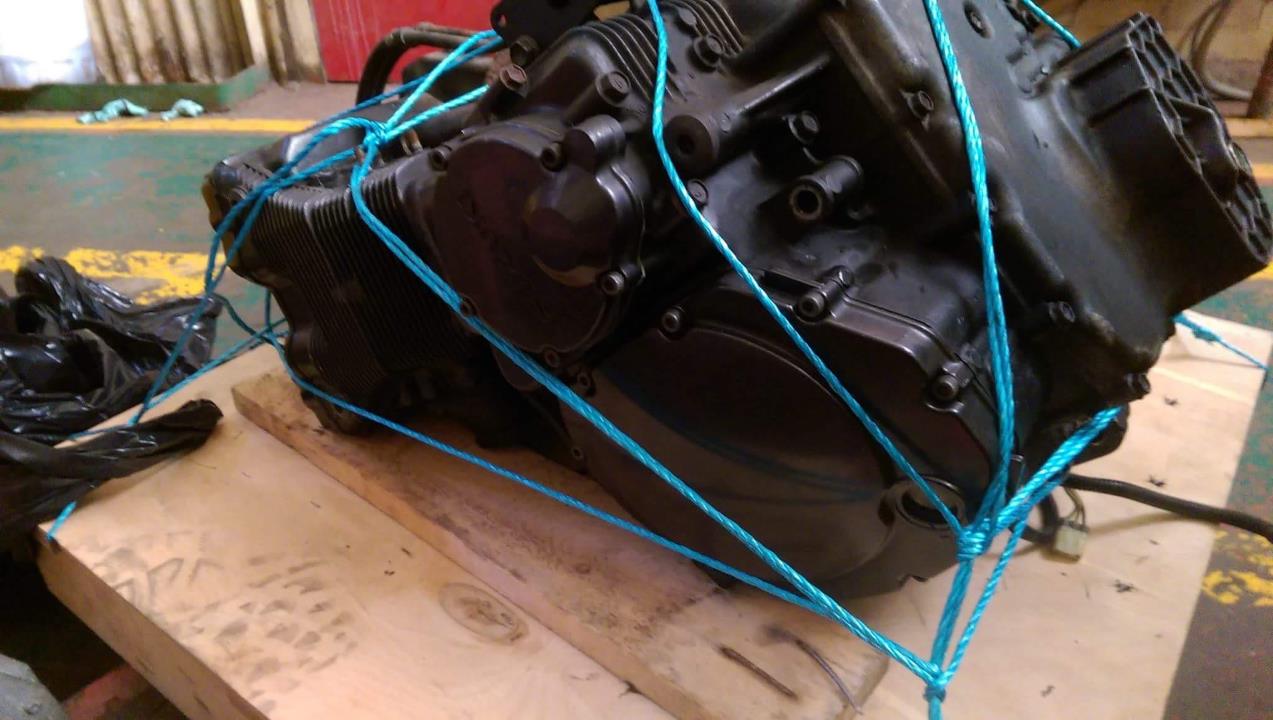
So, was going to put the motor into this:
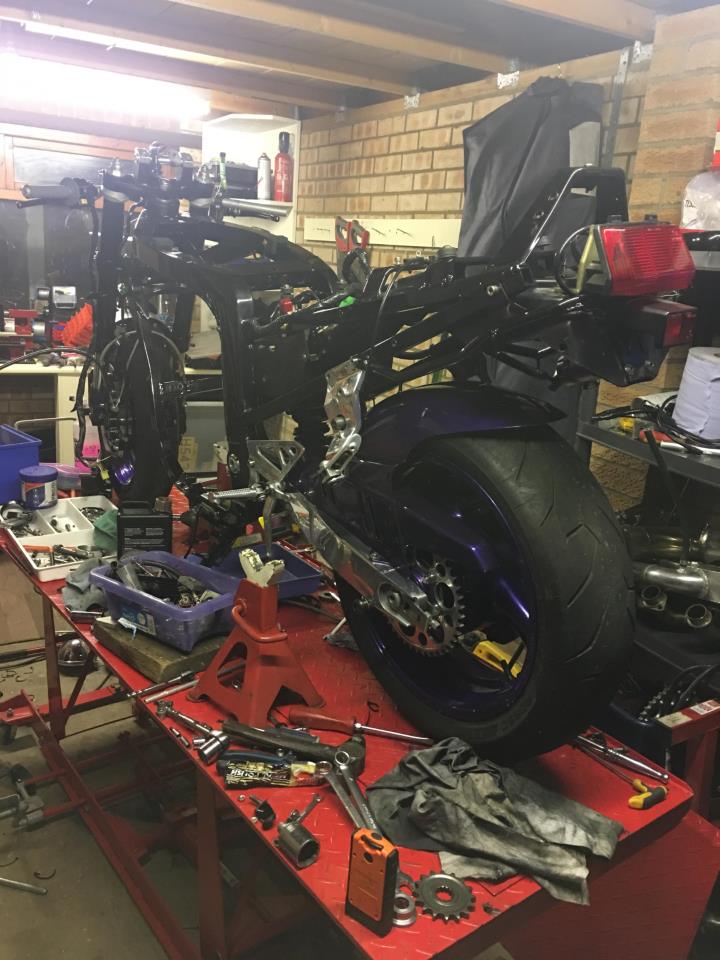
Old ET chassis, got a Hayabusa rear wheel for it which is away at SF Services for new spacers to match the 20mm axle.
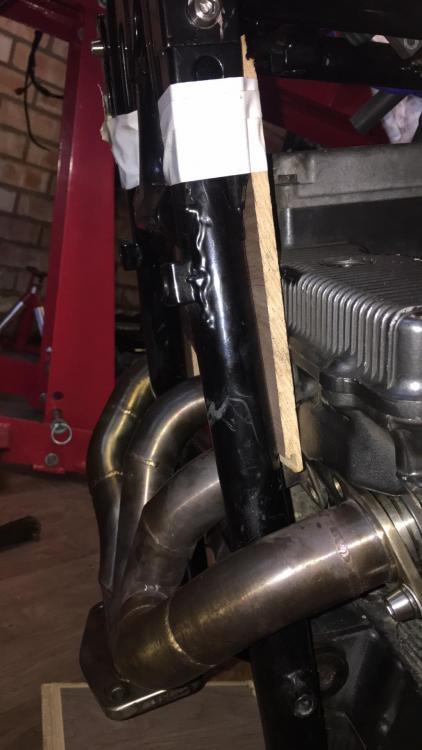
Started trying to align the motor:

Went for the alternative laminate flooring lining up method
 ..
..
As I'd already put the old GSXR back to a 750 wheelbase:

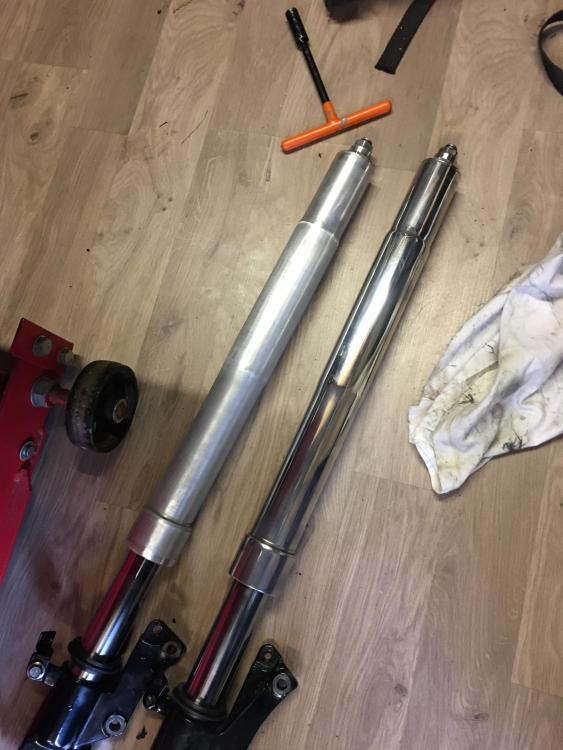
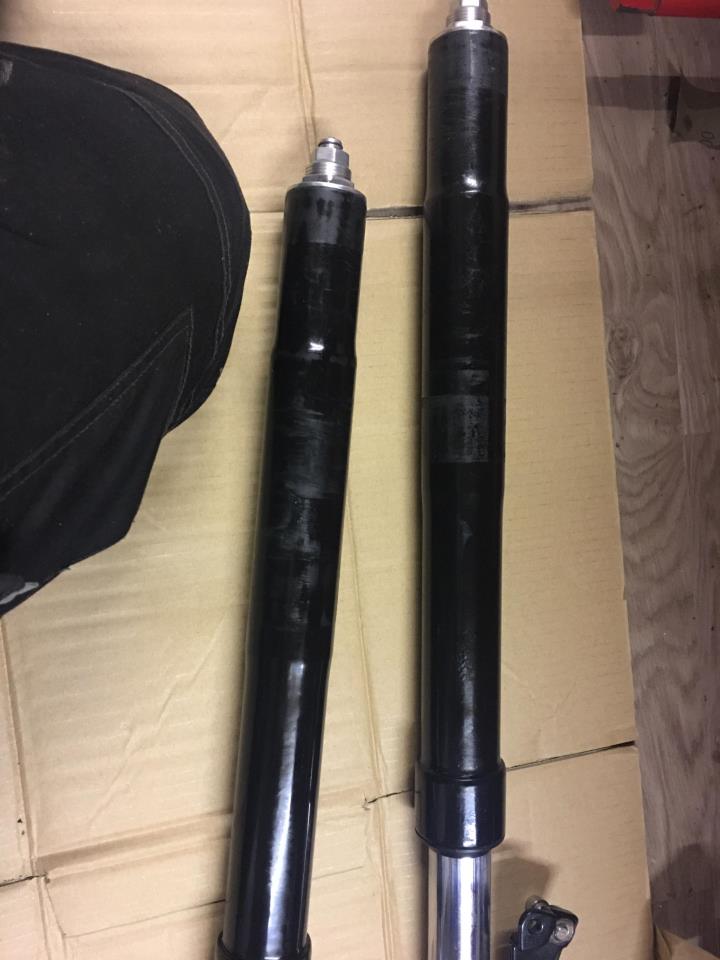
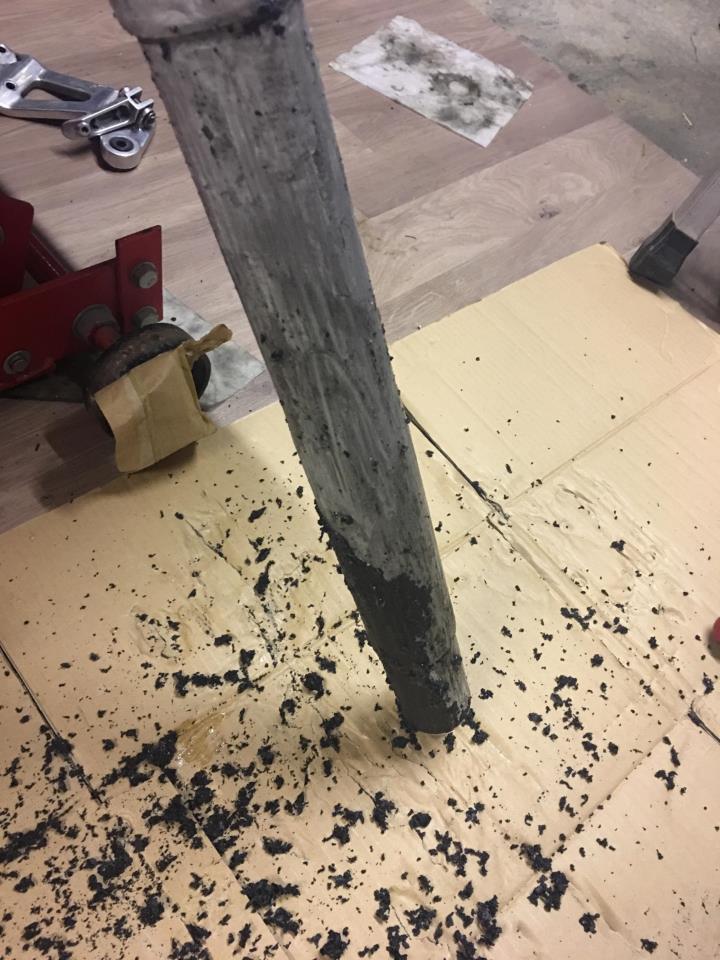
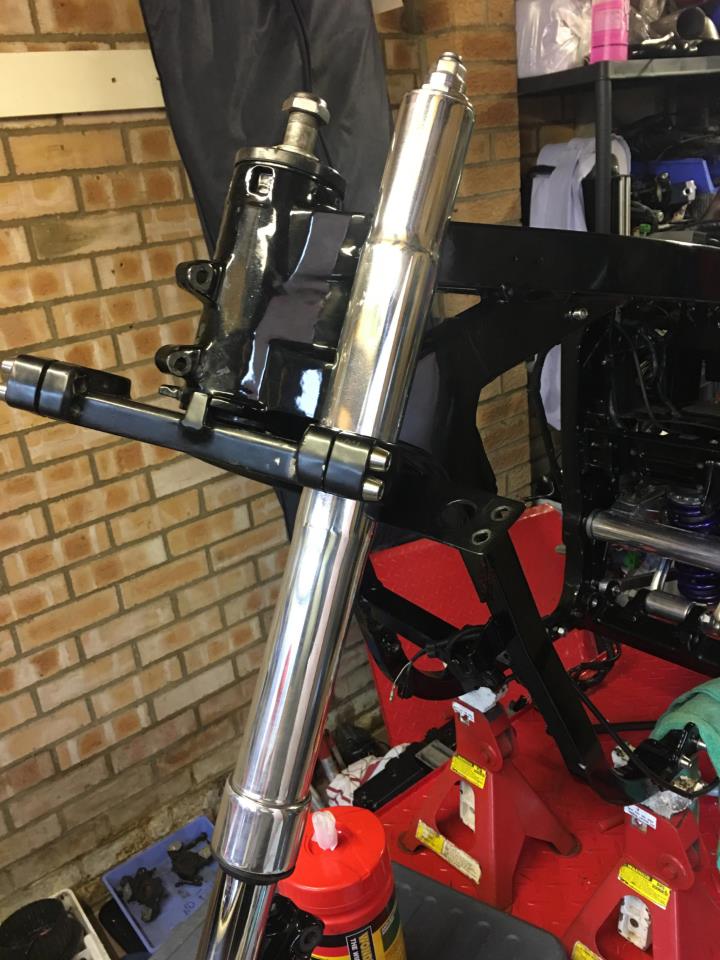
Wasn't happy with the forks as I'd previously had them powder coated and even though I was super careful they were just too thick to go into the yokes without scratching. It always annoyed me and after reading a post about some evil paint stripper, I removed the forks, stripped them, polished with 800, 1000, 1500 and finally precariously balanced polisher...


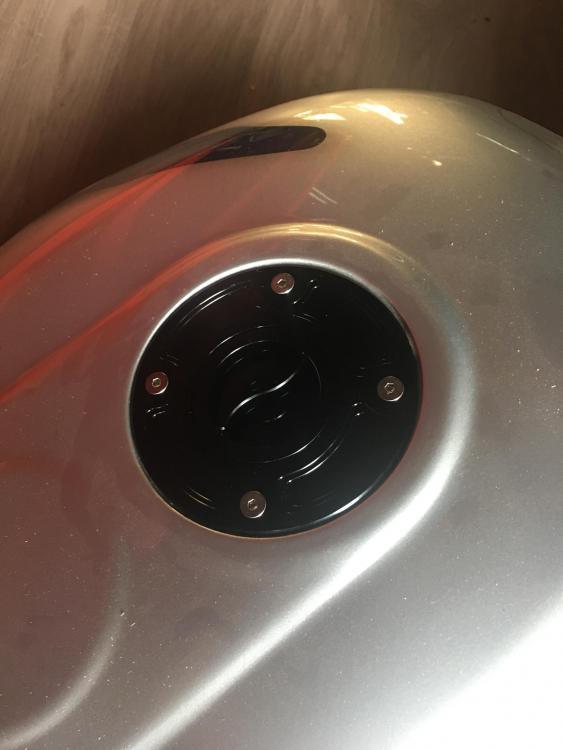
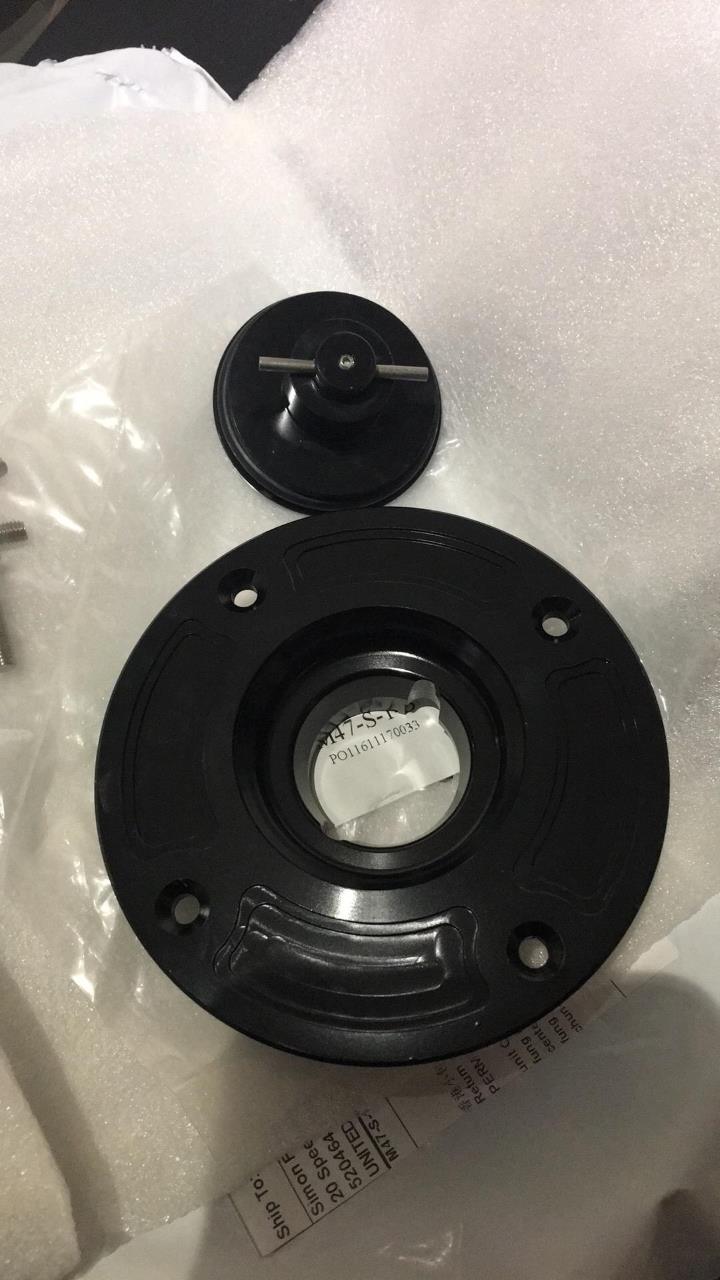
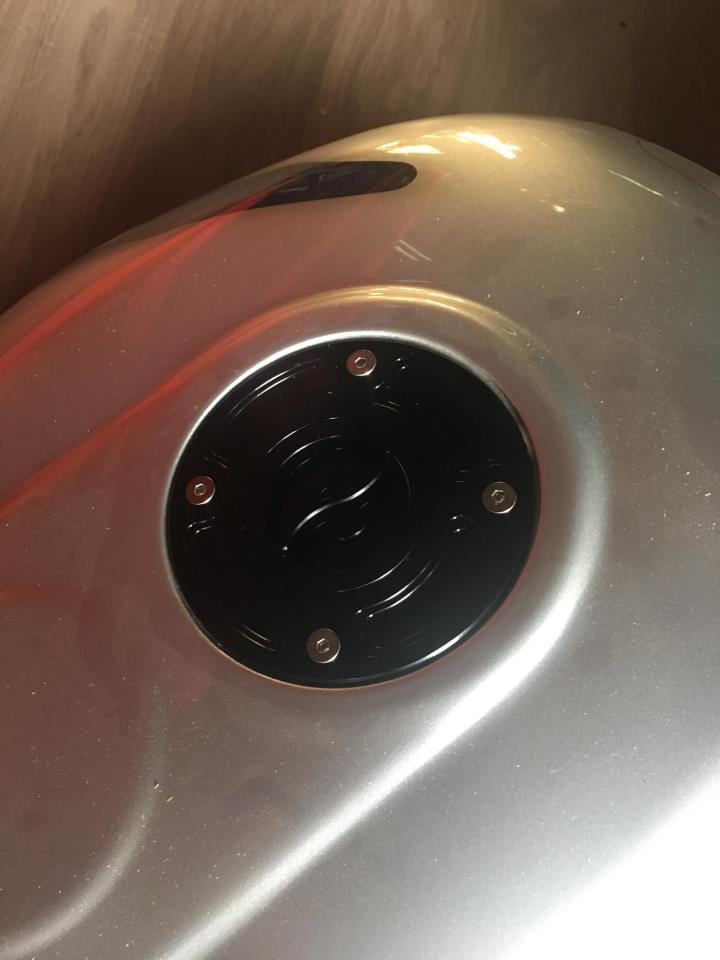
Also took a punt at a CNC fuel cap from China. £13.80 delivered. Wasn't expecting much, but to be honest, it's spot-on!

That's it for now, need to sort out more photos as once again my Iphone has decided not to talk to my lappy so can't transfer pics..
Simon
-
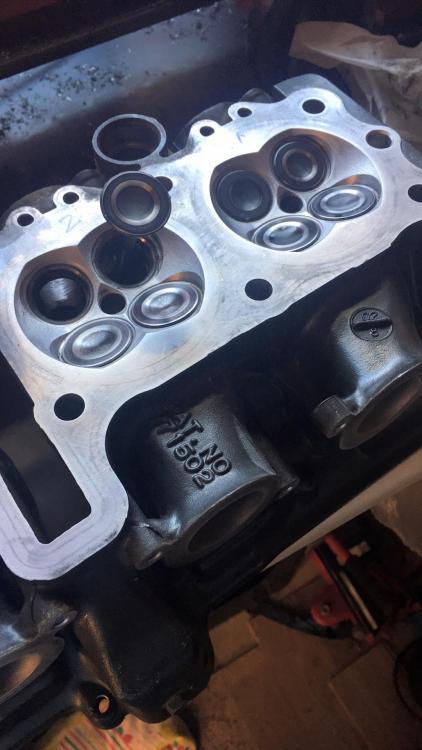
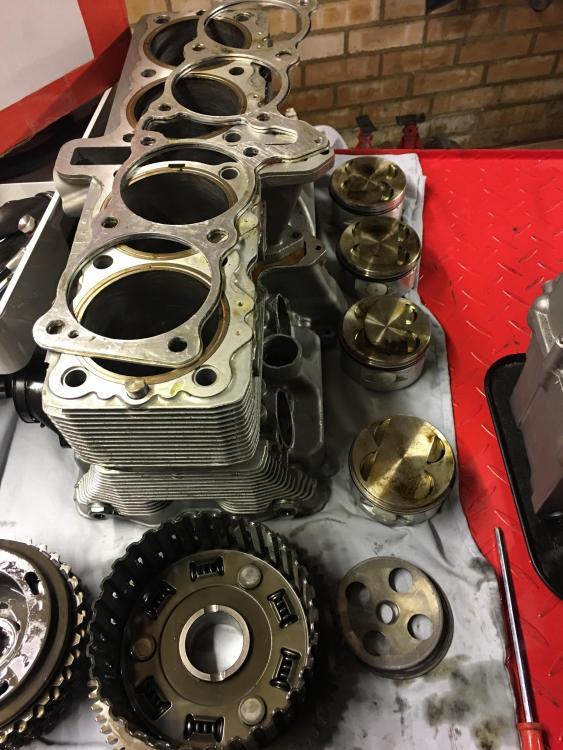
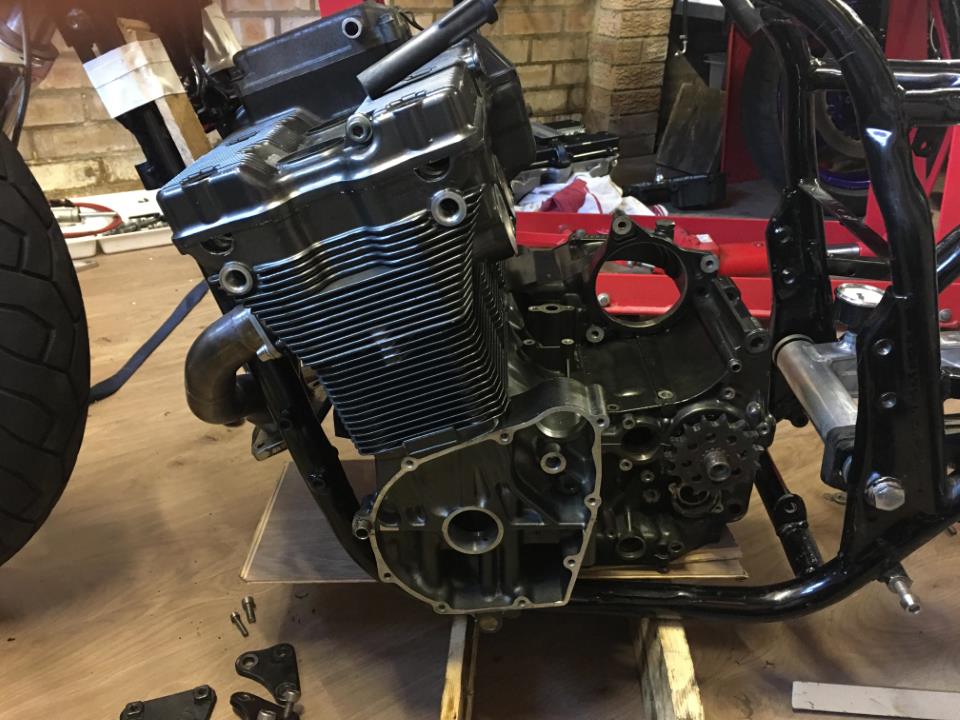
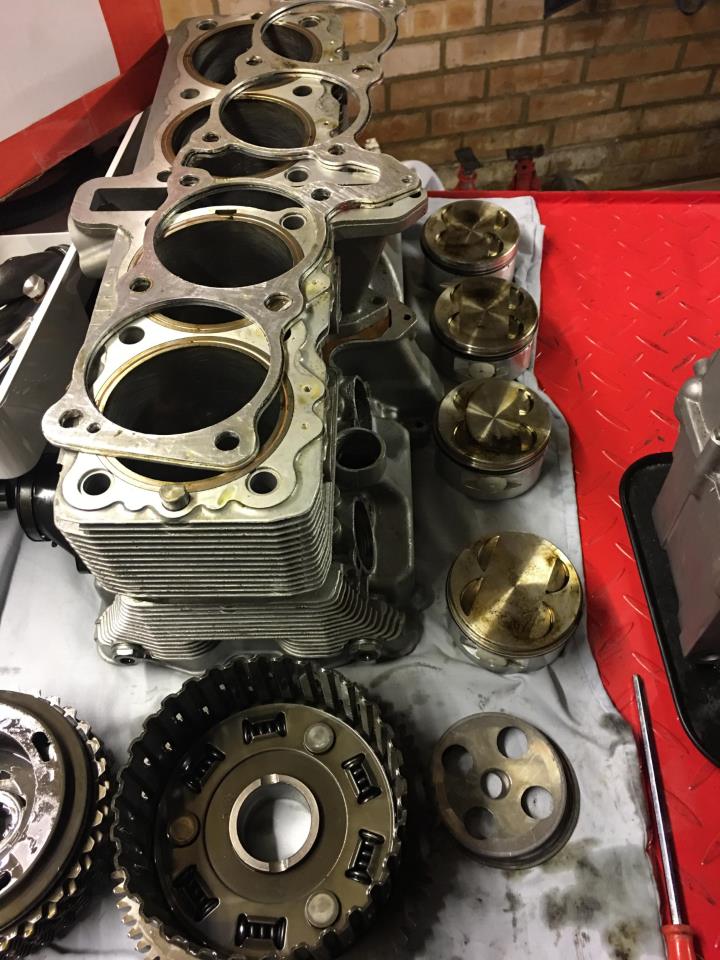
So, with the busa piston in the silver motor, with a suzuki stock base gasket we have this:

Which, I think, with a copper gasket and the head with 30thou" skimmed off should give me a streetable motor. Am I right?
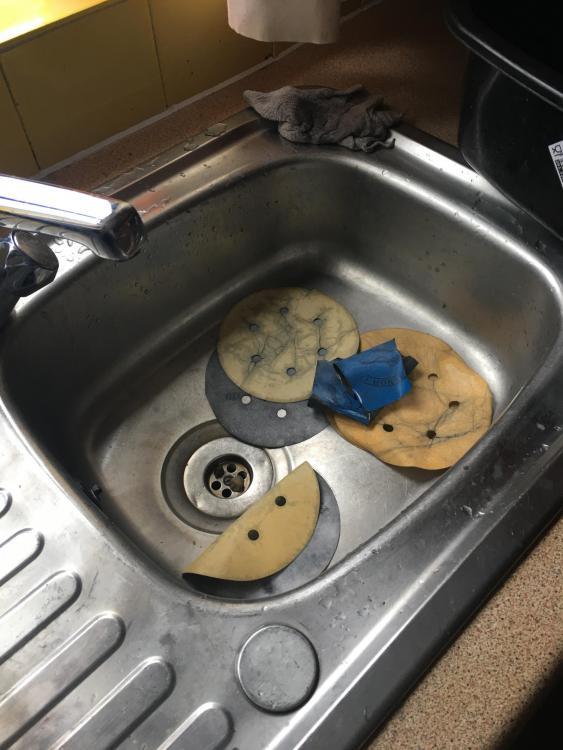
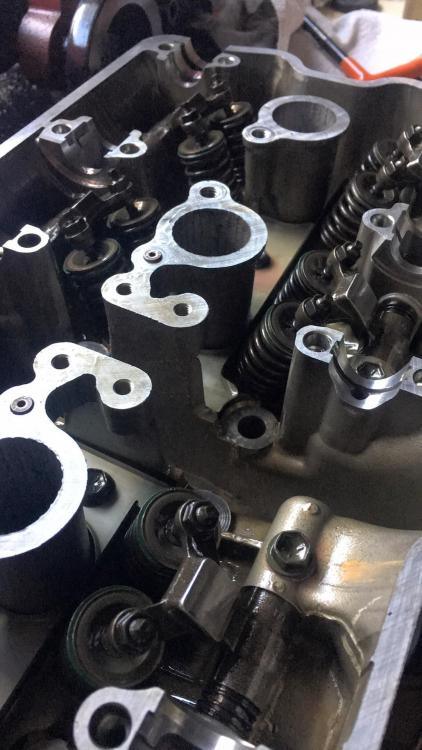
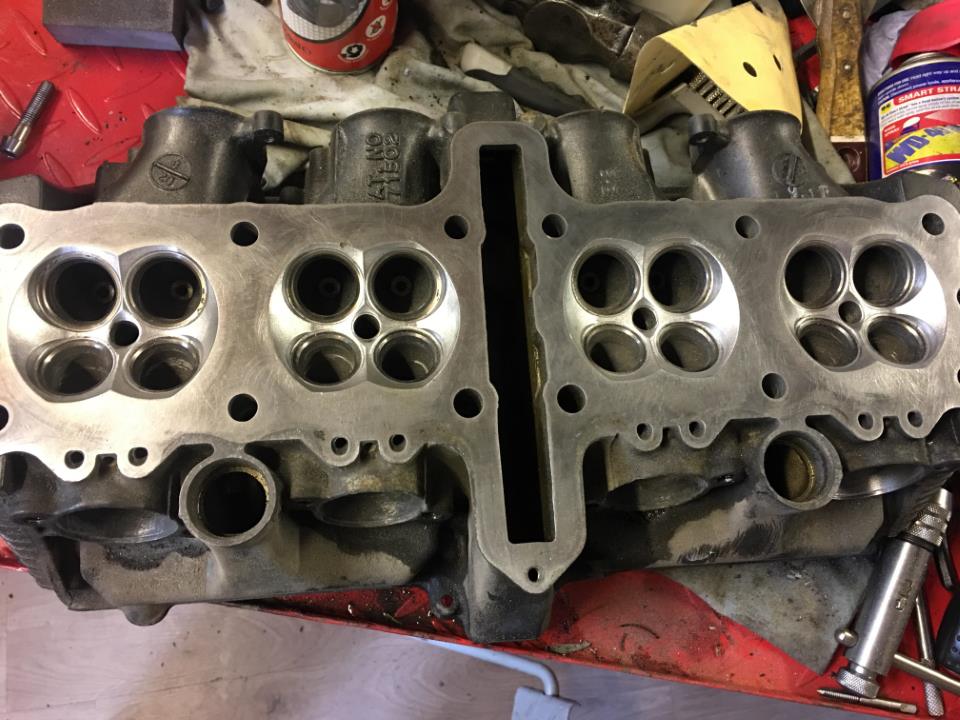
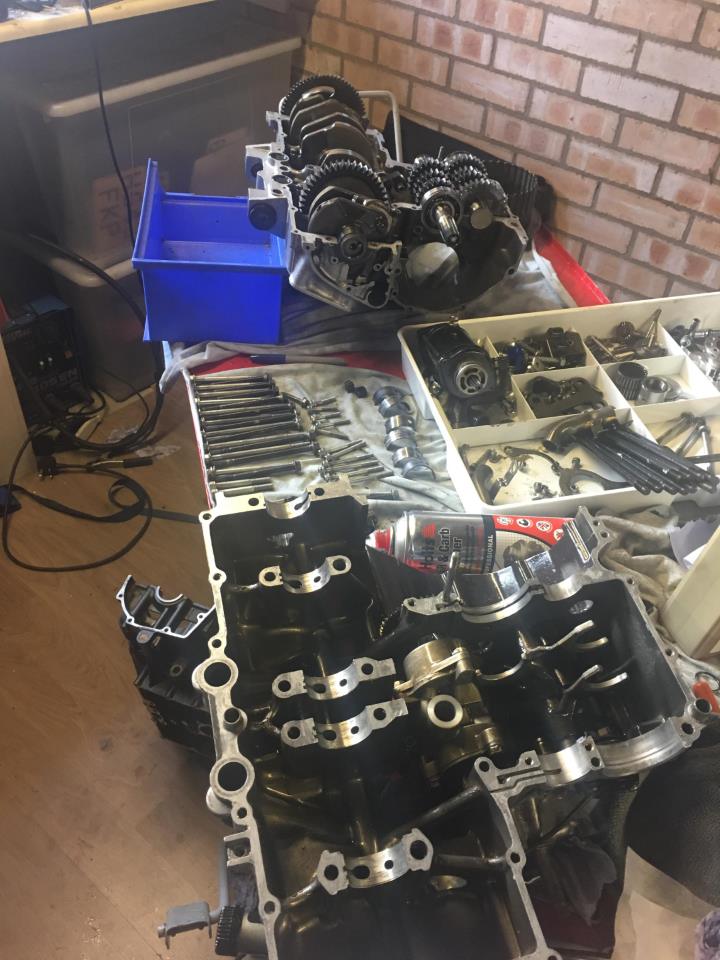
Meanwhile, the bandit head was stripped and an order put in to Robinsons...
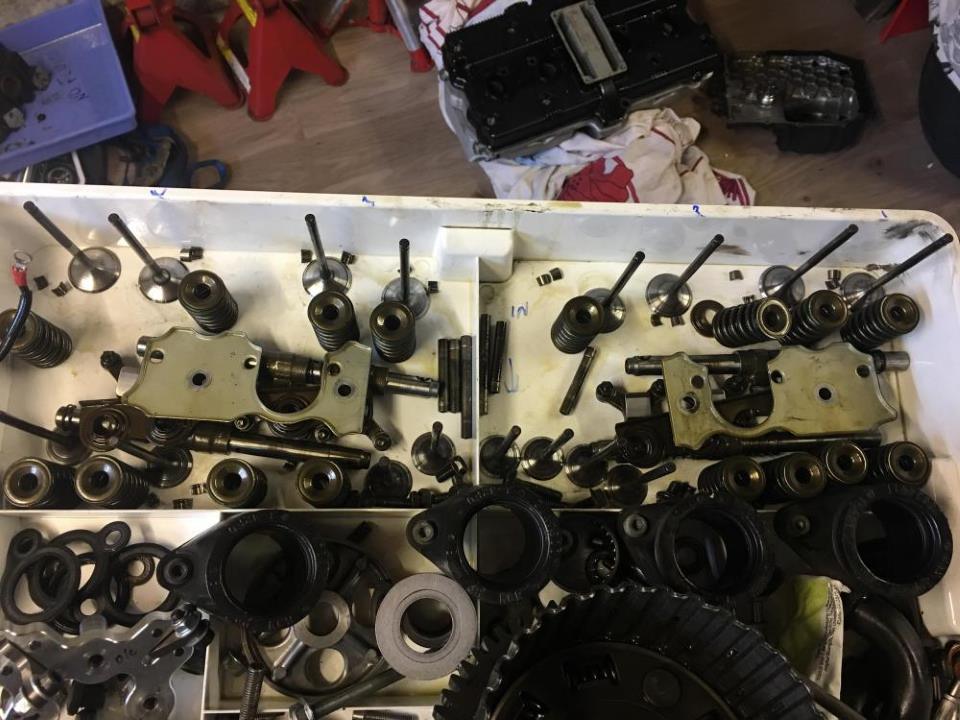
Head cleaned up. It was very carboned, must be all that egr shit on the front of the motor...

New seals, valves cleaned and lapped in
All done
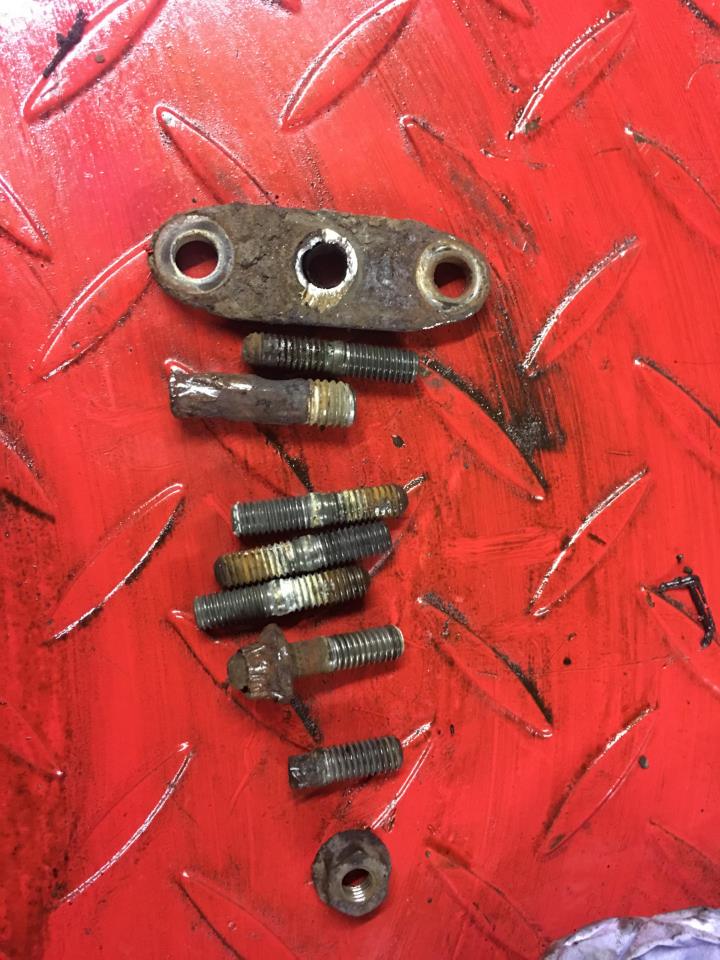
Not all plain sailing though...
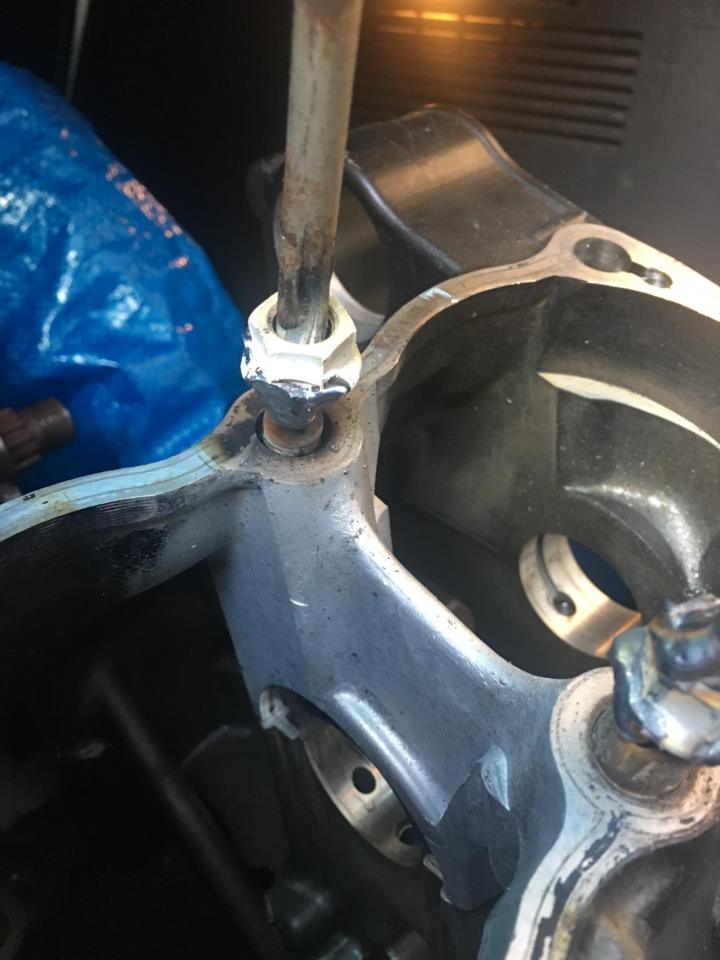
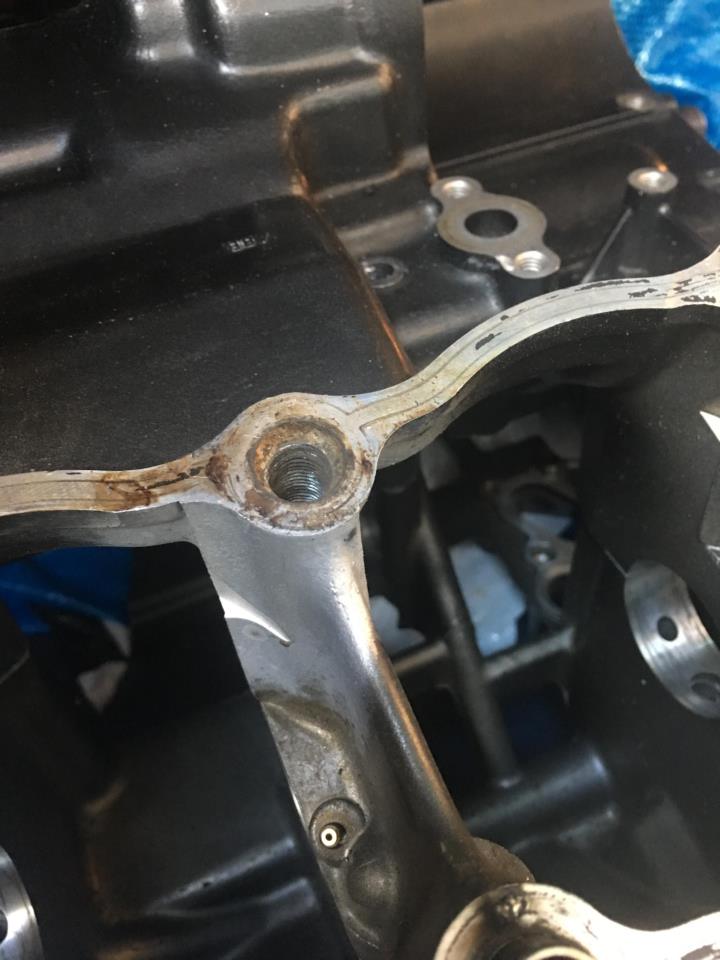
Bloody crancase studs..
.
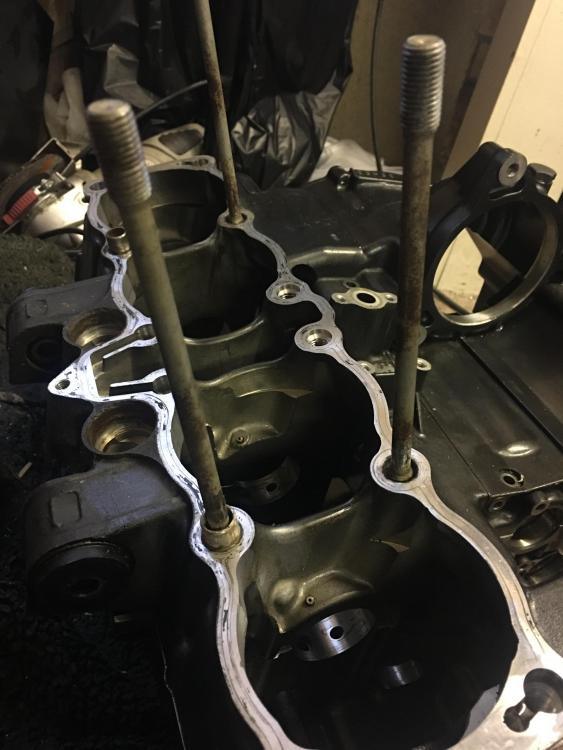
After lots and lots of heat with a 25 nozzle on the oxy/acetyline I had to succumb and weld nuts onto the studs.
Need to wait until the new year now as the kit is at my dads house and he's not well...

See ya in a bit...
Simon


-
Hello
Hello people may remember my build on the old site:
http://old-skool-suzuki.proboards.com/thread/1675/home-brew-7-1216-turbo
well, after holing a piston and it taking 18 months to rebuild due to outside forces, I'm back! I manged to get the Elivington to run the new engine in and was going ok until the rain came...
I only had my stitches out of a hernia operation the day before so the running in at 160mph was probably as fast as I could have gone. I didn't realise how much weight I'd put on and couldn't get behind the screen


So, on returning home I found that the motor was p1ssing oil out everywhere. A certain engineering company that did the rebore and ringing the barrels (in my mind) did a shit job, not listening to what Id asked for and it ended up being decked so I had to use 2x4mm base spacers...
Best thing is, a new engine. I've learn't now that the wheel has been invented, and it's not bad, why re-invent it?
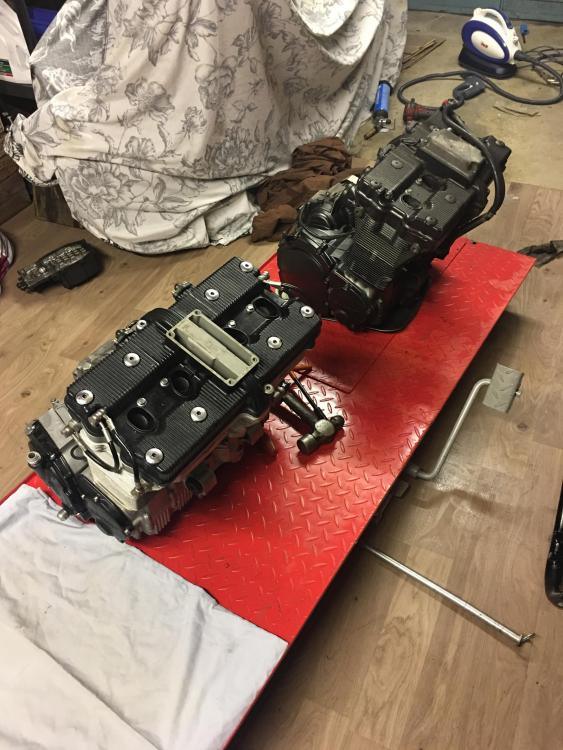
Blandit motor

Old motor meets new motor...
Old motor coming down so the Busa rods can go in the Blandit
t
These were laugh to get out.
..

Both engines down...

The idea is I'll put Busa pistons back in the silver motor with the bandit rods, and the MTC turbo pistons will go back on the busa rods in the bandit motor. Not sure yet if the silver motor will be built as a na motor as the head is skimmed and ported and I haven't got a road bike so it'd be nice putting the 750 back on the road....
More later
Thanks for looking
Simon
-
 1
1
-
-
3 minutes ago, Swiss Toni said:
Welding a nut down low seems a good idea. All the torque, right where it's needed. Looks like a good excuse for a pasting with anti-seize, or this Ceramic Grease everyone's talking about, on assembly!
Yeah, well we hit it big style with the size 25 nozzle but the molegrips were slipping. I popped to my mates garage and welded the nuts on but the weather was so bad I didn't have the heart to get my dad (who's 81 and has breathing difficulties) back out into the garage. So it'll have to wait for another day... Main thing was, it needed heat all the way to the last thread, and the one that came out was soooooo tight, it felt like it was going to snap.
Whatever you do, take your time and don't rush it.. You can see how much heat the two studs left have had to have with the colour of the casing. Now look at the one that's come out - a lot less. I can see these being a nightmare... I cleaned the other threads up with a m10 fine tap and will be copaslipping the threads before the APE studs go in
Simon
-
3 minutes ago, #26Racing said:
Going through the same at the moment. I feel your pain, last 4 are being absolute naught words. Had the oxy acetylene on them yesterday and still they won't budge. Welded a couple of nuts on the studs for the next attempt...


This was one I got out, it was tight to the last thread but the threads look good!
-
Going through the same at the moment. I feel your pain, last 4 are being absolute naught words. Had the oxy acetylene on them yesterday and still they won't budge. Welded a couple of nuts on the studs for the next attempt...


200mph - still trying...
in Forced Induction
Posted · Edited by #26Racing
Added more info
I 'm not using that chassis now as it's a bit too dedicated to what I need. I'd like something based more on stock than that long and low.
just used a small wire wheel on the end of the drill. Took quite a while to get off, especially in the inlet ports. For the valves I just used emery cloth with the valve in the bench drill