Digs
-
Posts
531 -
Joined
-
Last visited
Content Type
Profiles
Forums
Events
Everything posted by Digs
-
It’s all very tight fitting wider rims or larger offset carriers/wheels in a slingshot frame. I had to do a lot of modifications to get my 6” rim to work and some single shear calculations to make sure I still had enough material left.
-
I’m assuming it’s a typo and he meant 6”
-
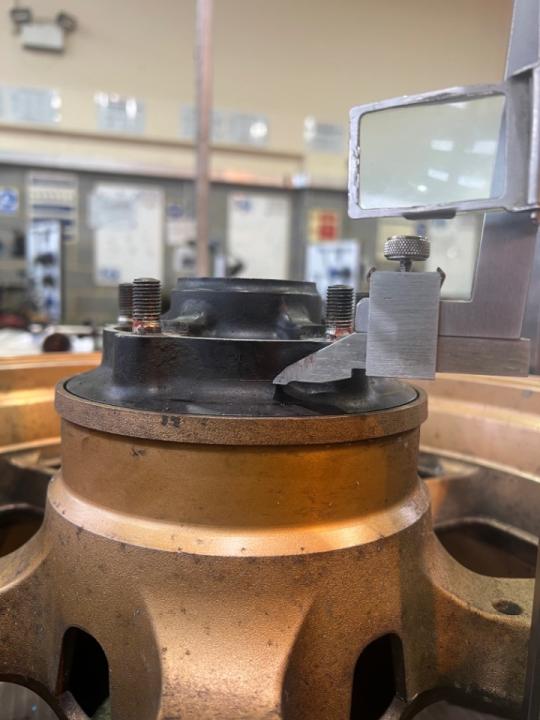
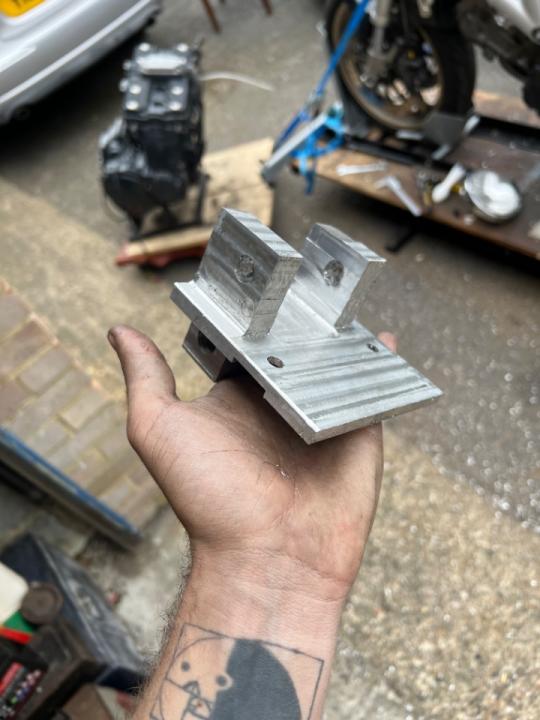
So I’ve put a 6” rim in two slingshots, they’re not k4 rims but zzr1400. I needed to machine down the rear sprocket carrier to make it work. You need to find out the distance from the wheel centre to the inside face of the sprocket. For a standard slingy wheel it will be 100mm, ideally you should aim for 105 with 6” rim to not run too close to the tyre. Also bare in mind you may want to run a 525 or 520 chain to help with the clearance if you run a larger offset. Picture here shows how much I had to remove.
-
I’ve no interest in restored or stock bikes, they do nothing for me. I do however agree that the variety is what makes a show, and - while it’s not my thing - I’m always keen to chat to the guy with the rattiest bike with the worn grips, they’re normally the ones that do the most miles anyway.
-
Bit of penetrating oil and some heat, that’ll get it out.
-
So my suspension setup is quite a bit different to any of these bikes stock. I made my setup for maximum adjustability in terms of motion ratio and swingarm angle. I’m using a shorter shock (309mm from memory) from a 2018 gsxr1000r and have different linkage plates for different applications. There were definitely issues with parts fouling to start with, and I did change shock a few times but it’s all resolved now. I spent a lot of time in cad going through it all. But that’s just the way I like to work.
-
Good work so far, and you can check that very easily. Unload the suspension and place a scissor jack or similar under the rear wheel. Measure every 5mm of shock travel and compare that to rear wheel travel. Once you’ve done that plot a graph with the data and you’ll have your motion ratio.
-
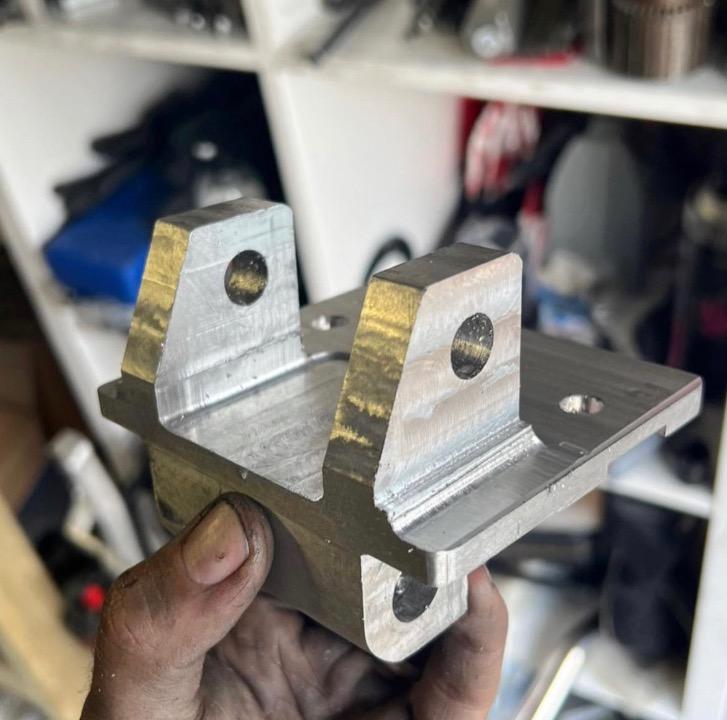
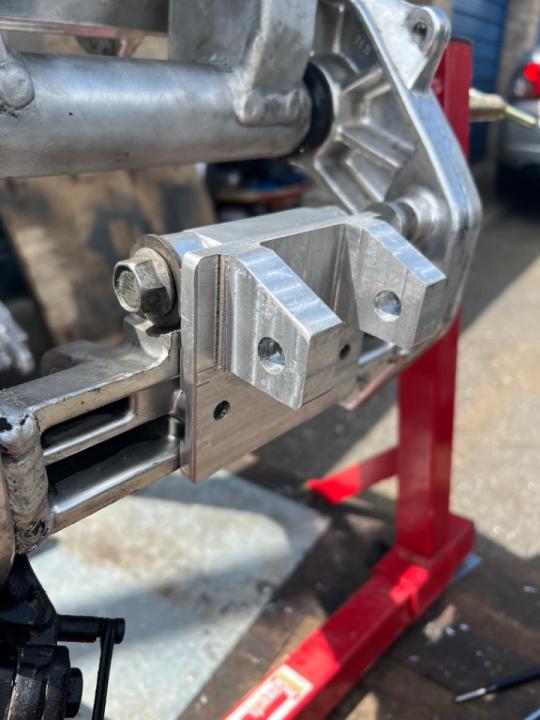
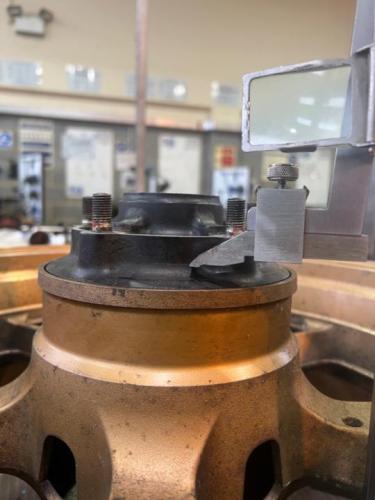
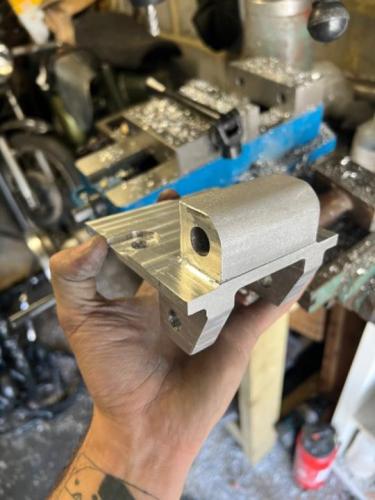
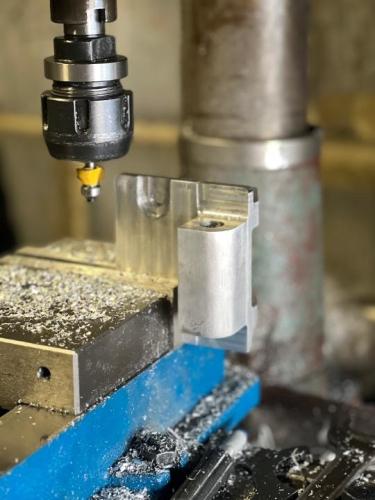
Cheers @KennyKak much appreciated. Yeah mine was a little different to the design shown above. The mount was a little further back and quite a bit lower to suit my use case. This probably shows it best. I also machined out the central part of the mount and machined out a couple of slots on the underside for the lower frame mounts which let it sit directly on the lower frame rail. Finished mount looks like this. Happy to modify my cad model and share it here to match the mount shown in this thread.


-
There’s a bit of ‘works well enough for me’ with the k series swap. In my view you need to actually do some work: cad, spreadsheet or pen and paper to make sure whatever you setup has a proper motion ratio and can transfer the loads properly. Moving the lower mount down and closer to the original k series geometry is a good idea, as is spacing the top mount out. It’s not the only way to do it, but it is a good way.
-
“I recently saw a person making some spacers to install modern GSX-R rims, versions K - L, it seemed like a pretty clean job to be able to replicate.“
-
Love that fillet brazing, looks mega.
-
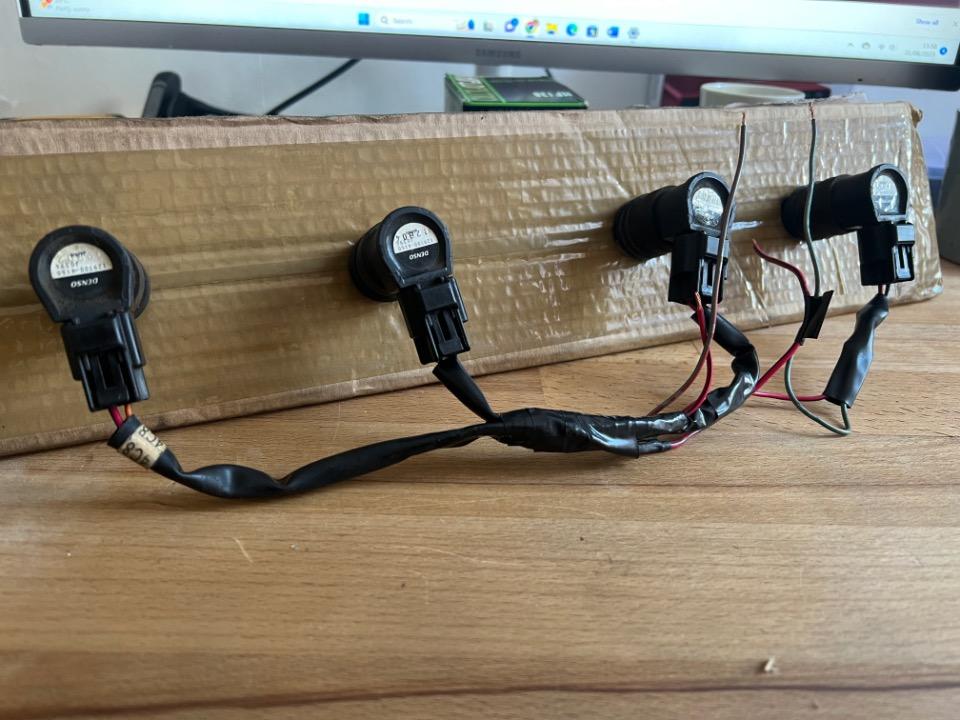
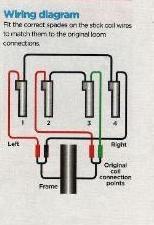
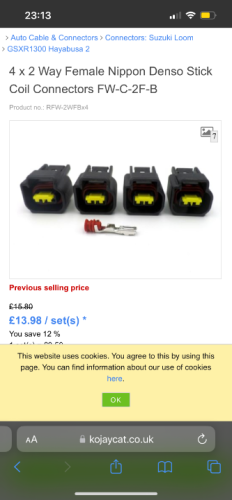
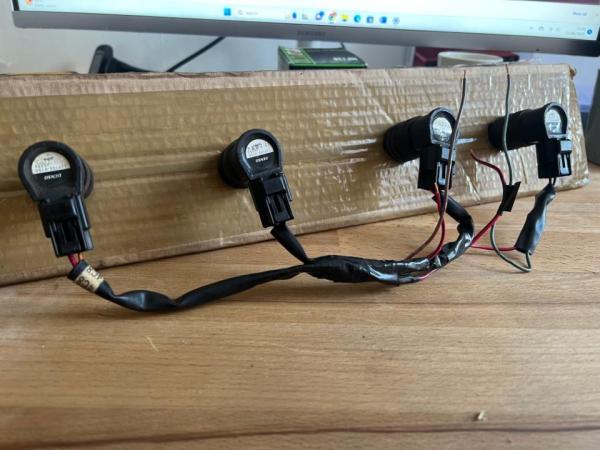
I used 4 denso 129700-4150 out of a k series gsxr on my 7/11. They worked great.
-
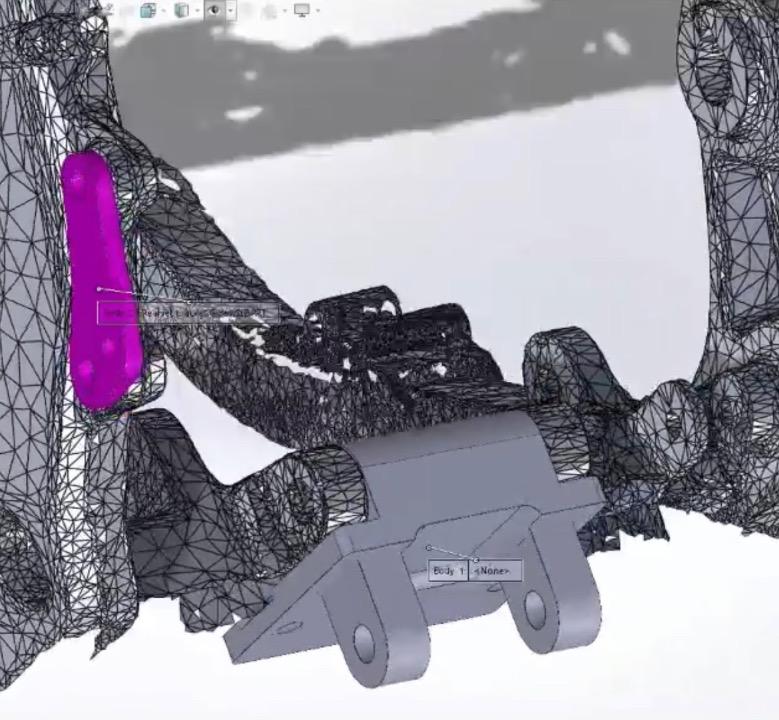
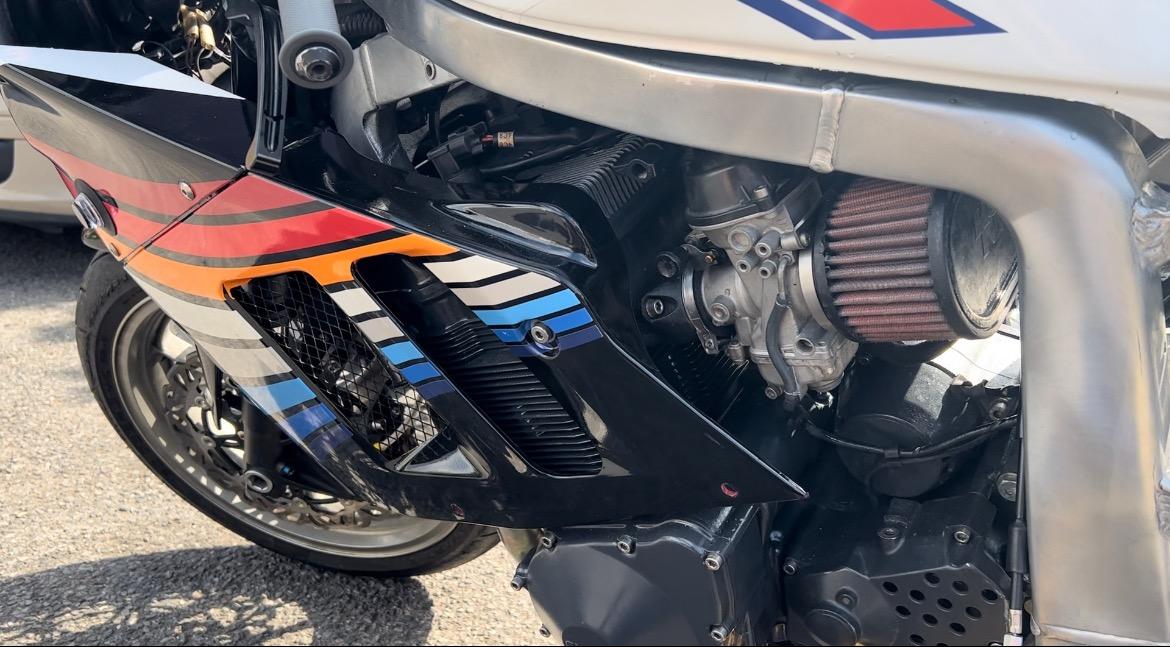
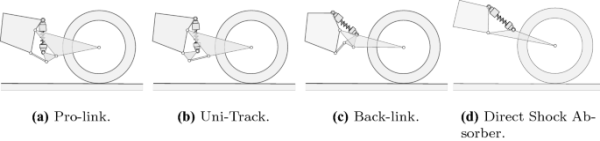
I fitted a k3 arm to my 7/11 build, but I designed the linkage from scratch around 3d scans and simple BREP models of the frame and components. In the end I used a Showa BFRC shock from a 2018 gsxr 1000r as I had some fouling issues with my original bmw shock and then other issues with the Kawasaki shock... But, there are definitely other ways to do it and achieve similar results. If you want minimal modifications the big thing you need to do - to make your life easy - is replicate the lower shock mounting position. The original lower mount location will make your life a nightmare if you try and use it. Also - as mentioned above by @Upshotknothole- the top shock mount needs to come out a fair way. You can get ballpark for this with a decent side elevation photo of the bike. Definitely check out @davecara’s thread too, he’s put a lot of good info up and done alot of the hard work. Food for thought: You need to work out the motion ratio you’re aiming for. You need to make sure the mounts you make can take the loads applied (they’re big) what’s your static swingarm angle? How much sag will you have? Does the shock you are planning on using have the correct spring rate? Are you getting the shock revalved? The k3 swingarm has a 28mm axle, what wheel are you using? it’s also a good idea to test the range of motion without the shock spring, helps you spot potential issues before finding out about them while riding. light reading: http://www.promecha.com.au/leverage_linkages.htm https://www.datamc.org/data-acquisition/suspension-data-analysis/anti-squat-geometry/ technical reading: https://link.springer.com/article/10.1007/s11081-019-09475-w Couple of useful diagrams: books that might help: https://www.classicbikehub.uk/News/article/motorcycle-modification-keeping-your-project-safe https://books.google.co.uk/books/about/Motorcycle_Handling_and_Chassis_Design.html?id=84hF-qoR5I8C&printsec=frontcover&source=kp_read_button&hl=en&newbks=1&newbks_redir=0&gboemv=1&ovdme=1&redir_esc=y#v=onepage&q&f=false

-
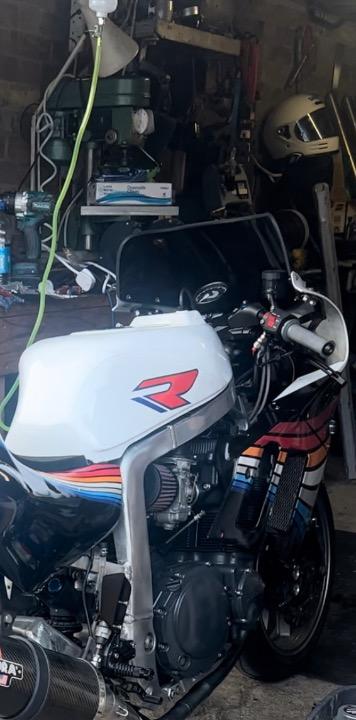
Beautiful work as always from Mark on the frame. You should be able to grab everything you need without stripping a whole bike down. Might be worth making a list and (once you get a few more posts) chucking it in the wanted section. Off the top of my head these are the prices I've paid from lowest to most expensive for parts: Engine: £550-750 Carbs: £150-250 Tank: £30-150 loom: £30-100 switchgear: £30-75 CDI: £50-100 MC: £150-350 as you'll probably go radial anyway Clutch Perch: £20-150 Cables: £30 Battery Lithium: £140 I reckon it'll work out cheaper than buying an 1100 and you can refurbish each bit as you chuck it on.
-
So the difficult thing is there was no one thing that made a massive difference. if I had to say it was probably a mixture of a worn fuel tap and the ID of the vac lines. I’ve re-routed the fuel lines and shortened them, but I was having the same issue with tank sitting above the bike on the frame.
-
All sorted and running well, here’s a cold start. Thanks every one for all the advice and help. I’m delighted it’s a simple fix.
-
May well have to give the tygon a go then, nothing to loose!
-
That's a good shout, either way I want enough fuel flow at low fuel levels so that I can at least limp it to a petrol station if needs be. So the hoses are 8mm ID and less than a week old so they shouldn't be an issue. I have found a few things that seem to have mostly resolved the problem: Shorter vac line with a slightly smaller ID Different routing of the fuel lines (not sure really if that has made much of a difference) fully charged battery, the CDI doesn't like to spark with a low battery
-
Also now tried a second tank that I know is good with two different fuel taps. Same issue.
-
Ahh okay! Well that’s good to know! Cheers for the heads up
-
I blew 30 psi through this hole and the cap assembly is new so I didn’t do anything to it.

-
Yeah I mentioned it briefly at the beginning of the thread, it's venting fine. I've run with the cap open and shut and blown a bit of compressed air through the tank breather no change unfortunately.
-
I’m using 8mm ID 14mm OD braided line for the fuel.
-
8mm ID line on a 300ml auxiliary tank hung 1m or so above the bike.
-
I’ll have a check tomorrow with fresh eyes.